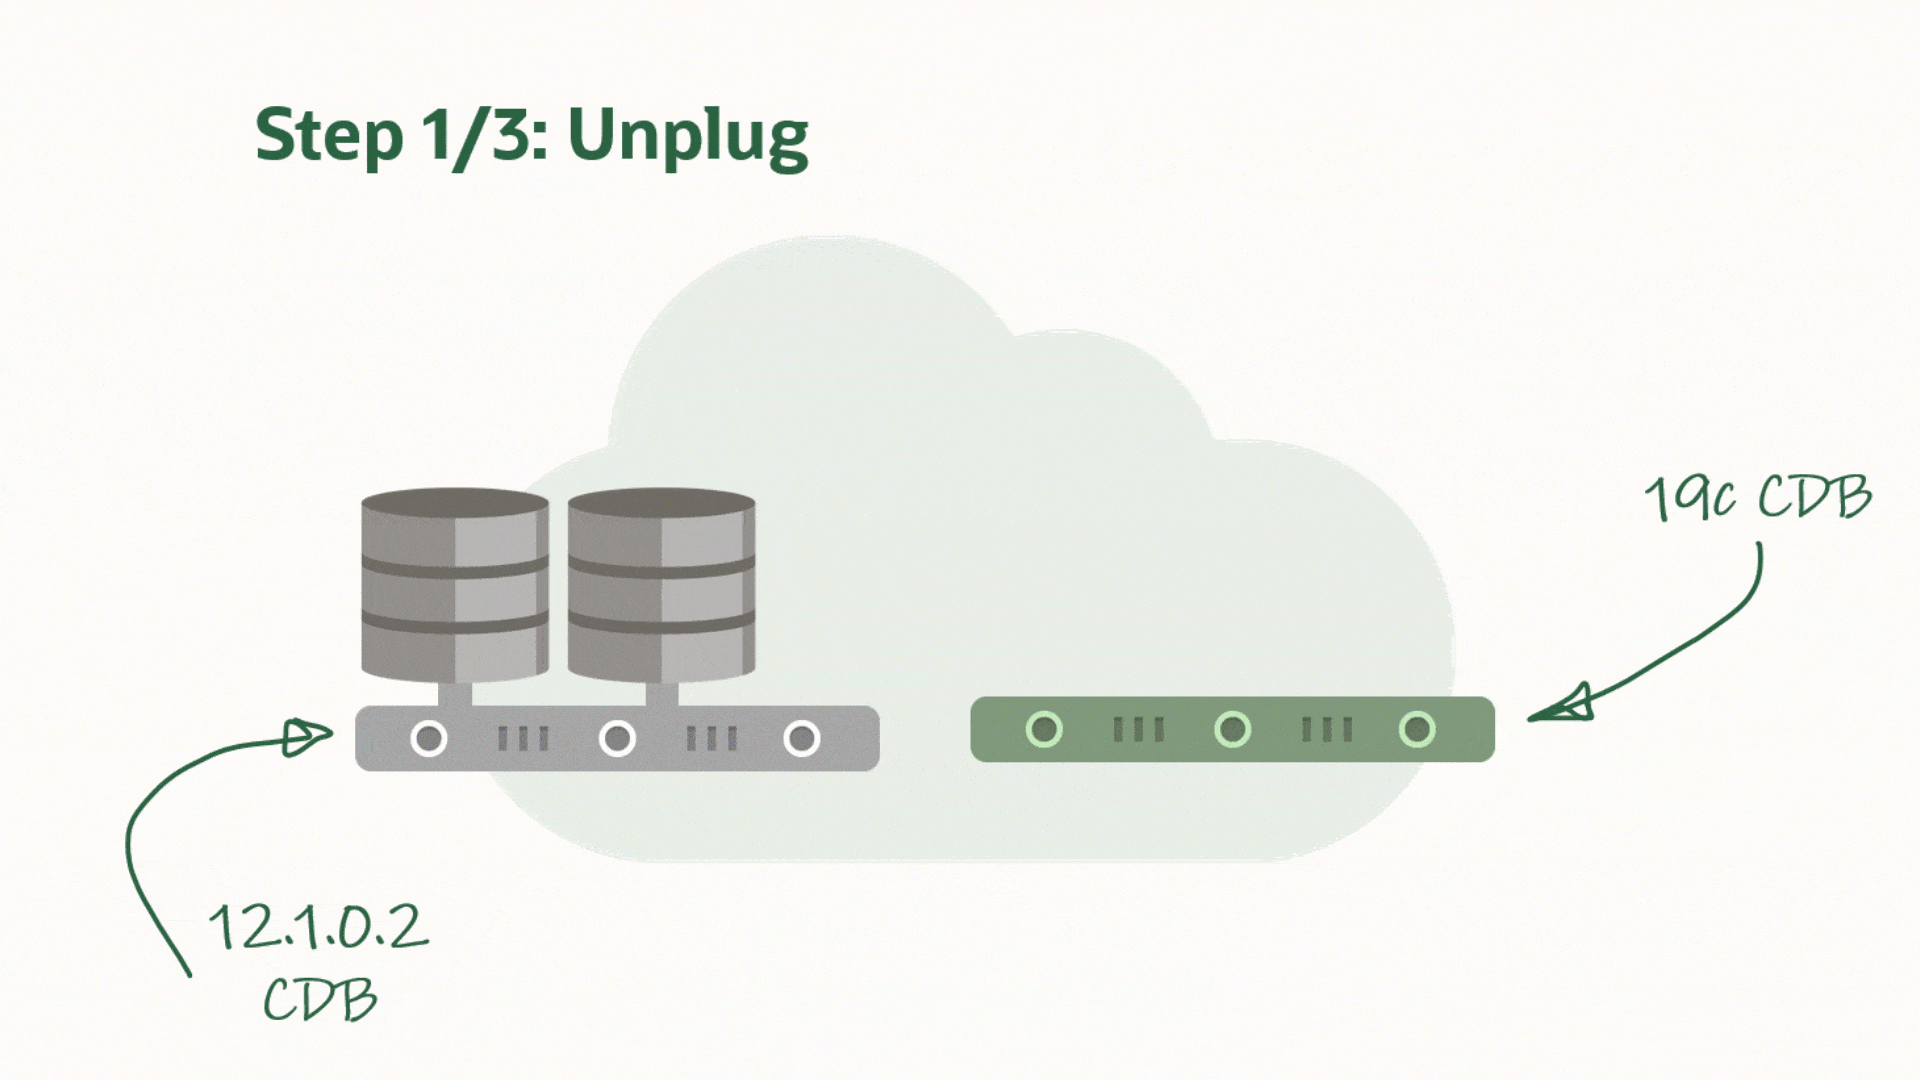
Let me show you how to upgrade a single PDB to Oracle AI Database 26ai.
This is called an unplug-plug upgrade and is much faster than a full CDB upgrade.
But what about Data Guard? I want to reuse the data files and plug in using enabled recovery. This ensures that my standby protects the PDB immediately.
Let’s see how it works.
Environment
The demo environment:
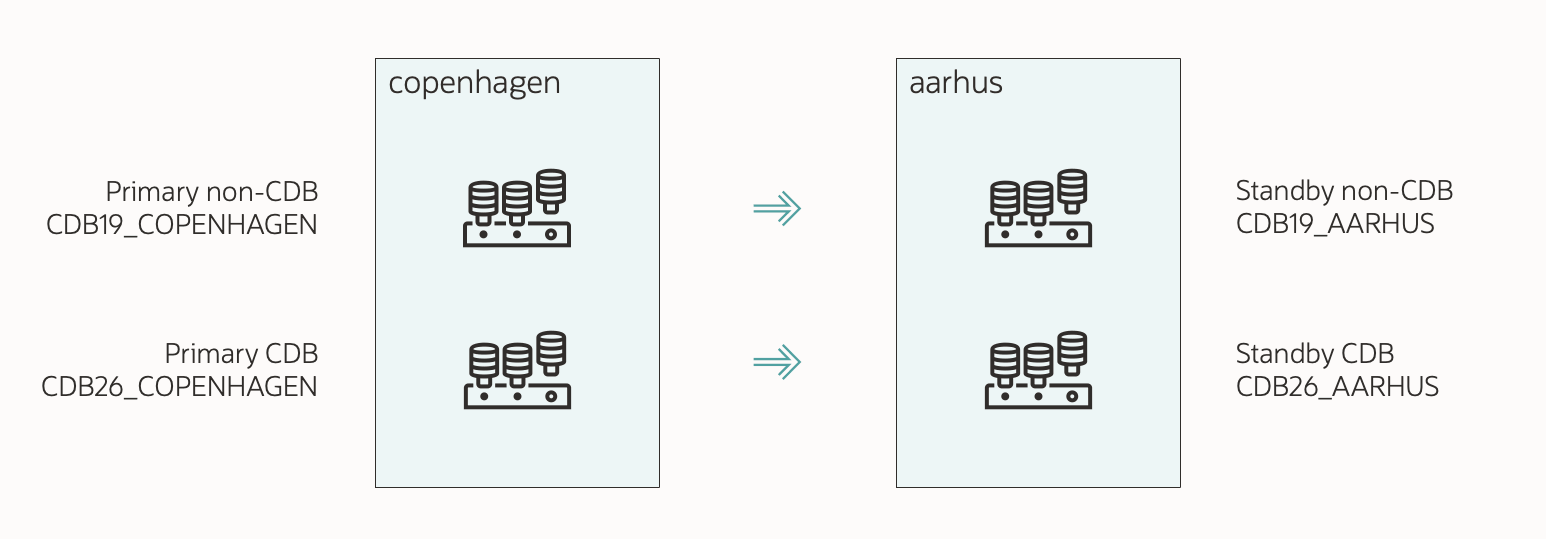
- Two servers:
- COPENHAGEN (primary)
- AARHUS (standby)
- Source CDB:
- SID: CDB19
- Primary unique name: CDB19_COPENHAGEN
- Standby unique name: CDB19_AARHUS
- Target CDB:
- SID: CDB26
- Primary unique name: CDB26_COPENHAGEN
- Standby unique name: CDB26_AARHUS
- PDB to upgrade: SALES
1. Prepare Standby
I’ve already prepared my database (SALES) and installed a new Oracle home. I’ve also created a new container database (CDB26) and configured it for Data Guard.
The maintenance window has started, and users have left the database.
- If I use Active Data Guard, I close my PDB (SALES) on the source standby (CDB19_AARHUS):
alter pluggable database SALES close instances=all; - I stop redo apply in my target standby (CDB26_AARHUS):
edit database cdb26_aarhus set state='apply-off';- I turn off redo apply, so I can control when the target standby should claim the PDB data files.
- I must ensure the source standby (CDB19_AARHUS) has released the PDB data files before doing the plug-in on the target standby (CDB26_AARHUS).
2. Upgrade On Primary
-
This is my AutoUpgrade config file:
global.global_log_dir=/home/oracle/autoupgrade/logs/SALES-CDB26 upg1.source_home=/u01/app/oracle/product/19 upg1.target_home=/u01/app/oracle/product/26 upg1.sid=CDB19 upg1.pdbs=SALES upg1.target_cdb=CDB26 upg1.manage_standbys_clause=standbys=all- I specify the source and target Oracle homes.
sidcontains the SID of my current CDB.target_cdbspecifies the SID of the container where I plug into.pdbsis the PDB that I want to upgrade. I can specify additional PDBs in a comma-separated list.- I want to reuse the existing data files, so I omit
target_pdb_copy_option. - To plug in with enabled recovery, I set
manage_standbys_clause=all. - Check the appendix for additional parameters.
-
I start AutoUpgrade in deploy mode:
java -jar autoupgrade.jar -config SALES-CDB26.cfg -mode deploy- AutoUpgrade starts by analyzing the database for upgrade readiness and executes the pre-upgrade fixups.
- Next, it creates a manifest file and unplugs from source CDB (CDB19_COPENHAGEN).
- Then, it plugs into the target CDB with enabled recovery (CDB26_COPENHAGEN).
- The plug-in doesn’t happen on the target standby (CDB26_AARHUS), because I stopped redo apply.
- Finally, it upgrades the PDB (SALES).
-
I wait until AutoUpgrade reaches the
DBUPGRADEphase. I monitor progress:upg> lsj -a 30- The
-a 30option automatically refreshes the information every 30 seconds. - I can also use
status -job 100 -a 30to get detailed information about a specific job.
- The
-
When AutoUpgrade is on the
DBUPGRADEphase, it means that the PDB has been unplugged from the source CDB (CDB19_COPENHAGEN) and plugged into the target CDB (CDB26_COPENHAGEN).
3. Check Standby
I must ensure the source standby (CDB19_AARHUS) has applied the redo, which unplugs the PDB.
- On the standby, I look in the source standby alert log:
tail -100f $ORACLE_BASE/diag/rdbms/cdb19_aarhus/CDB1/trace/alert_CDB19.log - I look for proof that SALES PDB has been unplugged:
2026-03-23T07:50:44.450680+00:00 SALES(3):Recovery deleting file #16:'/u02/oradata/CDB19_AARHUS/4DAD2FA764C642E4E0638338A8C0A72D/datafile/o1_mf_users_nw1vs832_.dbf' from controlfile. SALES(3):Recovery dropped tablespace 'USERS' SALES(3):Recovery dropped temporary tablespace 'TEMP' SALES(3):Recovery deleting file #15:'/u02/oradata/CDB19_AARHUS/4DAD2FA764C642E4E0638338A8C0A72D/datafile/o1_mf_undotbs1_nw1vrgby_.dbf' from controlfile. SALES(3):Recovery dropped tablespace 'UNDOTBS1' SALES(3):Recovery deleting file #14:'/u02/oradata/CDB19_AARHUS/4DAD2FA764C642E4E0638338A8C0A72D/datafile/o1_mf_sysaux_nw1vrgbx_.dbf' from controlfile. SALES(3):Recovery dropped tablespace 'SYSAUX' SALES(3):Recovery deleting file #13:'/u02/oradata/CDB19_AARHUS/4DAD2FA764C642E4E0638338A8C0A72D/datafile/o1_mf_system_nw1vrgbg_.dbf' from controlfile. SALES(3):Recovery dropped tablespace 'SYSTEM' SALES(3):Recovery dropped pluggable database 'SALES'- Notice the last line informing me that the SALES PDB has been unplugged from my source standby.
- The redo from the
ALTER PLUGGABLE DATABASE ... UNPLUGcommand on the primary has been applied on the standby. - All PDB data files are now consistent and available for the target standby.
4. Standby Data Files
I must ensure the target standby (CDB26_AARHUS) can find the PDB data files.
The plug-in operation happens on the primary. AutoUpgrade uses a manifest file for the plug-in. The manifest file contains a list of all the data files on the primary, but there’s no information about the standby database.
How does the standby find the data files to use for the plug-in?
1. Regular File System
- The standby (CDB26_AARHUS) expects to find the data files in the same location as on the primary (CDB26_COPENHAGEN).
- During plug-in, I reused the data files. So, the primary data files are in the location of the source CDB (CDB19_COPENHAGEN):
/u02/oradata/CDB19_COPENHAGEN/SALES/system01.dbf /u02/oradata/CDB19_COPENHAGEN/SALES/sysaux01.dbf /u02/oradata/CDB19_COPENHAGEN/SALES/undo01.dbf /u02/oradata/CDB19_COPENHAGEN/SALES/users01.dbf - However, on the standby (CDB19_AARHUS), the data files are here:
/u02/oradata/CDB19_AARHUS/SALES/system01.dbf /u02/oradata/CDB19_AARHUS/SALES/sysaux01.dbf /u02/oradata/CDB19_AARHUS/SALES/undo01.dbf /u02/oradata/CDB19_AARHUS/SALES/users01.dbf - On the standby, I move the data files to the correct location:
mv /u02/oradata/CDB19_AARHUS/SALES /u02/oradata/CDB26_AARHUS/SALES - And use
DB_FILE_NAME_CONVERTto redirect the files to the new location:alter system set db_file_name_convert='/u02/oradata/CDB19_COPENHAGEN','/u02/oradata/CDB26_AARHUS' scope=both;- Notice how I translate the source primary location to the target standby location.
- The plug-in operation only knows where the primary data files are, and expects the standby use the exact same location (which it doesn’t).
2. OMF In Regular File System
-
The standby (CDB26_AARHUS) expects to find the data files in the OMF location (
db_create_file_dest). -
On standby, I create the OMF location for the PDB in the target CDB (CDB26_AARHUS):
mkdir -p /u02/oradata/CDB26_AARHUS/4DB38AE91A244341E0638338A8C0934A4DB38AE91A244341E0638338A8C0934Ais the GUID of the PDB.- It doesn’t change when you move the PDB.
- You can find the GUID of the PDB in the primary:
select name, guid from v$containers;.
-
I move the PDB data files from the source OMF location to the target OMF location:
mv /u02/oradata/CDB19_AARHUS/4DB38AE91A244341E0638338A8C0934A/datafile \
   /u02/oradata/CDB26_AARHUS/4DB38AE91A244341E0638338A8C0934A/datafile
3. ASM
-
The standby (CDB26_AARHUS) expects to find the data files in the OMF location (
db_create_file_dest). -
On standby, I connect to the ASM instance:
export ORACLE_SID=+ASM1 sqlplus / as sysasm -
I create the OMF location for the PDB in the target CDB (CDB26_AARHUS):
alter diskgroup data add directory '+DATA/CDB26_AARHUS/4DB38AE91A244341E0638338A8C0934A'; alter diskgroup data add directory '+DATA/CDB26_AARHUS/4DB38AE91A244341E0638338A8C0934A/DATAFILE';4DB38AE91A244341E0638338A8C0934Ais the GUID of the PDB.- It doesn’t change when you move the PDB.
- You can find the GUID of the PDB in the primary:
select name, guid from v$containers;.
-
For each data file in my PDB (including undo, excluding temp files), I must create an ASM alias, for instance:
alter diskgroup data add alias '+DATA/CDB26_AARHUS/4DB38AE91A244341E0638338A8C0934A/DATAFILE/users_273_1103046827' for '+DATA/CDB19_AARHUS/4DB38AE91A244341E0638338A8C0934A/DATAFILE/users.273.1103046827';- I must create an alias for each data file. I create the alias in the OMF location of the PDB in the target standby.
- The alias must not contain dots/punctuation (.). That would violate the OMF naming standard. Notice how I replaced those with an underscore.
- The alias points to the location of the data file in the source standby location.
- You can find a script to create the aliases in MOS note KB106558.
5. Standby Redo Apply
At this point:
- The PDB data files are consistent and unplugged from the source standby (CDB19_AARHUS).
- I’ve ensured that the target standby (CDB26_AARHUS) can find the data files.
I can now re-enable redo apply in my target standby (CDB26_AARHUS).
-
On the standby, I re-enable redo apply:
edit database cdb26_aarhus set state='apply-on'; -
I monitor the alert log (CDB26_AARHUS):
cd $ORACLE_BASE/diag/rdbms/cdb26_aarhus/CDB26/trace tail -100f alert_CDB26.log -
I ensure that the target standby (CDB26_AARHUS) finds and plugs in the PDB data files:
2026-03-23T07:52:26.550343+00:00 PR00 (PID:26567): Media Recovery Log /u01/app/oracle/CDB26_AARHUS/archivelog/2026_03_23/o1_mf_1_30_nw1w78oo_.arc [krd.c:10255] Recovery created pluggable database SALES SALES(3):Recovery scanning directory +DATA/CDB26_AARHUS/4DB38AE91A244341E0638338A8C0934A/DATAFILE/ for any matching files SALES(3):Successfully added datafile 12 to media recovery SALES(3):Datafile #12: '+DATA/CDB26_AARHUS/4DB38AE91A244341E0638338A8C0934A/DATAFILE/o1_mf_system_nw1vrgbg_.dbf'- There should be one entry for each PDB data file.
6. Complete Upgrade
As the upgrade progresses, the redo is shipped to the target standby and applied.
- I wait until AutoUpgrade completes the upgrade:
Job 100 completed ------------------- Final Summary -------------------- Number of databases [ 1 ] Jobs finished [1] Jobs failed [0] Jobs restored [0] Jobs pending [0] Please check the summary report at: /home/oracle/autoupgrade/logs/SALES-CDB26/cfgtoollogs/upgrade/auto/status/status.html /home/oracle/autoupgrade/logs/SALES-CDB26/cfgtoollogs/upgrade/auto/status/status.log- This includes the post-upgrade checks and fixups.
- I review the Autoupgrade Summary Report. The path is printed to the console:
vi /home/oracle/autoupgrade/logs/SALES-CDB26/cfgtoollogs/upgrade/auto/status/status.log - I take care of the post-upgrade tasks.
- AutoUpgrade unplugs the PDB from the source CDB.
- On the primary, the PDB data files are in the original location. In the directory structure of the source CDB.
- Take care you don’t delete them by mistake; they are now used by the target CDB.
- Optionally, move them into the correct location using online datafile move.
- The same applies to the standby if I use ASM. For regular file system, I moved the PDB data files to the correct location.
7. Check Standby
-
At this point, the standby (CDB26_AARHUS) protects my PDB.
-
I check the Data Guard config:
validate database CDB26_AARHUS; -
Once my standby is in sync, I can do a switchover as the ultimate test:
switchover to CDB26_AARHUS; -
Now, I connect to the new primary (CDB26_AARHUS) and ensure the PDB opens in read write mode and unrestricted:
select open_mode, restricted from v$pdbs where name='SALES'; OPEN_MODE RESTRICTED _____________ _____________ READ WRITE NO -
You can find the full procedure in (KB106558) Reusing the Source Standby Database Files When Plugging a PDB into the Primary Database of a Data Guard Configuration.
That’s It!
With AutoUpgrade, you can easily upgrade a single PDB using an unplug-plug upgrade. For maximum protection and to minimize downtime, you can reuse the data files on both primary and standby.
Check the other blog posts related to upgrade to Oracle AI Database 26ai.
Happy upgrading!
Appendix
Rollback Options
When you perform an unplug-plug upgrade, you can’t use Flashback Database as a rollback method. You need to rely on other methods, like:
- RMAN backups.
- Storage snapshots.
- If you have multiple standbys, you can leave one behind.
Compatible
During plug-in, the PDB automatically inherits the compatible setting of the target CDB. You don’t have to raise the compatible setting manually.
Typically, the target CDB has a higher compatible and the PDB raises it on plug-in. This means you don’t have the option of downgrading.
If you want to preserve the option to downgrade, be sure to set the compatible parameter in the target CDB to the same value as in the source CDB.
Pre-plugin Backups
After doing an unplug-plug upgrade, you can restore a PDB using a combination of backups from before and after the plug-in operation. Backups from before the plug-in is called pre-plugin backups.
A restore using pre-plugin backups is more complicated; however, AutoUpgrade eases that by exporting the RMAN backup metadata automatically.
I suggest that you:
- Start a backup immediately after the upgrade, so you don’t have to use pre-plugin backups.
- Practice restoring with pre-plugin backups.
What If My Database Is A RAC Database?
There are no changes to the procedure if you have an Oracle RAC database. AutoUpgrade handles it transparently. You must manually recreate services in the target CDB using srvctl.
What If I Use Oracle Restart?
No changes. You must manually recreate services in the target CDB using srvctl.
What If My Database Is Encrypted
AutoUpgrade fully supports upgrading an encrypted PDB.
You’ll need to input the source and target CDB keystore passwords into the AutoUpgrade keystore. You can find the details in a previous blog post.
In the container database, AutoUpgrade always adds the database encryption keys to the unified keystore. After the conversion, you can switch to an isolated keystore.
Before starting redo apply on the standby, you must copy the keystore from the primary to the standby. Check (KB106558) Reusing the Source Standby Database Files When Plugging a PDB into the Primary Database of a Data Guard Configuration for details.
Other Config File Parameters
The config file shown above is a basic one. Let me address some of the additional parameters you can use.
-
timezone_upg: (default: Yes) AutoUpgrade upgrades the PDB time zone file after the actual upgrade. This might take significant time if you have lots ofTIMESTAMP WITH TIME ZONEdata. If so, you can postpone the time zone file upgrade or perform it in a more time-efficient manner. In multitenant, a PDB can use a different time zone file than the CDB. -
target_pdb_name: AutoUpgrade renames the PDB. I must specify the original PDB name (SALES) as a suffix to the parameter:upg1.target_pdb_name.SALES=NEWSALESIf I have multiple PDBs, I can specify
target_pdb_namemultiple times:upg1.pdbs=SALES,OLDNAME1,OLDNAME2 upg1.target_pdb_name.SALES=NEWSALES upg1.target_pdb_name.OLDNAME1=NEWNAME1 upg1.target_pdb_name.OLDNAME2=NEWNAME2 -
before_action/after_action: Extend AutoUpgrade with your own functionality by using scripts before or after the job. -
Check the documentation for the full list.