In a previous blog post I showed how you could upgrade a 12.2 PDB by plugging it into a 19c CDB. But what about downgrade? Yeah, downgrade. You know, that really cool feature that you never practice, but you know you should.
In the previous blog post, I used the CDB that gets automatically created when you deploy a new 19c VM DB System and it comes with COMPATIBLE set to 19.0.0 – the default. When you provision a new VM DB System there is no way to control that parameter. Thus, when I plug in my old release PDB into the new release CDB the COMPATIBLE parameter is automatically raised, and I have lost the possibility of doing a downgrade. The only option to get back to the old release would be a Data Pump export.
If you want to preserve the possibility of doing a database downgrade, I strongly recommend you switch to Bare Metal DB Systems or ExaCS which are much more flexible. But if you insist on using VM DB Systems there is an option – it is cumbersome – but doable. And believe it or not – after working with Oracle Database for so many years it was the first time ever that I had to a downgrade – not even in a lab or a test environment (which became fairly obvious after I had asked for advice the 100th time that day).
Drop pre-created 19c database
To get a 19c CDB with a non-default COMPATIBLE setting we will drop the pre-created database and replace it with a backup that has the proper COMPATIBLE setting. This is supported and the same approach is used in the whitepaper “Hybrid Data Guard to Oracle Cloud Infrastructure”. It is a good read and it has a lot of script examples that I stole… oh… got inspired by.
Connect to the new release VM DB System and ensure that the environment variable ORACLE_UNQNAME is set to the DB_UNIQUE_NAME of the database:
echo $ORACLE_UNQNAME
If it is not set, you can get it from srvctl:
srvctl config database
export ORACLE_UNQNAME=...
Generate a script that can delete all data -, temp -, redo log – and control files:
SET HEADING OFF LINESIZE 999 PAGESIZE 999 FEEDBACK OFF TRIMSPOOL ON TIMING OFF
SPOOL /tmp/db_replace_files.lst
SELECT 'asmcmd rm '|| name FROM V$DATAFILE UNION ALL SELECT 'asmcmd rm '|| name FROM V$TEMPFILE UNION ALL SELECT 'asmcmd rm '|| member FROM V$LOGFILE UNION ALL SELECT 'asmcmd rm '|| name FROM V$CONTROLFILE;
SPOOL OFF
host chmod 777 /tmp/db_replace_files.lst
You must edit the script and get rid of the unneeded lines. Next, stop the database:
srvctl stop database -d $ORACLE_UNQNAME -o immediate
And log on as grid and delete the files using the script we just created:
. /tmp/db_replace_files.lst
As oracle, now restart the database instance in NOMOUNT mode (can’t really go further since we nuked the control files) and set the COMPATIBLE to the same setting as the old release CDB.
srvctl start database -db $ORACLE_UNQNAME -o NOMOUNT
sql / as sysdba
SQL> ALTER SYSTEM SET COMPATIBLE='12.2.0' SCOPE=SPFILE;
SQL> CREATE PFILE FROM SPFILE;
srvctl stop database -db $ORACLE_UNQNAME -o immediate
srvctl start database -db $ORACLE_UNQNAME -o nomount
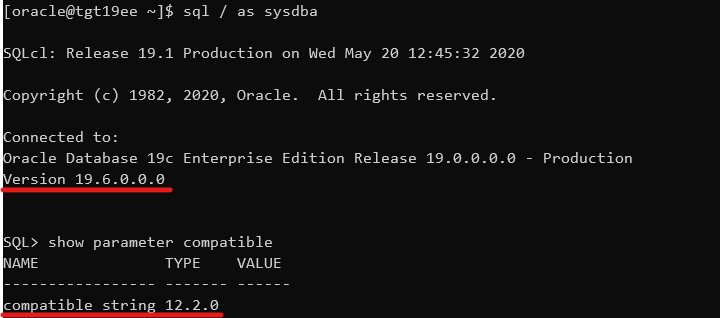
sql / as sysdba
SQL> SHOW PARAMETER COMPATIBLE
Now we have a new release instance running with the old COMPATIBLE setting. Obviously, it is of no use – yet.
Create a backup of old release CDB
I will use the old release CDB as the source for my new release CDB and thus preserve my COMPATIBLE setting. Obviously, the old release CDB must be upgraded to the new release, so let us first must ensure that the source CDB can actually be upgraded. Use AutoUpgrade in ANALYZE and FIXUPS mode which is described in a previous blog post. We must execute the ANALYZE and FIXUPS mode on the source system because the target system will only be able to open the database in UPGRADE mode, and these steps must be executed while the database is running in normal mode.
Next, I will create a File Storage Service that I can use to share files between the two VM DB Systems. The File Storage Service is really nice because the transfer speed in and out of the service depends on the network bandwidth of your VM DB System. So, if you add more CPUs to the system, you get more network bandwidth to the service automatically. It is really easy to create a File Storage Service and it is very well documented, so I will skip that part here. After that you can mount the file system in your systems (as opc):
sudo mkdir -p /mnt/db-downgrade-122
sudo mount x.x.x.x:/db-downgrade-122 /mnt/db-downgrade-122
sudo chmod 777 /mnt/db-downgrade-122
I can now take a backup of the CDB and store it directly in my NFS mount point:
rman target /

RMAN> BACKUP DATABASE ROOT FORMAT '/mnt/db-downgrade-122/cdbroot_%U' PLUGGABLE DATABASE 'PDB$SEED' FORMAT '/mnt/db-downgrade-122/pdbseed_%U' PLUS ARCHIVELOG FORMAT '/mnt/db-downgrade-122/arch_%U';
RMAN> BACKUP CURRENT CONTROLFILE FORMAT '/mnt/db-downgrade-122/cf_%U';
Since the database is encrypted, we also need a copy of the keystore (or wallet). An easy solution could be to put the keystore files into the File Storage Service but a safer approach is to transfer the file directly using scp. Although, the keystore is protected by a password, it is still safer to keep them separated.
At time of writing, in OCI you can find the location of the keystore in sqlnet.ora.
cat $ORACLE_HOME/network/admin/sqlnet.ora | grep -i encryption_wallet
But that will change at some point in time because as of Oracle Database release 19c the sqlnet.ora parameter ENCRYPTION_WALLET_LOCATION is deprecated. You might have to look at the database parameter WALLET_ROOT instead.
For now, just note down the location of the keystore.
Restore old release CDB and upgrade
Now we can restore the backup of the 12.2 database using the 19c binaries. This is supported and in fact newer releases of RMAN can always restore lower release backups. However, normally RMAN will try to open the database in normal mode which we can’t do because of the version mismatch. I will use the NOOPEN keyword which causes RMAN to leave the database in MOUNT mode and I can manually open the database with RESETLOGS and in UPGRADE mode.
But first we must copy the keystore files from the source database to the new release DB System. In my example I am also copying the auto-login keystore which you shouldn’t do if you are using local auto-login keystores. In that situation the auto-login keystore should be re-created at the new release system:
cd
scp -i  oracle@:/cwallet.sso cwallet.sso
scp -i  oracle@:/ewallet.p12 ewallet.p12
Now let’s do the restore and open the database in upgrade mode:
rman auxiliary /

RMAN> DUPLICATE DATABASE TO CDB1 AS ENCRYPTED NOOPEN SKIP PLUGGABLE DATABASE SALES BACKUP LOCATION '/mnt/db-downgrade-122/';
And in the end, you can see that RMAN does not open the database:

Then, you can open the database in UPGRADE mode and with RESETLOGS option to complete the restore. Also, drop the skipped pluggable databases from the data dictionary:
ALTER DATABASE OPEN RESETLOGS UPGRADE;
DROP PLUGGABLE DATABASE SALES INCLUDING DATAFILES;
Finally, you can use AutoUpgrade in UPGRADE mode to upgrade the CDB to the new release. You now have a new target system running on 19c but with a lower COMPATIBLE setting.
If you want to know more about the UPGRADE mode, have a look in the documentation.
Downgrading a PDB
Previously, we have laid the groundworks for the being able to do a downgrade. For the following, I am assuming that you have already upgraded your PDB to 19c and now you ended up in a big doo doo and have to downgrade.
Downgrading in VM DB Systems are also slightly more complicated than on other systems. Remember that VM DB Systems does only support one Oracle Home (the one that comes deployed automatically) and that means that we must move the database back to the source system. For that operation we can’t use data guard, RMAN, or any other fancy approach because they only work to the same or newer release. So, we will have to do an old-school cold copy of the database – and that requires additional downtime. But let’s get started!
I will create a file that gives me all the commands I need to copy the data files out of ASM and into my File Storage Service (you could also scp them directly to the old release system):
SET HEADING OFF LINESIZE 999 PAGESIZE 999 FEEDBACK OFF TRIMSPOOL ON TIMING OFF
SPOOL /tmp/db_downgrade_files.lst
SELECT 'asmcmd cp ' || name || ' ''/mnt/dbbackupstaging' || SUBSTR(name, INSTR(name, '/', -1 )) || '''' FROM V$DATAFILE
UNION
SELECT 'chown oracle:oinstall /mnt/dbbackupstaging' || SUBSTR(name, INSTR(name, '/', -1 )) FROM V$DATAFILE ORDER BY 1;
SPOOL OFF
And then I can proceed with the actual downgrade. I need to ensure that the unified audit trail is emptied before the downgrade:
ALTER PLUGGABLE DATABASE SALES CLOSE;
ALTER PLUGGABLE DATABASE SALES OPEN DOWNGRADE;
EXEC DBMS_AUDIT_MGMT.CLEAN_AUDIT_TRAIL(DBMS_AUDIT_MGMT.AUDIT_TRAIL_UNIFIED, FALSE);
SPOOL /tmp/db_downgrade.lst
SET TERMOUT ON TIMING ON SERVEROUT ON ECHO ON
@?/rdbms/admin/catdwgrd.sql
SPOOL OFF
Unplug the PDB and because the PDB is encrypted I have to specify a password that can protect the sensitive information inside the manifest file:
ALTER SESSION SET CONTAINER=CDB$ROOT;
ALTER PLUGGABLE DATABASE SALES CLOSE;
ALTER PLUGGABLE DATABASE SALES UNPLUG INTO '/mnt/db-downgrade-122/manifest_sales.xml' ENCRYPT USING [a-secret-password];
Now we can copy the data files from the local storage and on to the File Storage Service so we can use at the source system. Use the commands that we generated previously:
asmcmd ...
chown ...
Now switching to the old release system and create the PDB from manifest file. I will use the data files right off the File Storage Service and optionally I can move them afterwards – as an online operation (you might not want to do that, but I ran out of disk space):
CREATE PLUGGABLE DATABASE SALES USING '/mnt/db-downgrade-122/manifest_sales.xml' SOURCE_FILE_DIRECTORY='/mnt/db-downgrade-122' NOCOPY KEYSTORE IDENTIFIED BY [keystore-password] DECRYPT USING [a-secret-password];
Start up the database in UPGRADE mode and open the keystore:
ALTER PLUGGABLE DATABASE SALES OPEN UPGRADE;
ADMINISTER KEY MANAGEMENT SET KEYSTORE CLOSE CONTAINER=all;
ADMINISTER KEY MANAGEMENT SET KEYSTORE OPEN IDENTIFIED BY [keystore-password] CONTAINER=all;
Switch to the SALES PDB and complete the downgrade:
ALTER SESSION SET CONTAINER=SALES;
SET TERMOUT ON ECHO ON TIMING ON
SPOOL /home/oracle/sales_catreload.log
@?/rdbms/admin/catrelod.sql
SPOOL OFF
Restart, Recompile and fresh stats:
ALTER PLUGGABLE DATABASE SALES CLOSE IMMEDIATE;
ALTER PLUGGABLE DATABASE SALES OPEN;
@?/rdbms/admin/utlrp.sql
EXEC DBMS_STATS.GATHER_DICTIONARY_STATS;
EXEC DBMS_STATS.GATHER_FIXED_OBJECT_STATS;
Check the state of the Oracle Data Dictionary
SET SQLFORMAT ANSICONSOLE LINES 300
SELECT COMP_ID, COMP_NAME, VERSION, STATUS FROM DBA_REGISTRY ORDER BY MODIFIED;
And there you have it. Not exactly super easy, which is why I highly recommend you to look at Bare Metal DB Systems or Exadata DB Systems if you are required to be able to do downgrades (or be prepared to use Data Pump instead).
Other Posts in This Series