Why You Need to Use Oracle Fleet Patching and Provisioning

First, what is Oracle Fleet Patching and Provisioning (FPP)?

Oracle Fleet Patching & Provisioning (formerly known as Oracle Rapid Home Provisioning) is the recommended solution for performing lifecycle operations (provisioning, patching & upgrades) across entire Oracle Grid Infrastructure and Oracle RAC Database fleets and the default solution used for Oracle Database Cloud services.
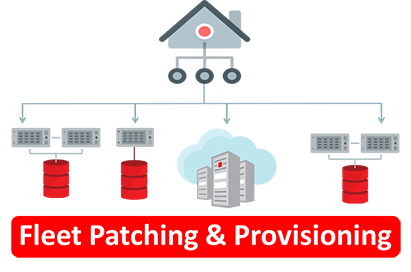
Oracle Fleet Patching and Provisioning automates your lifecycle activities

In my own words, a central server that provision, patch, and upgrade your Oracle Databases, Oracle Grid Infrastructure, and Oracle Exadata stack.

With FPP, the lifecycle operations are automated and handled centrally. The more systems you have, the greater the benefit of FPP.

If you are constantly busy trying to keep up with all the patching, or struggling to maintain your tooling, then it is time to look into FPP!

Many Good Reasons To Use Oracle Fleet Patching and Provisioning

Oracle Fleet Patching and Provisioning:

  • Uses a gold image approach to provision new Oracle Database and Grid Infrastructure homes.
  • Manages your software centrally. Install a new database or GI home based on a gold image centrally with one command.
  • Patches your database or GI home, including running datapatch.
  • Uses out-of-place patching to minimize downtime.
  • Makes it easy to use Zero Downtime Oracle Grid Infrastructure Patching (ZDOGIP).
  • Patches your entire Oracle Exadata stack, including the nodes, storage cells, and RoCE and Infiniband network.
  • Upgrades your databases using different approaches. Of course, FPP uses AutoUpgrade underneath the hood.
  • Creates new databases.
  • Adds nodes to your Oracle RAC cluster.
  • Detects missing bugfixes. If prior to patching database or GI home doesn’t have the expected patches, you are notified. Optionally, you can add the missing fixes to your gold image.
  • Checks for configuration drift. Compares the bug fixes in a gold image to the homes deployed.
  • Adheres to the MAA best practices. Provides options to control session draining, and perfectly integrates with Transparent Application Continuity. It will always use the latest HA and MAA features.
  • Does it the same way every time. No more human errors.

All of the above is done centrally from the FPP server.

Imagine how much time you spend on patching your Oracle stack. Now, take into consideration that you are doing it every quarter. Now, take Monthly Recommended Patches into account. Now, take all the other tasks into account. You can really save a lot of time using Oracle Fleet Patching and Provisioning.

But …

I need to learn a new tech!

You’re right. But there are so many resources to get you started:

It Requires a License

True, but it comes included in your Oracle RAC license. If you don’t have that, you must license the Enterprise Manager Lifecycle Management pack. Check the license guide for details.

My Database Is On Windows

OK, bummer. Then you can’t use FPP. It supports Linux, Solaris, and AIX only.

What’s the Result?

Settling the score is easy. There are many more pros than cons.

I recommend using Oracle Fleet Patching and Provisioning when you manage more than a few systems. It will make your life so much easier.

I interviewed Philippe Fierens, the product manager for Oracle Fleet Patching and Provisioning, on the benefits of using FPP.

Appendix

Further Reading

Other Blog Posts in This Series

How to Avoid Interruptions When You Patch Oracle Grid Infrastructure 19c

In previous blog posts, I have shown you have to patch Oracle Grid Infrastructure 19c (GI). When you patch GI, it happens in a rolling manner, node by node. The database is always up, but each instance is temporarily down.

If my application is connected to an instance going down, how do I ensure my application is not interrupted?

My demo system:

  • Is a 2-node RAC. The nodes are named copenhagen1 and copenhagen2.
  • Database is called CDB_COPENHAGEN
  • PDB is called SALES

Connect Using A Custom Service

  1. First, I create a dedicated service that my application must use:

    [oracle@copenhagen1]$ srvctl add service \
       -db CDB1_COPENHAGEN \
       -pdb SALES \
       -service SALESGOLD \
       -preferred CDB11,CDB12 \
       -failover_restore AUTO \
       -failoverretry 1 \
       -failoverdelay 3 \
       -commit_outcome TRUE \
       -failovertype AUTO \
       -replay_init_time 600 \
       -retention 86400 \
       -notification TRUE \
       -drain_timeout 300 \
       -stopoption IMMEDIATE
    
    • I want to use all nodes in my cluster for this service, so I set preferred to all instances of my database.
    • I set failover_restore AUTO to enable Transparent Application Continuity for the service.
    • When I stop the service, the sessions have 5 minutes to move to another instance as specified by drain_timeout.
    • If the sessions don’t drain in due time, the stopoption parameter tells that sessions are to be killed immediately.
  2. Now I start the service:

    [oracle@copenhagen1]$ srvctl start service \
       -db CDB1_COPENHAGEN \
       -service SALESGOLD
    
  3. I add an alias called SALESGOLD to tnsnames.ora:

    SALESGOLD =
    (DESCRIPTION =
       (CONNECT_TIMEOUT=90)(RETRY_COUNT=50)(RETRY_DELAY=3)(TRANSPORT_CONNECT_TIMEOUT=3)
       (ADDRESS_LIST =
          (LOAD_BALANCE=on)
          (ADDRESS = (PROTOCOL = TCP)(HOST=copenhagen-scan)(PORT=1521))
       )
       (CONNECT_DATA=
          (SERVICE_NAME = SALESGOLD)
       )
    )
    
    • I connect to SALESGOLD service using the SERVICE_NAME attribute.
    • I connect via the SCAN listener.
  4. I configure my application to connect via the SALESGOLD alias.

You should always configure your application to connect to a custom service. The database has default services, but you should not use them for your application. Custom services are the way to go if you want a highly available system.

Let’s Patch

It doesn’t matter whether you use in-place or out-of-place patching. If you are using out-of-place patching, do as much of the preparations as possible. This procedure starts right before a node goes down.

  1. First, I want to patch GI on copenhagen1.
  2. I stop my service SALESGOLD on that node only:
    [oracle@copenhagen1]$ srvctl stop service \
       -db CDB1_COPENHAGEN \
       -service SALESGOLD \
       -instance CDB11 \
       -force
    
    • I use the instance parameter to stop the service only on the node I am about to patch. In this case, CDB11 is the database instance name of my database CDB_COPENHAGEN running on copenhagen1.
    • GI marks the service as OFFLINE on copenhagen1, and new connections will be directed to the other node.
    • GI sends out a FAN event telling the instance is going down. The Oracle driver on the clients detects the event.
    • When I created the service, I set the drain timeout to 300. This gives database sessions 5 minutes to finish their work.
      • If desired, I can override the value using -drain_timeout.
    • If a session becomes idle before the timeout, the driver on the client automatically reconnects to the other node. The session continues on the other node; no error message is displayed.
    • If the session is still active after the timeout, it will be killed immediately. This I defined when I created the service using stopoption parameter.
      • I enabled Transparent Application Continuity (TAC) on my database service using the failover_restore parameter. TAC detects the session is killed and attempts to intervene.
      • If my application is fit for TAC, a new connection is made, any in-flight transaction is replayed in the new session; no error message is displayed.
      • If my application is not fit for TAC or if I was doing something that is not replayable, my session is terminated, and my application receives an error.
  3. Now, all sessions using SALESGOLD service have been drained from copenhagen1. I can bring down the GI stack to patch.
    • I use opatchauto apply for in-place patching.
    • Or, I use opatchauto apply -switch-clone for out-of-place patching.
    • Or, I use root.sh for out-of-place patching with switchGridHome.
    • Or, whatever method suits my environment. It doesn’t matter.
  4. When the GI stack is restarted, my service SALESGOLD is automatically restarted. Now, my application can connect to the instance on copehagen1 again.
  5. I ensure that the service is started:
    [grid@copenhagen1]$ crsctl stat resource -t
    
  6. I repeat steps 2-5 for the second node, copenhagen2.

My Application Can’t Use Application Continuity

If, for some reason, you are not ready to use Application Continuity or Tranparent Application Continuity yet, you can still use this procedure. You can change the failover_restore setting on the service to something that suits your application. You can still perform draining, but you need to find another method for dealing with those sessions that don’t drain in due time.

One option is to set the drain_timeout parameter high enough to allow everyone to finish their work and reconnect to another node. Just be aware that the other node must be able to handle the entire workload during that period.

If draining doesn’t work for you either (or the patch is non-rolling), you must take an outage to patch. You can follow the Minimum Downtime approach described in Rolling Patch – OPatch Support for RAC (Doc ID 244241.1):

  • Shut down GI stack on node 1
  • Patch node 1
  • Shut down GI stack on node 2
  • Patch node 2
  • Shut down GI stack on node 3
  • Start up node 1 and node 2
  • Patch node 3
  • Start up node 3

Happy Patching!

Appendix

Further Reading

Other Blog Posts in This Series

How to Patch Oracle Grid Infrastructure 19c Using Out-Of-Place OPatchAuto

Let me show you how I patch Oracle Grid Infrastructure 19c (GI) using the out-of-place method and opatchauto.

My demo system:

  • Is a 2-node RAC
  • Runs Oracle Linux
  • Is currently on 19.16.0, and I want to patch to 19.17.0

When I use this procedure, I patch both the GI home only. However, opatchauto has the option of patching the database home as well.

Preparation

I need to download:

  1. Latest OPatch from My Oracle Support (6880880).
  2. The 19.17.0 Release Update for Oracle Grid Infrastructure from My Oracle Support. I use patch 34416665.

I place the software in /u01/software.

How to Patch Oracle Grid Infrastructure 19c

1. Make Ready for Patching

I can do this in advance. It doesn’t cause any downtime.

  1. I ensure that there is passwordless SSH access between all the cluster nodes:

    [grid@copenhagen1]$ ssh copenhagen2 date
    
    [grid@copenhagen2]$ ssh copenhagen1 date
    
  2. I update OPatch to the latest available version.

    • On all nodes (copenhagen1 and copenhagen 2)
    • In the GI home as grid

    I just show how to do it for the GI home on one node:

    [grid@copenhagen1]$ cd $ORACLE_HOME
    [grid@copenhagen1]$ rm -rf OPatch
    [grid@copenhagen1]$ unzip -oq /u01/software/p6880880_190000_Linux-x86-64.zip
    
  3. I extract the patch file on both nodes. I show it for just the first node:

     [grid@copenhagen1]$ cd /u01/software
     [grid@copenhagen1]$ mkdir 34416665
     [grid@copenhagen1]$ mv p34416665_190000_Linux-x86-64.zip 34449117
     [grid@copenhagen1]$ cd 34416665
     [grid@copenhagen1]$ unzip p34416665_190000_Linux-x86-64.zip
    
  4. I check for patch conflicts.

    • I can find the details about which checks to make in the patch readme file.
    • I must check for conflicts in the GI home only.
    • Since I have the same patches on all nodes, I can check for conflicts on just one of the nodes.

    As grid with ORACLE_HOME set to the GI home:

    [grid@copenhagen1]$ $ORACLE_HOME/OPatch/opatch prereq CheckConflictAgainstOHWithDetail -phBaseDir /u01/software/34416665/34416665/34419443 | grep checkConflictAgainstOHWithDetail
    [grid@copenhagen1]$ $ORACLE_HOME/OPatch/opatch prereq CheckConflictAgainstOHWithDetail -phBaseDir /u01/software/34416665/34416665/34444834 | grep checkConflictAgainstOHWithDetail
    [grid@copenhagen1]$ $ORACLE_HOME/OPatch/opatch prereq CheckConflictAgainstOHWithDetail -phBaseDir /u01/software/34416665/34416665/34428761 | grep checkConflictAgainstOHWithDetail
    [grid@copenhagen1]$ $ORACLE_HOME/OPatch/opatch prereq CheckConflictAgainstOHWithDetail -phBaseDir /u01/software/34416665/34416665/34580338 | grep checkConflictAgainstOHWithDetail
    [grid@copenhagen1]$ $ORACLE_HOME/OPatch/opatch prereq CheckConflictAgainstOHWithDetail -phBaseDir /u01/software/34416665/34416665/33575402 | grep checkConflictAgainstOHWithDetail
    

2. Clone Home and Patch

Like phase 1, I can do this in advance. No downtime.

  1. First, on copenhagen1, I clone the existing GI home. I set ORACLE_HOME to my existing GI home. As root:
    [root@copenhagen1]$ export ORACLE_HOME=/u01/app/19.0.0.0/grid
    [root@copenhagen1]$ export PATH=$ORACLE_HOME/OPatch:$PATH
    [root@copenhagen1]$ $ORACLE_HOME/OPatch/opatchauto \
       apply /u01/software/34416665/34416665 \
       -prepare-clone \
       -oh $ORACLE_HOME
    
    • opatchauto prompts me for the location of the new GI home. I choose the following location:
      • /u01/app/19.17.0/grid
    • Optionally, I can specify the new location in a response file. See appendix.
    • opatchauto clones the GI home and applies the patches.
  2. Next, I clone on the other node. On copenhagen2, I repeat step 1.
    • opatchauto automatically chooses the same locations for GI home as I used on the first node.

Do not touch the new, cloned homes. The next step will fail if you make any changes (like applying additional patches).

3. Switch to the New GI Home

Now, I can complete the patching process by switching to the new GI home. I do this one node at a time.

  1. First, on copenhagen1, I switch to the new GI home. ORACLE_HOME is still set to my existing GI home. As root:
    [root@copenhagen1]$ export ORACLE_HOME=/u01/app/19.0.0.0/grid
    [root@copenhagen1]$ export PATH=$ORACLE_HOME/OPatch:$PATH
    [root@copenhagen1]$ $ORACLE_HOME/OPatch/opatchauto apply -switch-clone
    
    • Be sure to start with the same node you did when you cloned the GI home (phase 2).
    • This step stops the entire GI stack, including the resources it manages (databases, listener, etc.). This means downtime on this node only. The remaining nodes stay up.
    • In that period, GI marks the services as OFFLINE so users can connect to other nodes.
    • If my database listener runs out of the GI home, opatchauto will move it to the new GI home, including copying listener.ora.
    • Optionally, if I want a more graceful approach, I can manually stop the services and perform draining.
    • In the end, GI restarts using the new, patched GI home. GI restarts the resources (databases and the like) as well.
    • Proceed with the rest of the nodes as quickly as possible.
  2. I connect to the other node, copenhagen2, and repeat step 1.
    • If I had more nodes in my cluster, I must process the nodes in the same order as I did the cloning (phase 2).
  3. I update any profiles (e.g., .bashrc) and other scripts referring to the GI home on all nodes.

That’s it! I have now patched my Grid Infrastructure deployment.

In my demo environment, each node was down for around 7 minutes. But the database remained up on other nodes all the time.

For simplicity, I have removed some of the prechecks. Please follow the patch readme file instructions and perform all the described prechecks.

In this blog post, I decided to perform the out-of-place patching as a two-step process. This gives me more control. I can also do it all in just one operation. Please see Grid Infrastructure Out of Place ( OOP ) Patching using opatchauto (Doc ID 2419319.1) for details.

Later on, I patch my database.

A Word about the Directory for the New GI Home

Be careful when choosing a location for the new GI home. The documentation lists some requirements you should be aware of.

In my demo environment, the existing GI home is:

/u01/app/19.0.0.0/grid

Since I am patching to 19.17.0, I think it makes sense to use:

/u01/app/19.17.0/grid

If your organization has a different naming standard, that’s fine. Just ensure you comply with the requirements specified in the documentation.

Don’t Forget to Clean Your Room

At a future point, I need to remove the old GI home. I use the deinstall tool in the Oracle home.

I execute the command on all nodes in my cluster:

$ export OLD_GRID_HOME=/u01/app/19.0.0.0/grid
$ export ORACLE_HOME=OLD_GRID_HOME
$ $ORACLE_HOME/deinstall/deinstall -local

But I wait a week or two before doing so. To ensure that everything runs smoothly on the new patch level.

Happy Patching!

Appendix

Installing Multiple Patches

In the example above, I am just installing one patch. Often, you need to install multiple patches, like Release Update, Monthly Recommend Patches (MRP), and perhaps also one-offs.

OPatchAuto can install multiple patches in one operation. You can use -phBaseDir to specify a directory where you place all the patches as subdirectories:

opatchauto apply -phBaseDir <directory> ...

How to Use Prepare-Clone in Silent Mode

When I execute opatchauto apply -prepare-clone, the program prompts for the location of the new GI home. For an unattended execution, I can specify the old and new GI home in a file, and reference that file using the -silent parameter.

[root@copenhagen1]$ cat prepare-clone.properties
/u01/app/19.0.0.0/grid=/u01/app/19.17.0/grid

[root@copenhagen1]$ $ORACLE_HOME/OPatch/opatchauto apply ... -prepare-clone -silent prepare-clone.properties -oh $ORACLE_HOME

Further Reading

Other Blog Posts in This Series

How to Patch Oracle Grid Infrastructure 19c Using In-Place OPatchAuto

Let me show you how I patch Oracle Grid Infrastructure 19c (GI) using the in-place method and opatchauto.

My demo system:

  • Is a 2-node RAC
  • Runs Oracle Linux
  • Is currently on 19.16.0, and I want to patch to 19.17.0

When I use this procedure, I patch both the GI home only. However, opatchauto has the option of patching the database home as well.

Preparation

I need to download:

  1. Latest OPatch from My Oracle Support (6880880).
  2. The 19.17.0 Release Update for Oracle Grid Infrastructure from My Oracle Support. I use patch 34416665.

I place the software in /u01/software.

How to Patch Oracle Grid Infrastructure 19c

1. Make Ready For Patching

I can do this in advance. It doesn’t cause any downtime.

  1. I update OPatch to the latest available version.

    • On all nodes (copenhagen1 and copenhagen 2)
    • In the GI home as grid

    I just show how to do it for the GI home on one node

    [grid@copenhagen1]$ cd $ORACLE_HOME
    [grid@copenhagen1]$ rm -rf OPatch
    [grid@copenhagen1]$ unzip -oq /u01/software/p6880880_190000_Linux-x86-64.zip
    
  2. I extract the patch file on both nodes. I show it for just the first node:

     [grid@copenhagen1]$ cd /u01/software
     [grid@copenhagen1]$ mkdir 34416665
     [grid@copenhagen1]$ mv p34416665_190000_Linux-x86-64.zip 34449117
     [grid@copenhagen1]$ cd 34416665
     [grid@copenhagen1]$ unzip p34416665_190000_Linux-x86-64.zip
    
  3. I check for patch conflicts.

    • In the patch readme file I can find the details about which checks to make.
    • I must check for conflicts in the GI home only.
    • Since I have the same patches on all nodes, I can check for conflicts on just one of the nodes.

    As grid with ORACLE_HOME set to the GI home:

    [grid@copenhagen1]$ $ORACLE_HOME/OPatch/opatch prereq CheckConflictAgainstOHWithDetail -phBaseDir /u01/software/34416665/34416665/34419443 | grep checkConflictAgainstOHWithDetail
    [grid@copenhagen1]$ $ORACLE_HOME/OPatch/opatch prereq CheckConflictAgainstOHWithDetail -phBaseDir /u01/software/34416665/34416665/34444834 | grep checkConflictAgainstOHWithDetail
    [grid@copenhagen1]$ $ORACLE_HOME/OPatch/opatch prereq CheckConflictAgainstOHWithDetail -phBaseDir /u01/software/34416665/34416665/34428761 | grep checkConflictAgainstOHWithDetail
    [grid@copenhagen1]$ $ORACLE_HOME/OPatch/opatch prereq CheckConflictAgainstOHWithDetail -phBaseDir /u01/software/34416665/34416665/34580338 | grep checkConflictAgainstOHWithDetail
    [grid@copenhagen1]$ $ORACLE_HOME/OPatch/opatch prereq CheckConflictAgainstOHWithDetail -phBaseDir /u01/software/34416665/34416665/33575402 | grep checkConflictAgainstOHWithDetail
    

2. Start Patching

Now, I start the actual patch process. I do this one node at a time.

  1. First, as root on copenhagen1, I use opatchauto to patch my GI home:

    [root@copenhagen1]$ export ORACLE_HOME=/u01/app/19.0.0.0/grid
    [root@copenhagen1]$ export PATH=$ORACLE_HOME/OPatch:$PATH
    [root@copenhagen1]$ $ORACLE_HOME/OPatch/opatchauto \
       apply /u01/app/grid/patches/34416665/34416665 \
       -oh $ORACLE_HOME
    
    • This step stops the entire GI stack, including the resources it manages (databases, listener, etc.). This means downtime on this node only. The remaining nodes stay up.
    • In that period, GI marks the services as OFFLINE so users can connect to other nodes.
    • Optionally, if I want a more graceful approach, I can manually stop the services, and perform draining.
    • opatchauto applies the patches to the GI home.
    • In the end, opatchauto restarts GI, including the managed resources (databases and the like).
    • opatchauto does not patch the database home.
  2. I connect to the other node, copenhagen2, and repeat step 1.

That’s it! I have now patched my Grid Infrastructure.

In my demo environment, each node was down for around 15 minutes. But the database remained up on other nodes all the time.

For simplicity, I have removed some of the prechecks. Please follow the patch readme file instructions and perform all the described prechecks.

Later on, I can patch my database.

Happy Patching!

Appendix

Installing Multiple Patches

In the example above, I am just installing one patch. Often, you need to install multiple patches, like Release Update, Monthly Recommend Patches (MRP), and perhaps also one-offs.

OPatchAuto can install multiple patches in one operation. You can use -phBaseDir to specify a directory where you place all the patches as subdirectories:

opatchauto apply -phBaseDir <directory> ...

Other Blog Posts in This Series

Can I Run Datapatch When Users Are Connected

The short answer is: Yes! The longer answer is: Yes, but very busy systems or in certain situations, you might experience a few hiccups.

The obvious place to look for the answer would be in the documentation. Unfortunately, there is no Patching Guide similar to the Upgrade Guide. The information in this blog post is pieced together from many different sources.

A few facts about patching with Datapatch:

  • The database must be open in read write mode.
  • You can’t run Datapatch on a physical standby database – even if it’s open (Active Data Guard).
  • A patch is not fully installed until you have executed Datapatch successfully.

How To

First, let me state that it is fully supported to run Datapatch on a running database with users connected.

The procedure:

  1. Install a new Oracle Home and use OPatch to apply the desired patches.
  2. Shut down the database.
  3. Restart the database in the new, patched Oracle Home.
  4. Downtime is over! Users are allowed to connect to the database
  5. Execute ./datapatch -verbose.
  6. End of procedure. The patch is now fully applied.

Often users move step 4 (Downtime is over) to the end of the procedure. That’s of course also perfectly fine, but it does extend the downtime needed and often is not needed.

What About RAC and Data Guard

The above procedure is exactly what happens in a rolling patch apply on a RAC database. When you perform a rolling patch apply on a RAC database, there is no downtime at all. You use opatchauto to patch a RAC database. opatchauto restarts all instances of the database in the patched Oracle Home in a rolling manner. Finally, it executes datapatch on the last node. Individual instances are down temporarily, but the database is always up.

It is a similar situation when you use the Standby First Patch Apply. First, you restart all standby databases in the patched Oracle Home. Then, you perform a switchover and restart the former primary database in the patched Oracle Home. Finally, you execute datapatch to complete the patch installation. You must execute datapatch on the primary database.

Either way, don’t use Datapatch until all databases or instances run on the new, patched Oracle Home.

That’s It?

Yes, but I did write initally that there might be hiccups.

Waits

Datapatch connects to the database like any other session to make changes inside the database. These changes could be:

  • Creating new tables
  • Altering existing tables
  • Creating or altering views
  • Recreating PL/SQL packages like DBMS_STATS

Imagine this scenario:

  1. You restart the database in the patched Oracle Home.
  2. A user connects and starts to use DBMS_STATS.
  3. You execute datapatch.
    1. Datapatch must replace DBMS_STATS to fix a bug.
    2. Datapatch executes CREATE OR REPLACE PACKAGE SYS.DBMS_STATS .....
    3. The Datapatch database session go into a wait.
  4. User is done with DBMS_STATS.
  5. The Datapatch session come out of wait and replace the package.

In this scenario, the patching procedure was prolonged due to the wait. But it completed eventually.

Hangs

From time to time, we are told that Datapatch hangs. Most likely, it is not a real hang, but just a wait on a lock. You can identify the blocking session by using How to Analyze Library Cache Timeout with Associated: ORA-04021 ‘timeout occurred while waiting to lock object %s%s%s%s%s.’ Errors (Doc ID 1486712.1).

You might even want to kill the blocking session to allow Datapatch to do its work.

Timeouts

What will happen in the above scenario if the user never releases the lock on DBMS_STATS? By default, Datapatch waits for 15 minutes (controlled by _kgl_time_to_wait_for_locks) before throwing an error:

ORA-04021: timeout occurred while waiting to lock object

To resolve this problem, restart Datapatch and ensure that there are no blocking sessions. Optionally, increase the DDL timeout:

./datapatch -ddl_lock_timeout <time-in-sec>

Really Busy Databases

I recommend patching at off-peak hours to reduce the likelihood of hitting the above problems.

If possible, you can also limit the activity in the database while you perform the patching. If your application is using e.g. DBMS_STATS and locking on that object is often a problem, you can hold off these sessions for a little while.

The Usual Suspects

Based on my experience, when there is a locking situation, these are often the sinner:

  • Scheduler Jobs – if you have jobs runnings very frequently, they may all try to start when you restart your database in the new Oracle Home. Suspend the workload temporarilty by setting job_queue_processes to 0.
  • Advanced Queeing – if you have lots of activities happening via AQ, you can suspend it temporarily by setting aq_tm_processes to 0. If you disable the scheduler, you also disable AQ.
  • Materialized Views – when the database refreshes materialized views it uses internal functionality (or depending objects) that Datapatch needs to replace. By disabling the scheduler, you also disable the materialized view refreshes.
  • Backup jobs – I have seen several situations where Datapatch couldn’t replace the package dbms_backup_restore because the backup system took archive backups.

Last Resort

If you want to be absolutely sure no one intervenes with your patching, use this approach. But it means downtime:

  1. SQL> startup restrict
  2. ./datapatch -verbose
  3. SQL> alter system disable restricted session;

I don’t recommend starting in upgrade mode. To get out of upgrade mode a database restart is needed extending the downtime window.

Datapatch And Resources

How much resources does Datapatch need? Should I be worried about Datapatch depleting the system?

No, you should not. The changes that Datapatch needs to make are not resource-intensive. However, a consequence of the DDL statements might be object invalidation. But even here, you should not worry. Datapatch will automatically recompile any ORACLE_MAINTAINED object that was invalidated by the patch apply. But the recompilation happens serially, i.e., less resources needed.

Of course, if you system is running at 99% capacity, it might be a problem. On the other hand, if your system is at 99%, patching problems are probably the least of your worries.

What About OJVM

If you are using OJVM and you apply the OJVM bundle patch, things are a little different.

Release RAC Rolling Standby-First Datapatch
Oracle Database 21c Fully No No Datapatch downtime.
Oracle Database 19c + 18c Partial No No Datapatch downtime, but java system is patched which requires ~10 second outage. Connected clients using java will receive ORA-29548.
Oracle Database 12.2 + 12.1 No No Datapatch must execute in upgrade mode.
Oracle Database 11.2.0.4 No No Similar to 12.2 and 12.1 except you don’t use Datapatch.

Mike Dietrich also has a good blog that you might want to read: Do you need STARTUP UPGRADE for OJVM?

What About Oracle GoldenGate

You should stop Oracle GoldenGate when you execute datapatch. When datapatch is done, you can restart Oracle GoldenGate.

If you are manually recompiling objects after datapatch, I recommend that you restart Oracle GoldenGate after the recompilation.

The above applies even if the patches being applied does not contain any Oracle GoldenGate specific patches.

Oracle GoldenGate uses several objects owned by SYS. When datapatch is running it might change some of those objects. In that case, unexpected errors might occur.

Recommendations

Based on my experience, these are my recommendations

Before Patching

  • Recompile invalid objects (utlrp).
  • Perform a Datapatch sanity check ($ORACLE_HOME/OPatch/datapatch -sanity_checks).
  • Postpone your backup jobs.
  • Stop any Oracle GoldenGate processes that connects to the database.
  • Disable the scheduler.

Patching

  • Always use the latest OPatch.
  • Always use out-of-place patching, even for RAC databases.
  • Always enable verbose output in Datapatch ($ORACLE_HOME/OPatch/datapatch -verbose).

After Patching

  • If applicable, re-enable
    • Backup jobs.
    • Oracle GoldenGate processes.
    • The scheduler.
  • Check Datapatch output. If Datapatch failed to recompile any objects, a message is printed to the console. If you patch interactively, you can find the same information in the log files.

Still Don’t Believe Me?

In Autonomous Database (ADB), there is no downtime for patching. An ADB runs on RAC and patching is fully rolling. The automation tooling executes Datapatch while users are connected to the database.

Of course, one might run into the same issues described above. But Oracle have automation to handle the situation. If necessary, the database kills any sessions blocking Datapatch. In the defined maintenance window in your ADB, you may end up in a situation that a long-running, blocking session terminates because it was blocking a Datapatch execution. But if you minimize your activities in the defined maintenance windows, then chances of that happening is minimal.

Conclusion

Go ahead and patch your database with Datapatch while users are connected.

Further Reading