

To use Zero Downtime Migration (ZDM) I must install a Zero Downtime Migration service host. It is the piece of software that will control the entire process of migrating my database into Oracle Cloud Infrastructure (OCI). This post describes the process for ZDM version 21. The requirements are:
- Must be running Oracle Linux 7 or newer.
- 100 GB disk space according to the documentation. I could do with way less – basically there should be a few GBs for the binaries and then space for configuration and log files.
- SSH access (port 22) to each of the database hosts.
- Recommended to install it on a separate server (although technically possible to use one of the database hosts).
Create and configure server
In my example, I will install the ZDM service host on a compute instance in OCI. There are no requirements to CPU nor memory and ZDM is only acting as a coordinator – all the work is done by the database hosts – so I can use the smallest compute shape available. I was inspired to use OCI CLI after reading a blog post by Michał. I will use that approach to create the compute instance. But I could just as well use the web interface or REST APIs.
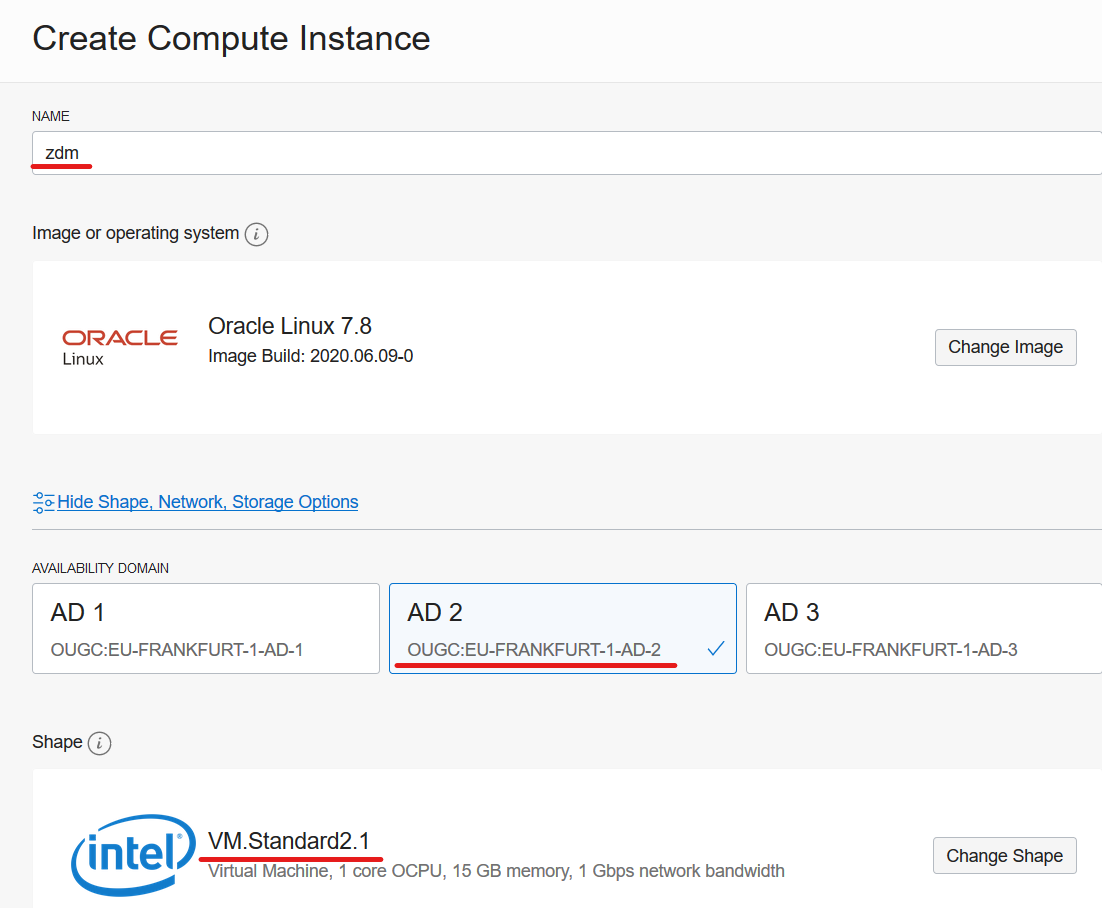
First, I will define a few variables that you have to change to your needs. DISPLAYNAME is the hostname of my compute instance – and also the name I see in the OCI webpage. AVAILDOM is the availability domain into which the compute instance is created. SHAPE is the compute shape:
DISPLAYNAME=zdm
AVAILDOM=OUGC:EU-FRANKFURT-1-AD-1
SHAPE=VM.Standard2.1
When I create a compute instance using the webpage these are the values:
In addition, I will define the OCID of my compartment, and also the OCID of the subnet that I will use. I am making sure to select a subnet that I can reach via SSH from my own computer. Last, I have the public key file:
COMPARTMENTID="..."
SUBNETID="..."
PUBKEYFILE="/path/to/key-file.pub"
Because I want to use the latest Oracle Linux 7 image I will query for the OCID of that and store it in a variable:
IMAGEID=`oci compute image list \
   --compartment-id $COMPARTMENTID \
   --operating-system "Oracle Linux" \
   --sort-by TIMECREATED \
   --query "data[?contains(\"display-name\", 'GPU')==\\\`false\\\` && contains(\"display-name\", 'Oracle-Linux-7')==\\\`true\\\`].{DisplayName:\"display-name\", OCID:\"id\"} | [0]" \
   | grep OCID \
   | awk -F'[\"|\"]' '{print $4}'`
And now I can create the compute instance:
oci compute instance launch \
 --compartment-id $COMPARTMENTID \
 --display-name $DISPLAYNAME \
 --availability-domain $AVAILDOM \
 --subnet-id $SUBNETID \
 --image-id $IMAGEID \
 --shape $SHAPE \
 --ssh-authorized-keys-file $PUBKEYFILE \
 --wait-for-state RUNNING
The command will wait until the compute instance is up and running because I used the wait-for-state RUNNING option. Now, I can get the public IP address so I can connect to the instance:
VMID=`oci compute instance list \
  --compartment-id $COMPARTMENTID \
  --display-name $DISPLAYNAME \
  --lifecycle-state RUNNING \
  | grep \"id\" \
  | awk -F'[\"|\"]' '{print $4}'`
oci compute instance list-vnics \
 --instance-id $VMID \
 | grep public-ip \
 | awk -F'[\"|\"]' '{print $4}'
Prepare Host
The installation process is described in the documentation which you should visit to get the latest changes. Log on to the ZDM service host and install required packages (python36 is needed for OCI CLI):
[root@zdm]$ yum -y install \
  glibc-devel \
  expect \
  unzip \
  libaio \
  kernel-uek-devel-$(uname -r) \
  python36
Create a group (ZDM) and user (ZDMUSER). This is only needed on the ZDM Service Host. You don’t need this user on the database hosts:
[root@zdm]$ groupadd zdm ; useradd -g zdm zdmuser
Make it possible to SSH to the box as zdmuser. I will just reuse the SSH keys from opc:
[root@zdm]$ cp -r /home/opc/.ssh /home/zdmuser/.ssh ; chown -R zdmuser:zdm /home/zdmuser/.ssh
Create directory for Oracle software and change permissions:
[root@zdm]$ mkdir /u01 ; chown zdmuser:zdm /u01
Edit hosts file, and ensure name resolution work to the source host (srchost) and target hosts (tgthost):
[root@zdm]$ echo -e "[ip address] srchost" >> /etc/hosts
[root@zdm]$ echo -e "[ip address] tgthost" >> /etc/hosts
Install And Configure ZDM
Now, to install ZDM I will log on as zdmuser and set the environment in my .bashrc file:
[zdmuser@zdm]$ echo "INVENTORY_LOCATION=/u01/app/oraInventory; export INVENTORY_LOCATION" >> ~/.bashrc
[zdmuser@zdm]$ echo "ORACLE_BASE=/u01/app/oracle; export ORACLE_BASE" >> ~/.bashrc
[zdmuser@zdm]$ echo "ZDM_BASE=\$ORACLE_BASE; export ZDM_BASE" >> ~/.bashrc
[zdmuser@zdm]$ echo "ZDM_HOME=\$ZDM_BASE/zdm21; export ZDM_HOME" >> ~/.bashrc
[zdmuser@zdm]$ echo "ZDM_INSTALL_LOC=/u01/zdm21-inst; export ZDM_INSTALL_LOC" >> ~/.bashrc
[zdmuser@zdm]$ source ~/.bashrc
Create directories
[zdmuser@zdm]$ mkdir -p $ORACLE_BASE $ZDM_BASE $ZDM_HOME $ZDM_INSTALL_LOC
Next, download the ZDM software into $ZDM_INSTALL_LOC.
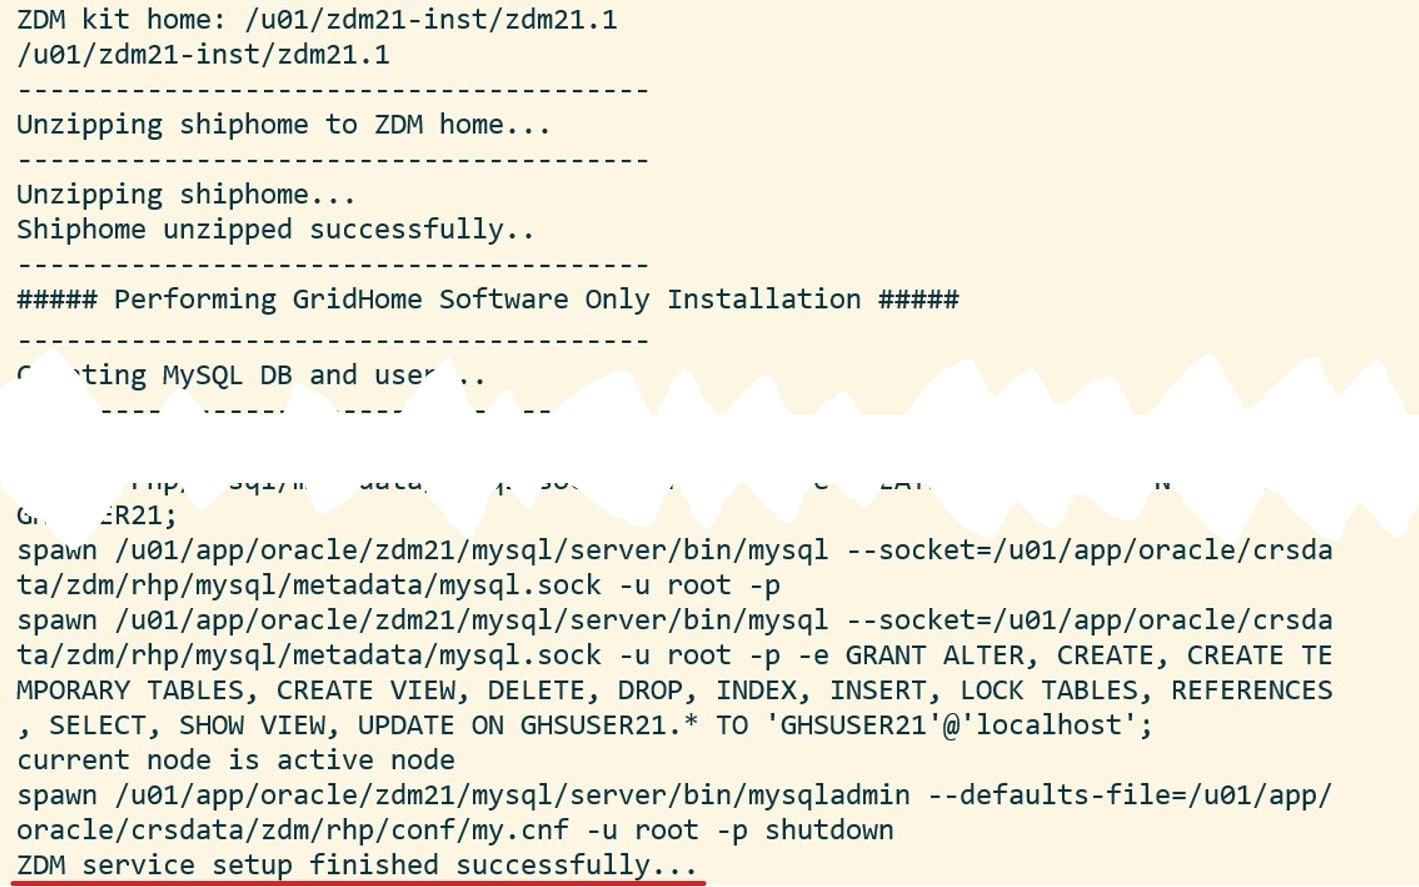
Once downloaded, start the installation:
[zdmuser@zdm]$ ./zdminstall.sh setup \
  oraclehome=$ZDM_HOME \
  oraclebase=$ZDM_BASE \
  ziploc=./zdm_home.zip -zdm
And it should look something similar to this:
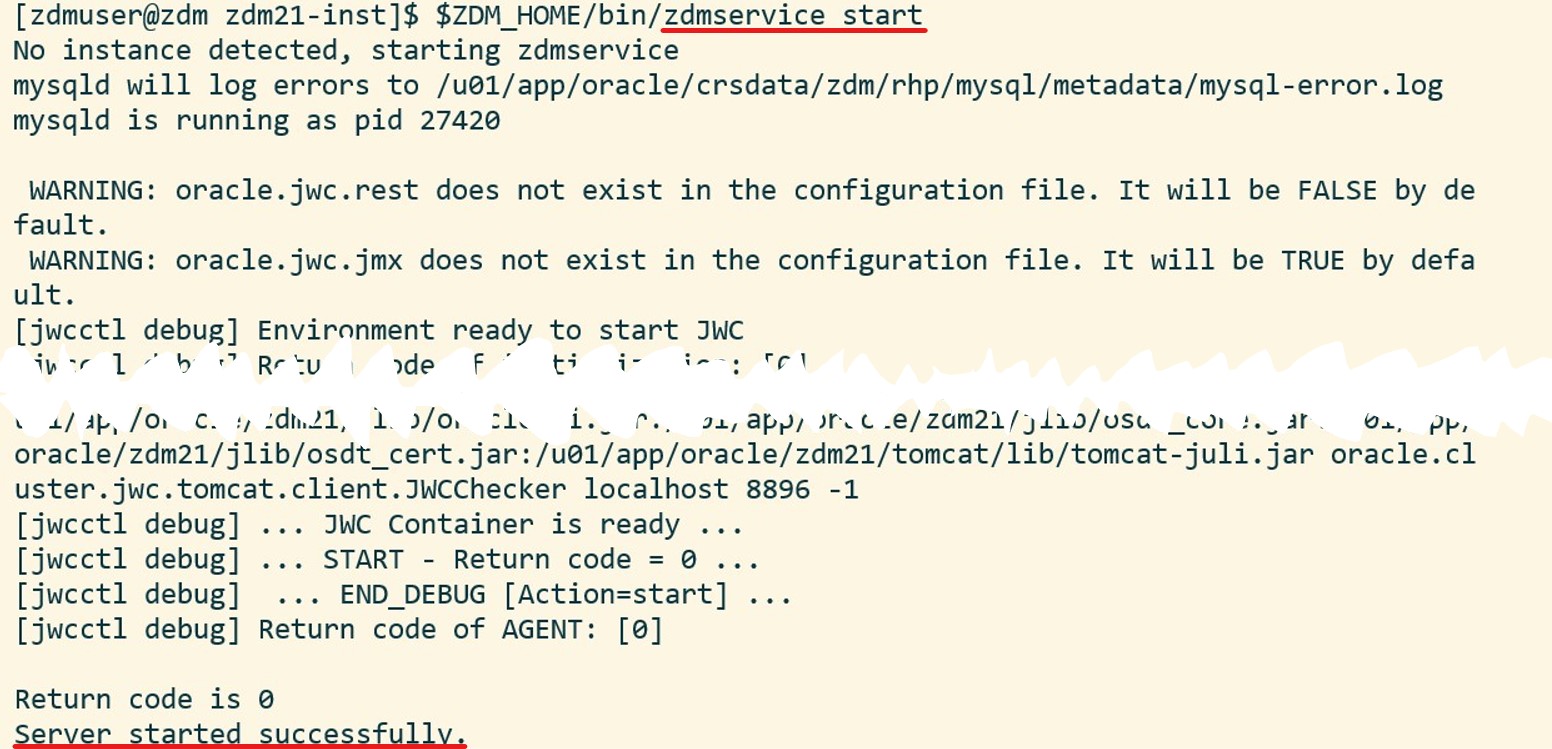
Start the ZDM service:
[zdmuser@zdm]$ $ZDM_HOME/bin/zdmservice start
Which should produce something like this:
 And, optionally, I can verify the status of the ZDM service:
[zdmuser@zdm]$ $ZDM_HOME/bin/zdmservice status

Install OCI CLI
You might need OCI CLI as part of the migration. It is simple to install, so I always do it:
bash -c "$(curl -L https://raw.githubusercontent.com/oracle/oci-cli/master/scripts/install/install.sh)"
oci setup config
You find further instructions here.
Configure Network Connectivity
The ZDM service host must communicate with the source and target hosts via SSH. For that purpose I need private key files to each of the hosts. The private key files must be without a passphrase, in RSA/PEM format and I have to put them at /home/zdmuser/.ssh/[host name]. In my demo, the files are to be named:
- /home/zdmuser/.ssh/srchost
- /home/zdmuser/.ssh/tgthost
Ensure that only zdmuser can read them:
[zdmuser@zdm]$ chmod 400 /home/zdmuser/.ssh/srchost
[zdmuser@zdm]$ chmod 400 /home/zdmuser/.ssh/tgthost
Now, I will verify the connection. In my example I will connect to opc on both database hosts, but you can change it if you like:
[zdmuser@zdm]$ ssh -i /home/zdmuser/.ssh/srchost opc@srchost
[zdmuser@zdm]$ ssh -i /home/zdmuser/.ssh/tgthost opc@tgthost
If you get an error when connecting ensure the following:
- The public key is added to /home/opc/.ssh/authorized_keys on both database hosts (change opc if you are connecting as another user)
- The key files are in RSA/PEM format (the private key file should start with
-----BEGIN RSA PRIVATE KEY-----) - The key files are without a passphrase
That’s It
Now, I have a working ZDM service host. I am ready to start the migration process.
It is probably also a good idea to find a way to start the ZDM service automatically, if the server restarts.
There is also a community marketplace image that comes with ZDM already installed. You can read about it here; evaluate it and see if it is something for you.
Other Blog Posts in This Series
- Introduction
- Install And Configure ZDM
- Physical Online Migration
- Physical Online Migration to DBCS
- Physical Online Migration to ExaCS
- Physical Online Migration and Testing
- Physical Online Migration of Very Large Databases
- Logical Online Migration
- Logical Online Migration to DBCS
- Logical Offline Migration to Autonomous Database
- Logical Online Migration and Testing
- Logical Online Migration of Very Large Databases
- Logical Online and Sequences
- Logical Offline Migration How To Minimize Downtime
- Logical Migration and Statistics
- Logical Migration and the Final Touches
- Create GoldenGate Hub
- Monitor GoldenGate Replication
- The Pro Tips


 Obviously, there is a difference in database release and patch level. The database upgrade will take care of those issues. Also, you get a warning about