Troubleshooting Rabbit Hole: From Data Guard to Data Integrity Checks

I always fear the worst when I get a TNS error. It’s not my expertise. A TNS error was exactly what I got while I configured a Data Guard environment. Redo Transport didn’t work; the redo logs never made it to the standby database.

The Error

I took a look in the alert log on the primary database and found this error:

2022-05-10T08:25:28.739917+00:00
"alert_SALES2.log" 5136L, 255034C
        TCP/IP NT Protocol Adapter for Linux: Version 12.2.0.1.0 - Production
  Time: 10-MAY-2022 18:09:02
  Tracing not turned on.
  Tns error struct:
    ns main err code: 12650

TNS-12650: No common encryption or data integrity algorithm
    ns secondary err code: 0
    nt main err code: 0
    nt secondary err code: 0
    nt OS err code: 0

A little further in the alert log, I found proof that the primary database could not connect to the standby database:

2022-05-10T18:09:02.991061+00:00
Error 12650 received logging on to the standby
TT04: Attempting destination LOG_ARCHIVE_DEST_2 network reconnect (12650)
TT04: Destination LOG_ARCHIVE_DEST_2 network reconnect abandoned
2022-05-10T18:09:02.991482+00:00
Errors in file /u01/app/oracle/diag/rdbms/sales2_fra3cx/SALES2/trace/SALES2_tt04_75629.trc:
ORA-12650: No common encryption or data integrity algorithm
Error 12650 for archive log file 1 to '...'

The Investigation

As always, Google it! Although I have used DuckDuckGo for privacy reasons instead of Google for many years, I still say google it, which is fairly annoying.

The search revealed this MOS note: ORA-12650: No Common Encryption Or Data Integrity Algorithm When Using SQLNET.CRYPTO_CHECKSUM_TYPES_SERVER=sha256 (Doc ID 2396891.1) Although it is fairly old, it led me to look for issues with data integrity checks defined in sqlnet.ora.

The primary database had the following defined in sqlnet.ora:

SQLNET.CRYPTO_CHECKSUM_SERVER=REQUIRED
SQLNET.CRYPTO_CHECKSUM_TYPES_SERVER=(SHA1)
SQLNET.CRYPTO_CHECKSUM_CLIENT=REQUIRED
SQLNET.CRYPTO_CHECKSUM_TYPES_CLIENT=(SHA1)

The above means that any connection made to or from this database must use data integrity checks. CRYPTO_CHECKSUM_SERVER and CRYPTO_CHECKSUM_CLIENT defines that. Also, the database will only accept connections using the SHA1 algorithm.

Then I looked in sqlnet.ora on the standby database:

SQLNET.CRYPTO_CHECKSUM_CLIENT=ACCEPTED
SQLNET.CRYPTO_CHECKSUM_SERVER=ACCEPTED
SQLNET.CRYPTO_CHECKSUM_TYPES_CLIENT=(SHA256,SHA384,SHA512,SHA1)
SQLNET.CRYPTO_CHECKSUM_TYPES_SERVER=(SHA256,SHA384,SHA512)

This database does not require data integrity checks. But if the other party requests or requires it, then the server is fine with it. That’s the meaning of ACCEPTED. But look at the allowed algorithms. When acting as server (i.e. receiving connections from someone else), it does not allow SHA1 algorithm, the only one allowed by the counterpart.

The Solution

I decided to remove all instances of SHA1 because:

  • It is an old algorithm
  • Any 12c database or client supports newer algorithms
  • In this environment, I don’t have any old 11g servers or clients

I added all the SHA-2 algorithms as supported algorithms. Now, sqlnet.ora in both databases look like this:

SQLNET.CRYPTO_CHECKSUM_TYPES_CLIENT=(SHA256,SHA384,SHA512)
SQLNET.CRYPTO_CHECKSUM_TYPES_SERVER=(SHA256,SHA384,SHA512)

This solved the problem and now redo transport worked fine.

If I wanted to go maximum security, I should allow only the SHA512 algorithm in both sqlnet.ora files:

SQLNET.CRYPTO_CHECKSUM_TYPES_CLIENT=(SHA512)
SQLNET.CRYPTO_CHECKSUM_TYPES_SERVER=(SHA512)

And force both databases to always use data integrity checks:

SQLNET.CRYPTO_CHECKSUM_SERVER=REQUIRED
SQLNET.CRYPTO_CHECKSUM_CLIENT=REQUIRED

Security

Some questions I asked myself while reading the Security Guide 19c.

Why do you want data integrity checks in our connections?

To protect against two types of attack:

  1. Data modification attack An unauthorized party intercepting data in transit, altering it, and retransmitting it is a data modification attack. For example, intercepting a $100 bank deposit, changing the amount to $10,000, and retransmitting the higher amount is a data modification attack.
  2. Replay attack Repetitively retransmitting an entire set of valid data is a replay attack, such as intercepting a $100 bank withdrawal and retransmitting it ten times, thereby receiving $1,000.

Can I do more to strengthen security in sqlnet.ora?

Yes. You should definitely also take a look at network encryption to protect data-in-transit. Take a look at Configuring Oracle Database Native Network Encryption and Data Integrity in the Security Guide 19c. These four parameters are of interest:

Also, reading Securing the Oracle Database – A technical primer can inspire you.

What’s wrong with SHA-1?

It’s old and has been made insecure by computer evolution. From Wikipedia:

In cryptography, SHA-1 (Secure Hash Algorithm 1) is a cryptographically broken but still widely used hash function which takes an input and produces a 160-bit (20-byte) hash value known as a message digest – typically rendered as a hexadecimal number, 40 digits long. It was designed by the United States National Security Agency, and is a U.S. Federal Information Processing Standard.

Since 2005, SHA-1 has not been considered secure against well-funded opponents; as of 2010 many organizations have recommended its replacement. NIST formally deprecated use of SHA-1 in 2011 and disallowed its use for digital signatures in 2013. As of 2020, chosen-prefix attacks against SHA-1 are practical. As such, it is recommended to remove SHA-1 from products as soon as possible and instead use SHA-2 or SHA-3. Replacing SHA-1 is urgent where it is used for digital signatures.

AutoUpgrade and Secure External Password Store Enables Complete Automation

Many commands that involve Transparent Data Encryption (TDE) require inputting the TDE keystore password. Also, when you use AutoUpgrade. on an encrypted Oracle Database you probably need to store the TDE keystore password using the -load_password option.

Manually inputting passwords is unsuitable for an environment with a high degree of automation. In Oracle Database it is solved by Secure External Password Store (SEPS) (as of Oracle Database 12.2). In a previous blog post, I showed how you could use it to your advantage.

This blog post is about how to use AutoUpgrade together with SEPS.

Good News

As of version 22.2 AutoUpgrade fully supports Oracle Database with a Secure External Password Store. If SEPS contains the TDE keystore password, you don’t have to input the password using the -load_password option.

If you are using AutoUpgrade in some sort of automation (like Ansible), you should look into SEPS. AutoUpgrade can use SEPS when the TDE keystore password is needed, and you can upgrade and convert completely unattended.

How To

The Oracle Database DB12 is encrypted and on Oracle Database 12.2. I want to upgrade, convert, and plug it into CDB2 on Oracle Database 19c.

  1. Ensure that your Oracle Databases DB12 and CDB2 are properly configured with a Secure External Password Store and it contains the TDE keystore password.
  2. Ensure that AutoUpgrade is version 22.2 or higher:
    $ java -jar autoupgrade.jar -version
    
  3. Create your AutoUpgrade config file and set global.keystore as specified in a previous blog post:
    global.autoupg_log_dir=/u01/app/oracle/cfgtoollogs/autoupgrade
    global.keystore=/u01/app/oracle/admin/autoupgrade/keystore
    	
    upg1.log_dir=/u01/app/oracle/cfgtoollogs/autoupgrade/DB12
    upg1.source_home=/u01/app/oracle/product/12.2.0.1
    upg1.target_home=/u01/app/oracle/product/19
    upg1.sid=DB12
    upg1.target_cdb=CDB2
    
  4. Analyze:
    $ java -jar autoupgrade.jar -config DB12.cfg -mode analyze
    
  5. The summary report tells me everything is fine; just go ahead. I don’t need to input the TDE keystore passwords:
    [Stage Name]    PRECHECKS
    [Status]        SUCCESS
    [Start Time]    2022-03-30 10:28:38
    [Duration]       
    [Log Directory] /u01/app/oracle/cfgtoollogs/autoupgrade/DB12/DB12/100/prechecks
    [Detail]        /u01/app/oracle/cfgtoollogs/autoupgrade/DB12/DB12/100/prechecks/db12_preupgrade.log
    				Check passed and no manual intervention needed
    
  6. Optionally, I can use the -load_password prompt to check the TDE configuration:
    $ java -jar autoupgrade.jar -config DB12.cfg -load_password
    	
    TDE> list
    +----------+---------------+------------------+-----------+------------------+
    |ORACLE_SID|Action Required|      TDE Password|SEPS Status|Active Wallet Type|
    +----------+---------------+------------------+-----------+------------------+
    |      CDB2|               |No password loaded|   Verified|               Any|
    |      DB12|               |No password loaded|    Unknown|        Auto-login|
    +----------+---------------+------------------+-----------+------------------+
    
    Action Required is empty and verifies that I don’t need to input the TDE keystore passwords. AutoUpgrade checked SEPS in CDB2 and found that it works. It is impossible to check SEPS in DB12 because it is on Oracle Database 12.2. The functionality was added in Oracle Database 19c.
  7. Start the upgrade and conversion:
    $ java -jar autoupgrade.jar -config DB12.cfg -mode deploy
    
  8. That’s it!

What Happens

  • You must configure an AutoUpgrade keystore. Even though you are not loading any TDE keystore passwords, it is still required. Some commands require a passphrase (or transport secret) and AutoUpgrade must store them in its keystore.
  • Whenever a database is using SEPS, and a TDE keystore password is required, AutoUpgrade will use the IDENTIFIED BY EXTERNAL STORE clause.

What Else

You can mix and match. If only one database uses SEPS, you can input the other TDE keystore password manually using the -load_password option. AutoUpgrade will check your database configuration and ask only for the needed TDE keystore passwords.

Other Blog Posts in This Series

Upgrading an Encrypted PDB

An unplug-plug upgrade of an encrypted PDB requires the keystore password of the source and target CDB, and you can do it with AutoUpgrade.

How To

The pluggable database PDB1 is encrypted and is plugged into CDB1, which is Oracle Database 12.2. I want to upgrade the PDB to Oracle Database 19c by plugging it into CDB2.

  1. Ensure that AutoUpgrade is version 22.2 or higher:
    $ java -jar autoupgrade.jar -version
    
  2. Create your AutoUpgrade config file and set global.keystore as specified in a previous blog post:
    global.autoupg_log_dir=/u01/app/oracle/cfgtoollogs/autoupgrade
    global.keystore=/u01/app/oracle/admin/autoupgrade/keystore
    
    upg1.log_dir=/u01/app/oracle/cfgtoollogs/autoupgrade/PDB1
    upg1.source_home=/u01/app/oracle/product/12.2.0.1
    upg1.target_home=/u01/app/oracle/product/19
    upg1.sid=CDB1
    upg1.target_cdb=CDB2
    upg1.pdbs=PDB1
    
  3. Analyze:
    $ java -jar autoupgrade.jar -config PDB1.cfg -mode analyze
    
  4. The summary report warns me that TDE keystore passwords are needed:
    [Stage Name]    PRECHECKS
    [Status]        FAILURE
    [Start Time]    2022-03-29 07:58:52
    [Duration]       
    [Log Directory] /u01/app/oracle/cfgtoollogs/autoupgrade/PDB1/CDB1/100/prechecks
    [Detail]        /u01/app/oracle/cfgtoollogs/autoupgrade/PDB1/CDB1/100/prechecks/cdb1_preupgrade.log
    		Check failed for PDB1, manual intervention needed for the below checks
    		[TDE_PASSWORDS_REQUIRED]
    
    There are more details in the preupgrade log file:
    ==============
    BEFORE UPGRADE
    ==============
    
    	REQUIRED ACTIONS
    	================
    		1.  Perform the specified action ...
    		ORACLE_SID                      Action Required
    		------------------------------  ------------------------
    		CDB1                            Add TDE password
    		CDB2                            Add TDE password
    
  5. Add the TDE keystore passwords into the AutoUpgrade keystore:
    $ java -jar autoupgrade.jar -config PDB1.cfg -load_password
    
    TDE> add CDB1
    Enter your secret/Password:    
    Re-enter your secret/Password: 
    TDE> add CDB2
    Enter your secret/Password:    
    Re-enter your secret/Password: 
    
  6. Save the passwords into the AutoUpgrade keystore. I choose to create an auto-login keystore:
    TDE> save
    Convert the keystore to auto-login [YES|NO] ? YES
    TDE> exit
    
  7. Re-analyze the PDB:
    $ java -jar autoupgrade.jar -config PDB1.cfg -mode analyze
    
  8. If AutoUpgrade does not report any other problems, start the unplug-plug upgrade. Since I chose to create an AutoUpgrade auto-login keystore, I don’t have to provide the password when AutoUpgrade starts:
    $ java -jar autoupgrade.jar -config PDB1.cfg -mode deploy
    
  9. That’s it!

What Happens

  • When AutoUpgrade needs to unplug the encrypted PDB into a manifest file, the source CDB will need the TDE keystore password. AutoUpgrade can get it from its keystore. This is the IDENTIFIED BY clause of the ALTER PLUGGABLE DATABASE ... UNPLUG INTO statement.
  • The encryption keys of the PDB go into the manifest file. The database doesn’t want to write the encryption keys in clear text in the manifest file and asks for a passphrase that can encrypt the encryption keys. AutoUpgrade generates a passphrase and stores the passphrase in the AutoUpgrade keystore. This is the ENCRYPT USING clause of the ALTER PLUGGABLE DATABASE ... UNPLUG INTO statement.
  • When the PDB plugs into the target CDB, the target CDB will need the TDE keystore password. This is the IDENTIFIED BY clause of the CREATE PLUGGABLE DATABASE ... USING statement.
  • The database must get the encryption keys of the PDB from the manifest files. The encryption keys are encrypted using a passphrase. The database asks AutoUpgrade about the passphrase which is stored in the AutoUpgrade keystore. This is the DECRYPT USING clause of the CREATE PLUGGABLE DATABASE ... USING statement.

Fallback

AutoUpgrade fallback functionality also works on an encrypted PDB. When it comes to unplug-plug upgrades and fallback capability, it is a requirement that the data files were copied as part of the upgrade process.

In the above example, a fallback using AutoUpgrade would not be possible. Since I did not specify a target_pdb_copy_option the data files were re-used. Other means of falling back to the original state is needed.

Had I specified a target_pdb_copy_option in my config file, a fallback would be possible. In the below example, I am specifying a copy option. file_name_convert=none means that the data files are copied and new OMF names are generated:

upg1.target_pdb_copy_option=file_name_convert=NONE

In this case, I can revert the unplug-plug upgrade and return to the original state using AutoUpgrade. 103 is the job id of the upgrade:

$ java -jar autoupgrade.jar -config PDB1.cfg -restore -jobs 103

Isolated Keystore Mode

In CDBs the default way of storing TDE encryption keys is in a united keystore. The CDB has one keystore and all PDBs store their encryption keys in that one keystore.

With Oracle Database 19.14 a new option became possible: isolated keystore. The CDB still has a keystore that PDBs can use. But you can also configure each individual PDB to use its own keystore.

Currently, AutoUpgrade does not support isolated keystore mode. But we are working on it.

Other Blog Posts in This Series

Upgrading an Encrypted Non-CDB or CDB

Upgrading a non-CDB or an entire CDB is straightforward with AutoUpgrade. There is only one requirement:

  • An auto-login keystore must be present.

Upgrade Non-CDB and CDB

The auto-login keystore enables the database to open the TDE keystore without a DBA manually entering the keystore password. During a database upgrade, the database will restart multiple times. The upgrade process embeds the restarts, and there is no way for a DBA to intervene halfway to enter the TDE keystore password. Hence, it is required to use an auto-login keystore.

You can query the database for the type of the TDE keystore:

SQL> select wallet_type from v$encryption_wallet;

AUTOLOGIN

It must be an AUTOLOGIN keystore or a LOCAL_AUTOLOGIN. I like the local autologin keystore because it adds an additional layer of security.

When a proper keystore is in place, you can start the upgrade.

Keystore Location and WALLET_ROOT

The Oracle Database must know where to find the TDE keystore. It will look in the following locations in the following order:

  • As of Oracle Database 19c, WALLET_ROOT initialization parameter.
  • ENCRYPTION_WALLET_LOCATION sqlnet.ora parameter.
  • $ORACLE_BASE/admin/DB_UNIQUE_NAME/wallet
  • $ORACLE_HOME/admin/DB_UNIQUE_NAME/wallet

Oracle recommends using the parameter WALLET_ROOT when your database is on Oracle Database 19c. The parameter is introduced in Oracle Database 19c, and all other methods have been deprecated.

It is easier to configure the TDE keystore using WALLET_ROOT than sqlnet.ora. AutoUpgrade can implement the changes needed to switch to the WALLET_ROOT parameter as part of an upgrade . I recommend doing that.

TNS_ADMIN

Often, sqlnet.ora defines the TDE keystore configuration. This means that the TNS_ADMIN location is important.

TNS_ADMIN defaults to $ORACLE_HOME/network/admin. But sometimes, it is relocated either via a profile (like .bashrc) or using srvctl setenv database. AutoUpgrade fully supports both methods.

But it does happen from time to time that there are issues with the TNS_ADMIN location. Recently, I saw it at a customer. The customer used a dedicated sqlnet.ora for each database. The parameter ENCRYPTION_WALLET_LOCATION was unique in each of the sqlnet.ora files. They had issues with their profiles and AutoUpgrade picked up the wrong sqlnet.ora. This caused AutoUpgrade to report issues with the TDE keystore during analyze phase.

Luckily, there is functionality in AutoUpgrade to override the TNS_ADMIN location:

You can put them into the config file. AutoUpgrade will set the TNS_ADMIN environment variable before executing any command. That will effectively override any other TNS_ADMIN setting:

upg1.target_tns_admin_dir=/etc/oracle/keystores/DB12

Usually, I would not recommend using these parameters. In most cases, the correct TNS_ADMIN location is set and all is good. Use only when you encounter issues.

Other Blog Posts in This Series

AutoUpgrade and Transparent Data Encryption (TDE)

It is now easier to upgrade and convert your encrypted Oracle Database. The latest version of AutoUpgrade adds much better support for Oracle Databases that are encrypted with Transparent Data Encryption (TDE).

You must ensure that you are using the latest version of AutoUpgrade. You can download it from My Oracle Support AutoUpgrade Tool (Doc ID 2485457.1). At the time of writing, the latest version of AutoUpgrade is 22.2:

$ java -jar autoupgrade.jar -version
build.version 22.2.220324

AutoUpgrade Keystore

Dealing with TDE, also means dealing with sensitive information. AutoUpgrade must adequately protect the TDE keystore passwords. To do so, AutoUpgrade can have its own keystore to store sensitive information, i.e., TDE keystore passwords. Whenever a TDE keystore password is needed, e.g., during an unplug-plug upgrade of an encrypted PDB, it can get the password from the AutoUpgrade keystore.

You need to tell AutoUpgrade where it can create the keystore. You do so in the config file:

global.keystore=/etc/oracle/keystores/autoupgrade/DB12

When you start to use the AutoUpgrade keystore the following files are created in the directory:

$ pwd
/etc/oracle/keystores/autoupgrade/DB12

$ ll
-rw-------. 1 oracle dba 765 Mar 28 14:56 cwallet.sso
-rw-------. 1 oracle dba 720 Mar 28 14:56 ewallet.p12

It is similar to other keystores that Oracle Database use. ewallet.p12 is the keystore, and cwallet.sso is an auto-login keystore used to open the real keystore. You don’t have to create an auto-login keystore.

You should protect the AutoUpgrade keystore files like you protect any other Oracle Database keystore:

  • Apply restrictive file system permissions.
  • Audit access.
  • Back it up.

Using the Keystore

Create your AutoUpgrade config file and specify global.keystore as described above. Start an interactive prompt that allows you to add the necessary passwords:

$ java -jar autoupgrade.jar -config DB12.cfg -load_password

The first time you use the AutoUpgrade keystore, you must provide a password that protects the AutoUpgrade keystore:

Starting AutoUpgrade Password Loader - Type help for available options
Creating new keystore - Password required
Enter password:       
Enter password again: 
Keystore was successfully created

In the TDE console, the following commands are available:

  • add
  • delete
  • list
  • save
  • help
  • exit

The SID references the databases. If you want to add a TDE password for the database DB12, use the following command:

TDE> add DB12
Enter your secret/Password:    
Re-enter your secret/Password: 
TDE> add CDB2
Enter your secret/Password:    
Re-enter your secret/Password: 

If you want to delete the TDE password for DB12:

TDE> delete DB12

Keystore Password is required prior to operation
Enter wallet password:   

When you save the passwords into the AutoUpgrade keystore, you must decide whether you want to have an auto-login keystore:

TDE> save
Convert the keystore to auto-login [YES|NO] ? 

I recommend using auto-login keystores. If you do not create an AutoUpgrade auto-login keystore, you will be prompted for the AutoUpgrade keystore password when you start AutoUpgrade. If you want to use AutoUpgrade in noconsole mode (-noconsole), then an auto-login keystore is required.

I will show how to upgrade and convert encrypted databases in later blog posts.

Loss of AutoUpgrade Keystore

What happens if your AutoUpgrade keystore is lost? This is fairly simple. You can re-create the keystore and load all passwords into it using the load_password command line option as described above.

Preupgrade Checks

We have added new preupgrade checks to the analyze phase in AutoUpgrade. These checks will help you to provide the needed passwords and ensure your TDE configuration meets certain standards:

  • auto_login_keystore_required
  • keystore_conflict
  • no_keystore_files
  • tde_passwords_required
  • wallet_root
  • tde_in_use
  • oracle_home_keystore

You can read more about these checks in MOS note Database Preupgrade tool check list. (Doc ID 2380601.1).

Further Reading

Other Blog Posts in This Series

How To Upgrade An Encrypted Oracle Database and Convert to PDB

New functionality superseeds the functionality mentioned in this blog post. Please use the method described in Upgrading an Encrypted Non-CDB and Converting To PDB.

Using AutoUpgrade, you can upgrade your encrypted Oracle Database and convert to a pluggable database. The process is not entirely automated, so you must handle the TDE encryption key manually.

A new parameter called skip_tde_key_import is introduced. Here is what the documentation says:

(Optional) The default is NO. You can use this option for non-CDB-to-PDB and unplug/plug operations. When set to YES, the upgrade is run, but import of the source database KeyStore into the target database is skipped, without raising an error. AutoUpgrade will leave the PDB open in upgrade mode, so that you can import the keys manually yourself. After you import the keys, you must then restart the database in normal mode.

In other words, AutoUpgrade does everything except import of the TDE encryption key.

How To

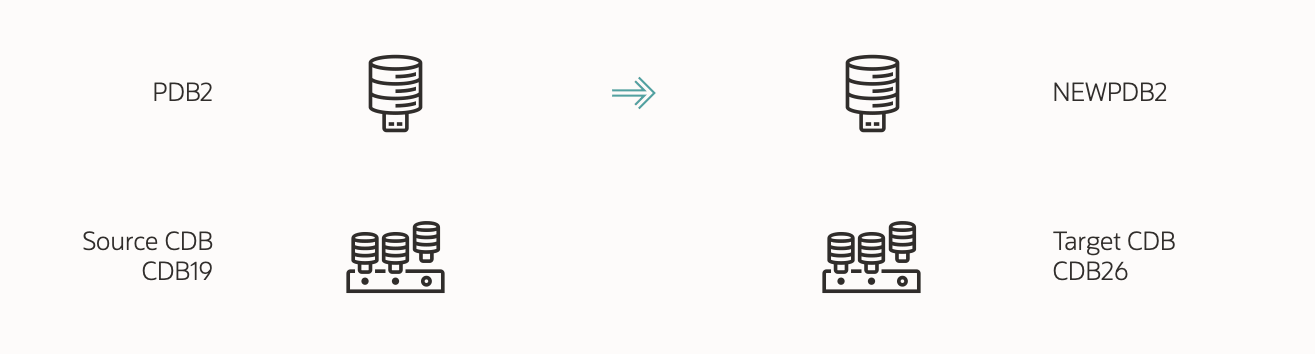
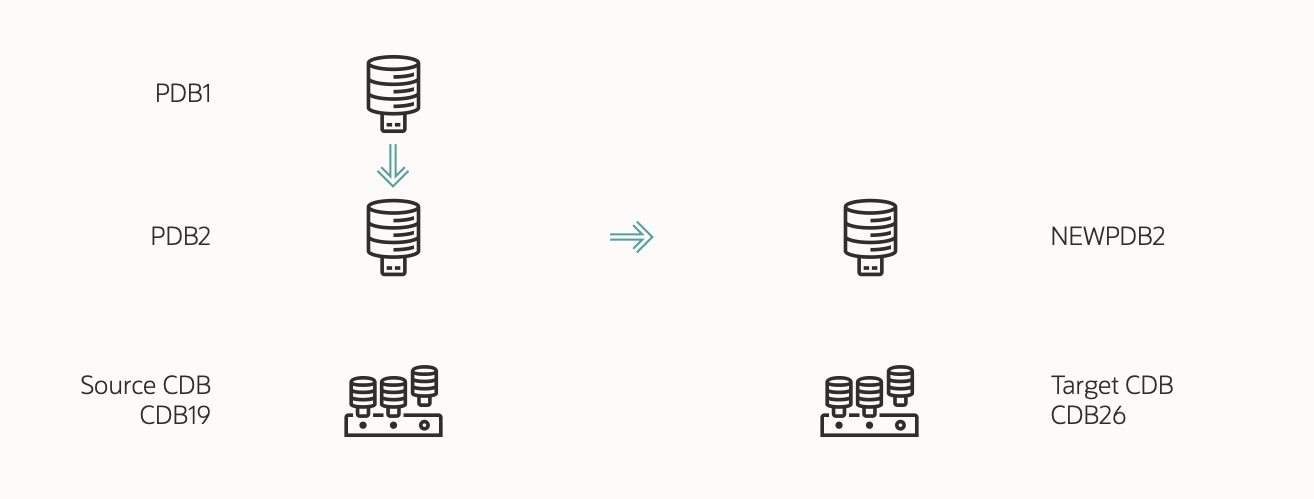
This is what happens: Overview of upgrading to Oracle Database 19c of database encrypted with TDE and convert to a PDB

AutoUpgrade handles the green things – you handle the yellow thing. My environment:

  1. Non-CDB called FTEX running on Oracle Database 11.2.0.4
  2. FTEX is encrypted with TDE and has an auto-login keystore
  3. CDB called CDB2 running on Oracle Database 19c
  4. CDB2 is prepared for TDE and has a keystore defined

First, I ensure that AutoUpgrade is version 21.2 or newer:

java -jar autoupgrade.jar -version

I create a config file for AutoUpgrade. Notice, that I have specified that the database is plugged into CDB2 using the parameter target_cdb. Also, notice that I have specified the new parameter skip_tde_key_import and set it to YES:

upg1.source_home=/u01/app/oracle/product/11.2.0.4
upg1.target_home=/u01/app/oracle/product/19
upg1.sid=FTEX
upg1.target_cdb=CDB2
upg1.skip_tde_key_import=YES

Then, I analyze my database (FTEX) for any issues:

java -jar autoupgrade.jar -config FTEX.cfg -mode analyze

No issues are detected, so I proceed with the upgrade:

java -jar autoupgrade.jar -config FTEX.cfg -mode deploy

After the upgrade and conversion to PDB, I log on to CDB2. I want to check the outcome. Has FTEX been upgraded and converted?

SQL> select name, open_mode, restricted from v$pdbs

NAME      OPEN_MODE    RESTRICTED
PDB$SEED  READ ONLY    NO        
FTEX      READ WRITE   YES                

Open – but restricted. I check for plug-in violations:

SQL> select cause, type, message, status, action 
     from pdb_plug_in_violations 
     where name = 'FTEX' AND status not in ('RESOLVED')

CAUSE                TYPE       MESSAGE                                STATUS     ACTION
Wallet Key Needed    ERROR      PDB needs to import keys from source.  PENDING    Import keys from source.    

OK. This is expected. AutoUpgrade does not handle the TDE encryption key. See the yellow part of the arrow above. You have to do that.

I start by merging the two keystores – the keystore of the old non-CDB database (FTEX) and the keystore of the CDB (CDB2). I merge the two keystores into the one of CDB2:

CDB$ROOT SQL> administer key management 
   merge keystore '/u01/app/oracle/admin/FTEX/wallet' identified by "oracle_4U" 
   into existing keystore '/u01/app/oracle/admin/CDB2/wallet/tde' identified by "oracle_4U" 
   with backup using 'merge_keystore';

Notice that I have specified the folders of keystores and not the actually file names. I have also specified the keystore password for both the keystores. And, finally, I tell the database to create a backup of the keystore before the merge (as a precaution – and I recommend always doing that).

Now, I switch to the FTEX PDB. I need to configure FTEX to use the TDE encryption key that is merged from the old keystore. Each key in the keystore has a key ID and I tell the PDB to use the right one. I explain later on how to determine the key ID:

CDB$ROOT SQL> alter session set container=FTEX;

FTEX SQL> administer key management 
   use key 'Ad8l2SYuf0/dv+6Au9tRmAIAAAAAAAAAAAAAAAAAAAAAAAAAAAAA' 
   force keystore identified by "oracle_4U" 
   with backup using 'use_key_ftex';

Now, the PDB knows the TDE encryption key and you can actually start to query data from an encrypted tablespace. However, there is still a plug-in violation saying the TDE encryption key has to be imported. The PDB insists that the encryption key is imported – rather than merged into the keystore. So I will export the key from the PDB and import it again:

FTEX SQL> administer key management 
   export keys with secret "secret-passphrase" 
   to '/etc/oracle/exported-keys-ftex' force keystore identified by "oracle_4U";
FTEX SQL> administer key management 
   import keys with secret "secret-passphrase" 
   from '/etc/oracle/exported-keys-ftex' force keystore identified by "oracle_4U" 
   with backup using 'import_key_ftex';
FTEX SQL> host rm /etc/oracle/exported-keys-ftex

The encryption key is saved in an encrypted file in the OS. The file is encrypted using a passphrase (secret-passphrase), and you should pick a better one than I did. Finally – and important – I remove the file from the OS when I am done. I don’t want my encryption keys lying around in files all over the OS.

I restart the FTEX PDB:

FTEX SQL> alter pluggable database FTEX close immediate;
FTEX SQL> alter pluggable database FTEX open;

And the PDB is now open in READ WRITE mode and unrestricted

SQL> select name, open_mode, restricted from v$pdbs

NAME      OPEN_MODE    RESTRICTED
PDB$SEED  READ ONLY    NO        
FTEX      READ WRITE   NO

I check for plug-in violations:

SQL> select cause, type, message, status, action 
     from pdb_plug_in_violations 
     where name = 'FTEX' AND status not in ('RESOLVED')

No rows selected.

Job done! Encrypted database upgraded and converted to a PDB.

Determine Key ID

Use the orapki utility to determine the key ID of the TDE encryption key. Specify the location of the old non-CDB keystore:

orapki wallet display -wallet /u01/app/oracle/admin/FTEX/wallet

Oracle PKI Tool : Version 11.2.0.4.0 - Production
Copyright (c) 2004, 2013, Oracle and/or its affiliates. All rights reserved.

Requested Certificates: 
User Certificates:
Oracle Secret Store entries: 
ORACLE.SECURITY.DB.ENCRYPTION.Ad8l2SYuf0/dv+6Au9tRmAIAAAAAAAAAAAAAAAAAAAAAAAAAAAAA
ORACLE.SECURITY.DB.ENCRYPTION.MASTERKEY
ORACLE.SECURITY.TS.ENCRYPTION.BUCsXzQga4wfJ8gNSuptAPMCAwAAAAAAAAAAAAAAAAAAAAAAAAAA
Trusted Certificates: 
Subject:        OU=Class 1 Public Primary Certification Authority,O=VeriSign\, Inc.,C=US
Subject:        OU=Class 3 Public Primary Certification Authority,O=VeriSign\, Inc.,C=US
Subject:        OU=Class 2 Public Primary Certification Authority,O=VeriSign\, Inc.,C=US
Subject:        OU=Secure Server Certification Authority,O=RSA Data Security\, Inc.,C=US
Subject:        CN=GTE CyberTrust Global Root,OU=GTE CyberTrust Solutions\, Inc.,O=GTE Corporation,C=US

The TDE encryption key is starting with ORACLE.SECURITY.DB.ENCRYPTION and doesn’t end on MASTERKEY. In the above example the key ID is Ad8l2SYuf0/dv+6Au9tRmAIAAAAAAAAAAAAAAAAAAAAAAAAAAAAA.

If your non-CDB is Oracle Database 12c or later you can also get the key ID using a view:

SQL> select key_id from v$encryption_keys where key_use='TDE';

Why Do I Need to Export and Import?

Above you saw that I had to export and import the encryption keys, even after merging the keystores. You might ask: Why is that even needed? Why is the ADMINISTER KEY MANAGEMENT MERGE KEYSTORE command not enough? That’s a very good question. I have reached out to our security people to get their take on it. It sounds like a bug to me.

The Future

The above solution makes it easier to handle encrypted databases. But we are not satisfied yet. A future version of AutoUpgrade will have even better support for encrypted databases, and everything will be automated.

The biggest issue for us is to find a safe way to handle the TDE keystore password. We need to have a safe way of getting the password from you and storing it in memory until we actually need it.

We are just about to start testing the very first version of AutoUpgrade with proper TDE support. If you are interested in becoming a beta tester, reach out to me to work something out.

Conclusion

Converting encrypted databases to PDB is now possible in AutoUpgrade. AutoUpgrade mainly handles the process, but you have to manage the TDE encryption keys yourself.

New functionality superseeds the functionality mentioned in this blog post. Please use the method described in Upgrading an Encrypted Non-CDB and Converting To PDB.

Future-proof Your Encrypted Database During Upgrade

In Oracle Database 19c, use of sqlnet.ora to define the keystore (or wallet) location has been deprecated. Instead you should use the database parameter WALLET_ROOT. If you upgrade to Oracle Database 19c with AutoUpgrade, it has become a lot easier. Let AutoUpgrade do the work for you.

How To

If you instruct AutoUpgrade to use the new encryption parameters it will not only add the parameters to the SPFile but also copy the keystore file to the location defined. This is what you have to do:

  1. Create a text file which contains the definition of WALLET_ROOT and TDE_CONFIGURATION. I call it /tmp/au-pfile-tde. Optionally, change the location of the keystore to fit your organization.
WALLET_ROOT='/etc/oracle/keystores/$ORACLE_SID'
TDE_CONFIGURATION='KEYSTORE_CONFIGURATION=FILE'
  1. Instruct AutoUpgrade to add those parameter during and after upgrade. Add the following to your AutoUpgrade config file:
upg1.add_during_upgrade_pfile=/tmp/au-pfile-tde
upg1.add_after_upgrade_pfile=/tmp/au-pfile-tde

That’s it! AutoUpgrade will detect that you are changing the keystore location, and it will copy the keystore files to the new location at the appropriate time.

Important

  • When you use WALLET_ROOT the keystore files should always be stored in a subfolder called tde. This means that the keystore files will end up in /etc/oracle/keystores/$ORACLE_SID/tde. You should not add /tde manually to WALLET_ROOT. The database will do that automatically when it looks up the keystore.
  • If you want to move the keystore into ASM, there is a special procedure that you must follow. AutoUpgrade can’t do that for you. Check How To Migrate TDE Wallet From Local OS File System to ASM ? (Doc ID 2369614.1).

Now What

Since you have moved the keystore files to a new location there are some things that you should take care of:

  • You can remove the sqlnet.ora parameter ENCRYPTION_WALLET_LOCATION. It is not used anymore.
  • The keystore files that were stored in the old location (that defined by ENCRYPTION_WALLET_LOCATION) can be moved manually to a backup location. I would never recommend that you delete keystore files – NEVER! Instead move the old files to a backup location and keep them there.
  • The keystore files are to be considered critical and contain sensitive information, so ensure that the new location has the same security measures as the old one – like:
    • Restricted file permissions
    • Auditing
    • Backup

Background

Traditionally, if you have an encrypted database, you need to define the keystore location in sqlnet.ora using the parameter ENCRYPTION_WALLET_LOCATION. You would set it to something like this:

ENCRYPTION_WALLET_LOCATION=
 (SOURCE=
  (METHOD=FILE)
   (METHOD_DATA=
    (DIRECTORY=/etc/oracle/keystores/$ORACLE_SID)))

For many reasons, sqlnet.ora was not a good location for this parameter, and especially with the introduction of isolated keystore mode, a new method was needed.

In came WALLET_ROOT and TDE_CONFIGURATION database initialization parameters. The former, WALLET_ROOT, defines the location of the keystore. The latter, TDE_CONFIGURATION, defines which kind of keystore is in use. Typically, it is set to FILE – that’s when you use a software keystore (a file in the OS). But it could also be OKV if you are Oracle Key Vault. For a software keystore you would set it to something like:

ALTER SYSTEM SET WALLET_ROOT='/etc/oracle/keystores/$ORACLE_SID' SCOPE=SPFILE;
ALTER SYSTEM SET TDE_CONFIGURATION='KEYSTORE_CONFIGURATION=FILE' SCOPE=SPFILE;
SHUTDOWN IMMEDIATE
STARTUP

Now, the database finds the keystore location using the WALLET_ROOT parameter which is much more smooth.

As of Oracle Database 19c, configuration the keystore using sqlnet.ora has been deprecated, and as with any other deprecated functionality, you should move to a fully supported alternative.

Further Reading

Other Blog Posts in This Series

Upgrade & Plug In: With ASM, Data Guard, TDE and no Keystore Password

I was helping a customer the other day together with Mike. They were upgrading from 18c to 19c and had to convert the database to a PDB as well. At first glance, it seemed pretty straightforward, but things got complicated because:

  • They have standby databases and want the Data Guard setup to survive the plug-in operation.
  • They are using ASM.
  • They are using TDE Tablespace Encryption and have also encrypted their SYSTEM and SYSAUX tablespace.
  • The DBA that will carry out the upgrade and plug-in is not allowed to have the TDE Keystore password. They have separation of duties, so only the security admins have the keystore password.

Can you do that? Yes, you can! Let me tell you how.

Upgrade

First, upgrade the database. You can easily maintain the Data Guard setup during an upgrade. I wrote a blog post about a little while ago. In addition, to upgrade a database with encrypted tablespaces you don’t need the keystore password. You must configure the database to use an auto login keystore, and that’s it. If you are concerned about the use of an auto-login keystore, you can simply remove it again after the upgrade.

External Store for a Keystore Password

The plug-in operation will require the keystore password. But the DBA doesn’t know it – so we need to find a solution for that. The solution is to store the keystore password in an external store. I also wrote a blog post about that a while ago. When you have it configured you can exchange the commands that require a keystore password, like:

SQL> ADMINISTER KEY MANAGEMENT ... KEYSTORE IDENTIFIED BY "S3c3tPassw0rd";

With this:

SQL> ADMINISTER KEY MANAGEMENT ... KEYSTORE IDENTIFIED BY EXTERNAL STORE;

The database will get the keystore password from an external store, which is basically a file in the file system which is encrypted with a password that only the database know.

The security admins would need to do this in the CDB that will receive the non-CDB database. They can do it in advance, so they can relax while the DBA carries out the operation in a maintenance window. If the TDE keystore is already configured using the WALLET_ROOT parameter, you can use the feature right away. Otherwise, you need a database restart to configure it.

Like with the auto-login keystore, if you are concerned about the security, you can simply disable it again after the operation.

Plug In

Now things get complicated. When you plug in your non-CDB database the manifest file contains information on where the data files are located – but only on the primary database. This is an extract of a manifest file (the one you create with DBMS_PDB.DESCRIBE):

<PDB>
  ...
  <tablespace>
    <name>SYSTEM</name>
    ...
	<file>
      <path>+DATA/SALES1/DATAFILE/system.311.1058127529</path>

After plug-in, the CDB can start to use the data files right away. It reads from the manifest files where the data files are located. But there is no information on where files are located on the standby database. To overcome this you must create aliases in the ASM instance on the standby host. The aliases will point back to the original data files (used by the standby database). So, when the plug-in happens and redo start to flow to the standby database, it will know which data files to recover. If you are storing data files in a regular file system, you could use soft links to serve the same purpose.

The procedure is already very well described:

I won’t repeat the procedure as the above articles are really good. But these articles don’t consider the situation where your SYSTEM and/or SYSAUX tablespace is encrypted.

If that is the case, you must import your encryption keys into CDB$ROOT before you execute the CREATE PLUGGABLE DATABASE command. In Reusing the Source Standby Database Files When Plugging a non-CDB as a PDB into the Primary Database of a Data Guard Configuration (Doc ID 2273304.1) it should happen right before step 17.2.2:

SQL> alter session set container=CDB$ROOT;
SQL> administer key management import keys ... keystore identified by external store ... ;
SQL> --Continue with step 17.2.2
SQL> create pluggable database .... ;

Dots and Underscores

When you follow the MOS notes you might wonder why the dots in the ASM aliases are replaced with underscores. At first glance, I had no idea, but it worked. I later learned the following:

The format for an ASM filename is [filetype|tablespacename].[ASM file number].[file incarnation], but basically it is three pieces of name separated by periods. We can’t create any filename or alias that mimics that format. So the scripts change those periods to underscores (‘_’). That is allowed.

ORA-15032 and ORA-15046

Most likely you get this error because there are already existing aliases on the ASM file. Only one alias is allowed per file.

  1. You can verify that by using the ls command in ASMCMD. If it is an alias the Name column will look similar to this alias1 => +DATA/......
  2. Ensure the database is not using the alias. If it does, rename the file in the database.
  3. Remove the alias from ASM. It is strongly recommended to use rmalias. Although also possible with rm I consider it much safer to use rmalias.

Conclusion

You can upgrade and convert your database to a PDB without comprising your standby database. In addition to that, you can configure your database in such a way that you don’t even need to type in the TDE keystore password.

TDE from a Non-Security Guy

TDE Tablespace Encryption is a must-have in the cloud and something that most of us have to learn. I recently gave a presentation on the basics and what you will need to learn to survive in the cloud.

If you are interested in the recording, it is uploaded to our YouTube channel. It is 43 minutes and no one will probably see it from start to end. But you should really have a look at the Secure External Password Store. It is a really awesome feature. There is a demo right here.

Danish Oracle User Group

The presentation was organized together with the Danish Oracle User Group and I have also published the slides. Please note that some of the content is now out-of-date. With the introduction of isolated keystore mode, using SEPS is now different.

I made a quick poll during the presentation to ask how many years the attendees had worked with databases without worrying about encryption. The answers ranged from eight to 35 (or even 42 – but was that a joke?). The majority was above 20. But with the evolution of the cloud this is about to change. You must learn about encryption these days.

I also mentioned some indications that AES256 is not necessarily more secure than AES128 (the latter being the default encryption algorithm in Oracle Database 19c). I can’t tell you why – that’s way beyond my knowledge – but here are the references:

Also, there was a comment from Asger stating that an encrypted database is hard to compress by your storage system. That is true – normally encryption is bad for your compression ratio. Unless you use compression options that are built into the database. It will compress the data before it is encrypted. You can have your cake – and eat it!

And just a few final words of advice:

  • Always back up your keystore
  • Never delete a keystore
  • Never forget your keystore password

I had much fun talking about TDE. The more I explore, the more I like it. Thanks to those that attended.

Upgrading in the cloud – VM DB Systems – What about downgrade?

In a previous blog post I showed how you could upgrade a 12.2 PDB by plugging it into a 19c CDB. But what about downgrade? Yeah, downgrade. You know, that really cool feature that you never practice, but you know you should.

In the previous blog post, I used the CDB that gets automatically created when you deploy a new 19c VM DB System and it comes with COMPATIBLE set to 19.0.0 – the default. When you provision a new VM DB System there is no way to control that parameter. Thus, when I plug in my old release PDB into the new release CDB the COMPATIBLE parameter is automatically raised, and I have lost the possibility of doing a downgrade. The only option to get back to the old release would be a Data Pump export.

If you want to preserve the possibility of doing a database downgrade, I strongly recommend you switch to Bare Metal DB Systems or ExaCS which are much more flexible. But if you insist on using VM DB Systems there is an option – it is cumbersome – but doable. And believe it or not – after working with Oracle Database for so many years it was the first time ever that I had to a downgrade – not even in a lab or a test environment (which became fairly obvious after I had asked for advice the 100th time that day).

Drop pre-created 19c database

To get a 19c CDB with a non-default COMPATIBLE setting we will drop the pre-created database and replace it with a backup that has the proper COMPATIBLE setting. This is supported and the same approach is used in the whitepaper “Hybrid Data Guard to Oracle Cloud Infrastructure”. It is a good read and it has a lot of script examples that I stole… oh… got inspired by.

Connect to the new release VM DB System and ensure that the environment variable ORACLE_UNQNAME is set to the DB_UNIQUE_NAME of the database:

echo $ORACLE_UNQNAME

If it is not set, you can get it from srvctl:

srvctl config database
export ORACLE_UNQNAME=...

Generate a script that can delete all data -, temp -, redo log – and control files:

SET HEADING OFF LINESIZE 999 PAGESIZE 999 FEEDBACK OFF TRIMSPOOL ON TIMING OFF
SPOOL /tmp/db_replace_files.lst
SELECT 'asmcmd rm '|| name FROM V$DATAFILE UNION ALL SELECT 'asmcmd rm '|| name FROM V$TEMPFILE UNION ALL SELECT 'asmcmd rm '|| member FROM V$LOGFILE UNION ALL SELECT 'asmcmd rm '|| name FROM V$CONTROLFILE;
SPOOL OFF
host chmod 777 /tmp/db_replace_files.lst

You must edit the script and get rid of the unneeded lines. Next, stop the database:

srvctl stop database -d $ORACLE_UNQNAME -o immediate

And log on as grid and delete the files using the script we just created:

. /tmp/db_replace_files.lst

As oracle, now restart the database instance in NOMOUNT mode (can’t really go further since we nuked the control files) and set the COMPATIBLE to the same setting as the old release CDB.

srvctl start database -db $ORACLE_UNQNAME -o NOMOUNT

sql / as sysdba
SQL> ALTER SYSTEM SET COMPATIBLE='12.2.0' SCOPE=SPFILE;
SQL> CREATE PFILE FROM SPFILE;

srvctl stop database -db $ORACLE_UNQNAME -o immediate
srvctl start database -db $ORACLE_UNQNAME -o nomount

sql / as sysdba
SQL> SHOW PARAMETER COMPATIBLE

Now we have a new release instance running with the old COMPATIBLE setting. Obviously, it is of no use – yet. Starting a 19c instance with a lower compatible setting

Create a backup of old release CDB

I will use the old release CDB as the source for my new release CDB and thus preserve my COMPATIBLE setting. Obviously, the old release CDB must be upgraded to the new release, so let us first must ensure that the source CDB can actually be upgraded. Use AutoUpgrade in ANALYZE and FIXUPS mode which is described in a previous blog post. We must execute the ANALYZE and FIXUPS mode on the source system because the target system will only be able to open the database in UPGRADE mode, and these steps must be executed while the database is running in normal mode.

Next, I will create a File Storage Service that I can use to share files between the two VM DB Systems. The File Storage Service is really nice because the transfer speed in and out of the service depends on the network bandwidth of your VM DB System. So, if you add more CPUs to the system, you get more network bandwidth to the service automatically. It is really easy to create a File Storage Service and it is very well documented, so I will skip that part here. After that you can mount the file system in your systems (as opc):

sudo mkdir -p /mnt/db-downgrade-122
sudo mount x.x.x.x:/db-downgrade-122 /mnt/db-downgrade-122
sudo chmod 777 /mnt/db-downgrade-122

I can now take a backup of the CDB and store it directly in my NFS mount point:

rman target / 

RMAN> BACKUP DATABASE ROOT FORMAT '/mnt/db-downgrade-122/cdbroot_%U' PLUGGABLE DATABASE 'PDB$SEED' FORMAT '/mnt/db-downgrade-122/pdbseed_%U' PLUS ARCHIVELOG FORMAT '/mnt/db-downgrade-122/arch_%U';
RMAN> BACKUP CURRENT CONTROLFILE FORMAT '/mnt/db-downgrade-122/cf_%U';

Since the database is encrypted, we also need a copy of the keystore (or wallet). An easy solution could be to put the keystore files into the File Storage Service but a safer approach is to transfer the file directly using scp. Although, the keystore is protected by a password, it is still safer to keep them separated.

At time of writing, in OCI you can find the location of the keystore in sqlnet.ora.

cat $ORACLE_HOME/network/admin/sqlnet.ora | grep -i encryption_wallet

But that will change at some point in time because as of Oracle Database release 19c the sqlnet.ora parameter ENCRYPTION_WALLET_LOCATION is deprecated. You might have to look at the database parameter WALLET_ROOT instead.

For now, just note down the location of the keystore.

Restore old release CDB and upgrade

Now we can restore the backup of the 12.2 database using the 19c binaries. This is supported and in fact newer releases of RMAN can always restore lower release backups. However, normally RMAN will try to open the database in normal mode which we can’t do because of the version mismatch. I will use the NOOPEN keyword which causes RMAN to leave the database in MOUNT mode and I can manually open the database with RESETLOGS and in UPGRADE mode.

But first we must copy the keystore files from the source database to the new release DB System. In my example I am also copying the auto-login keystore which you shouldn’t do if you are using local auto-login keystores. In that situation the auto-login keystore should be re-created at the new release system:

cd 
scp -i  oracle@:/cwallet.sso cwallet.sso
scp -i  oracle@:/ewallet.p12 ewallet.p12

Now let’s do the restore and open the database in upgrade mode:

rman auxiliary /

RMAN> DUPLICATE DATABASE TO CDB1 AS ENCRYPTED NOOPEN SKIP PLUGGABLE DATABASE SALES BACKUP LOCATION '/mnt/db-downgrade-122/';

And in the end, you can see that RMAN does not open the database: Using the NOPEN keyword you can prevent RMAN from opening a database at the end of the restore and recover operation

Then, you can open the database in UPGRADE mode and with RESETLOGS option to complete the restore. Also, drop the skipped pluggable databases from the data dictionary:

ALTER DATABASE OPEN RESETLOGS UPGRADE;
DROP PLUGGABLE DATABASE SALES INCLUDING DATAFILES;

Finally, you can use AutoUpgrade in UPGRADE mode to upgrade the CDB to the new release. You now have a new target system running on 19c but with a lower COMPATIBLE setting.

If you want to know more about the UPGRADE mode, have a look in the documentation.

Downgrading a PDB

Previously, we have laid the groundworks for the being able to do a downgrade. For the following, I am assuming that you have already upgraded your PDB to 19c and now you ended up in a big doo doo and have to downgrade.

Downgrading in VM DB Systems are also slightly more complicated than on other systems. Remember that VM DB Systems does only support one Oracle Home (the one that comes deployed automatically) and that means that we must move the database back to the source system. For that operation we can’t use data guard, RMAN, or any other fancy approach because they only work to the same or newer release. So, we will have to do an old-school cold copy of the database – and that requires additional downtime. But let’s get started!

I will create a file that gives me all the commands I need to copy the data files out of ASM and into my File Storage Service (you could also scp them directly to the old release system):

SET HEADING OFF LINESIZE 999 PAGESIZE 999 FEEDBACK OFF TRIMSPOOL ON TIMING OFF
SPOOL /tmp/db_downgrade_files.lst
SELECT 'asmcmd cp ' || name || ' ''/mnt/dbbackupstaging' || SUBSTR(name, INSTR(name, '/', -1 )) || '''' FROM V$DATAFILE
UNION
SELECT 'chown oracle:oinstall /mnt/dbbackupstaging' || SUBSTR(name, INSTR(name, '/', -1 )) FROM V$DATAFILE ORDER BY 1;
SPOOL OFF

And then I can proceed with the actual downgrade. I need to ensure that the unified audit trail is emptied before the downgrade:

ALTER PLUGGABLE DATABASE SALES CLOSE;
ALTER PLUGGABLE DATABASE SALES OPEN DOWNGRADE;
EXEC DBMS_AUDIT_MGMT.CLEAN_AUDIT_TRAIL(DBMS_AUDIT_MGMT.AUDIT_TRAIL_UNIFIED, FALSE);
SPOOL /tmp/db_downgrade.lst
SET TERMOUT ON TIMING ON SERVEROUT ON ECHO ON
@?/rdbms/admin/catdwgrd.sql
SPOOL OFF

Unplug the PDB and because the PDB is encrypted I have to specify a password that can protect the sensitive information inside the manifest file:

ALTER SESSION SET CONTAINER=CDB$ROOT;
ALTER PLUGGABLE DATABASE SALES CLOSE;
ALTER PLUGGABLE DATABASE SALES UNPLUG INTO '/mnt/db-downgrade-122/manifest_sales.xml' ENCRYPT USING [a-secret-password];

Now we can copy the data files from the local storage and on to the File Storage Service so we can use at the source system. Use the commands that we generated previously:

asmcmd ...
chown ...

Now switching to the old release system and create the PDB from manifest file. I will use the data files right off the File Storage Service and optionally I can move them afterwards – as an online operation (you might not want to do that, but I ran out of disk space):

CREATE PLUGGABLE DATABASE SALES USING '/mnt/db-downgrade-122/manifest_sales.xml' SOURCE_FILE_DIRECTORY='/mnt/db-downgrade-122' NOCOPY KEYSTORE IDENTIFIED BY [keystore-password] DECRYPT USING [a-secret-password];

Start up the database in UPGRADE mode and open the keystore:

ALTER PLUGGABLE DATABASE SALES OPEN UPGRADE;
ADMINISTER KEY MANAGEMENT SET KEYSTORE CLOSE CONTAINER=all;
ADMINISTER KEY MANAGEMENT SET KEYSTORE OPEN IDENTIFIED BY [keystore-password] CONTAINER=all;

Switch to the SALES PDB and complete the downgrade:

ALTER SESSION SET CONTAINER=SALES;
SET TERMOUT ON ECHO ON TIMING ON
SPOOL /home/oracle/sales_catreload.log
@?/rdbms/admin/catrelod.sql
SPOOL OFF

Restart, Recompile and fresh stats:

ALTER PLUGGABLE DATABASE SALES CLOSE IMMEDIATE;
ALTER PLUGGABLE DATABASE SALES OPEN;
@?/rdbms/admin/utlrp.sql
EXEC DBMS_STATS.GATHER_DICTIONARY_STATS;
EXEC DBMS_STATS.GATHER_FIXED_OBJECT_STATS;

Check the state of the Oracle Data Dictionary

SET SQLFORMAT ANSICONSOLE LINES 300
SELECT COMP_ID, COMP_NAME, VERSION, STATUS FROM DBA_REGISTRY ORDER BY MODIFIED;

And there you have it. Not exactly super easy, which is why I highly recommend you to look at Bare Metal DB Systems or Exadata DB Systems if you are required to be able to do downgrades (or be prepared to use Data Pump instead).

Other Posts in This Series