

When you provision a new database in Oracle Cloud Infrastructure (OCI), it always comes with the latest timezone file installed.
But in a recent migration, we wanted a database with a specific timezone file version.
Here’s how you can get a new PDB with a custom timezone file.
Using OCI Tooling Doesn’t Work
The OCI tooling uses a template file to provision the database faster. But the template file comes with the latest timezone file. Timezone files are part of the Release Update, so the newer Release Update you’re on, the newer the timezone file is.
Using template files for provisioning means that you don’t get to choose which version of the timezone file you want in your database. Further, the usual hacks like removing timezone files from the Oracle home or using the environment variable ORA_TZFILE won’t work.
The Solution
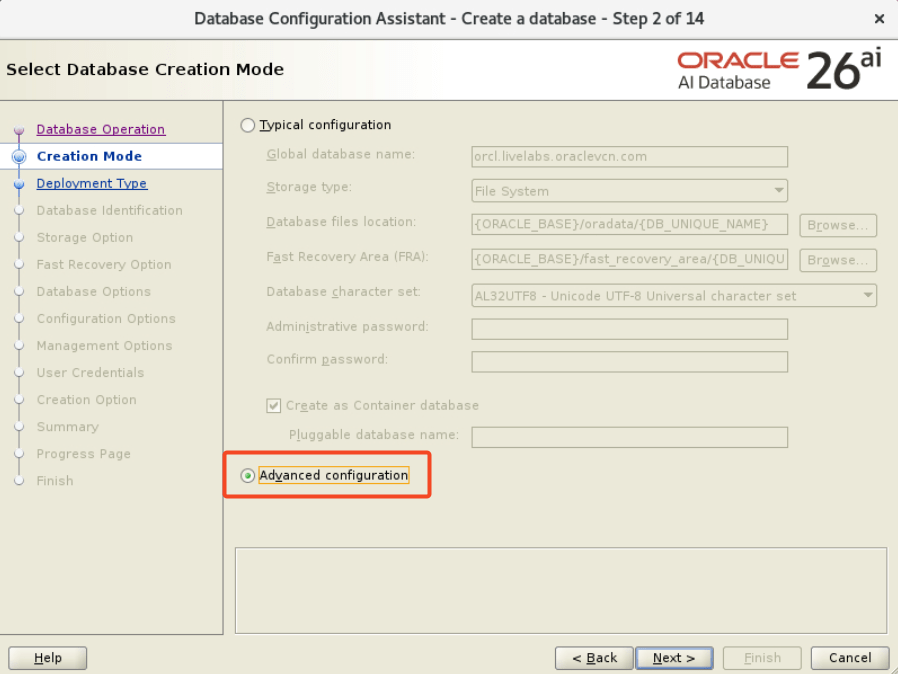
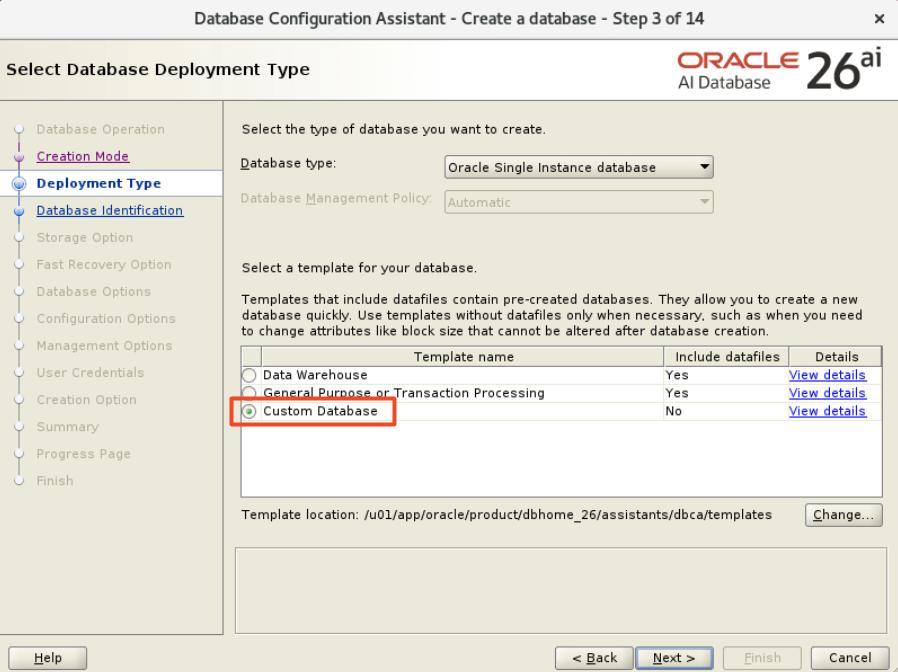
I’m going to create a new PDB in an on-prem database, export that PDB to OCI and use that as my new PDB.
-
I start by finding an existing CDB with the desired timezone file, or I create a new one. ~~~ select version from v$timezone_file;</p> <pre><code> VERSION ———- 44 ~~~
-
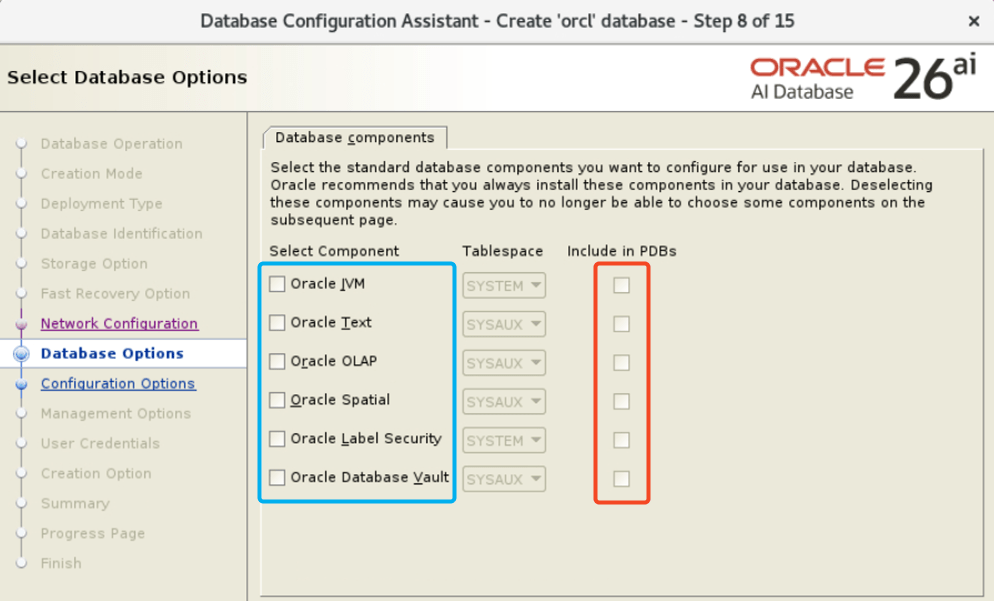
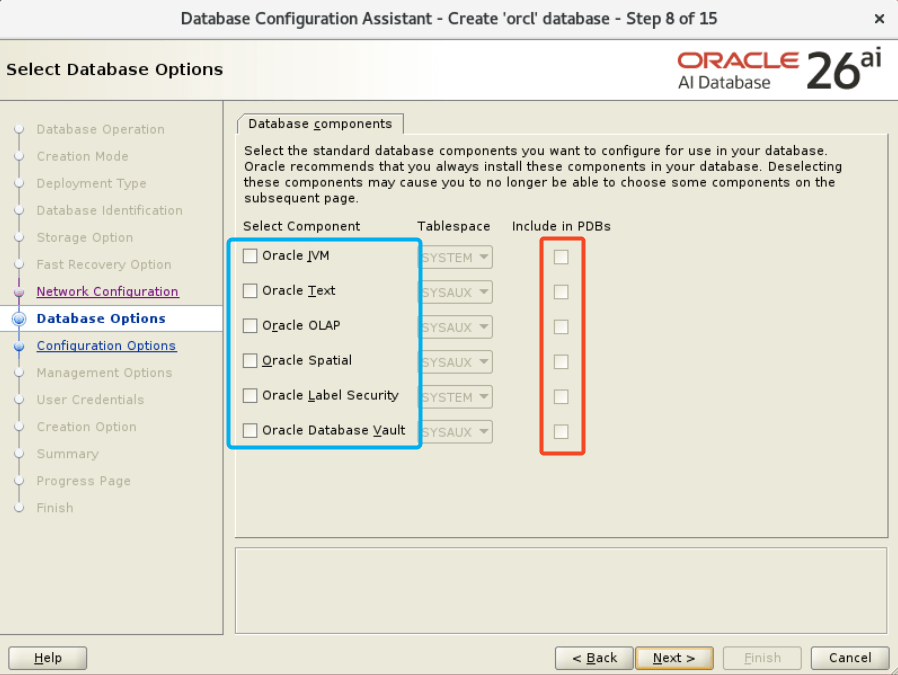
I don’t need to check * The patch level: I’ll sort out any patch differences with Datapatch in OCI. * The components: CDBs in OCI have all components installed.
-
I create a new empty PDB: ~~~ CREATE PLUGGABLE DATABASE PDBTEMPLATE ADMIN USER ADMIN IDENTIFIED BY mys3cr3tpassw0rd!; ~~~
-
I close and unplug my PDB: ~~~~ ALTER PLUGGABLE DATABASE PDBTEMPLATE CLOSE; ALTER PLUGGABLE DATABASE PDBTEMPLATE UNPLUG INTO ‘/home/oracle/pdbtemplate.pdb’; DROP PLUGGABLE DATABASE PDBTEMPLATE INCLUDING DATAFILES; ~~~~
-
I transfer the PDB to my host in OCI. In my test, the size of the PDB was 600 MB. Size: 0,61735765 GB
-
Now, I can create a new PDB using the archive file: ~~~~ CREATE PLUGGABLE DATABASE PDBNEW USING ‘/home/oracle/pdbtemplate.pdb’; ALTER PLUGGABLE DATABASE PDBNEW OPEN READ WRITE; ~~~~ * The PDB probably opens with plug-in violations. I ignore this for now.
-
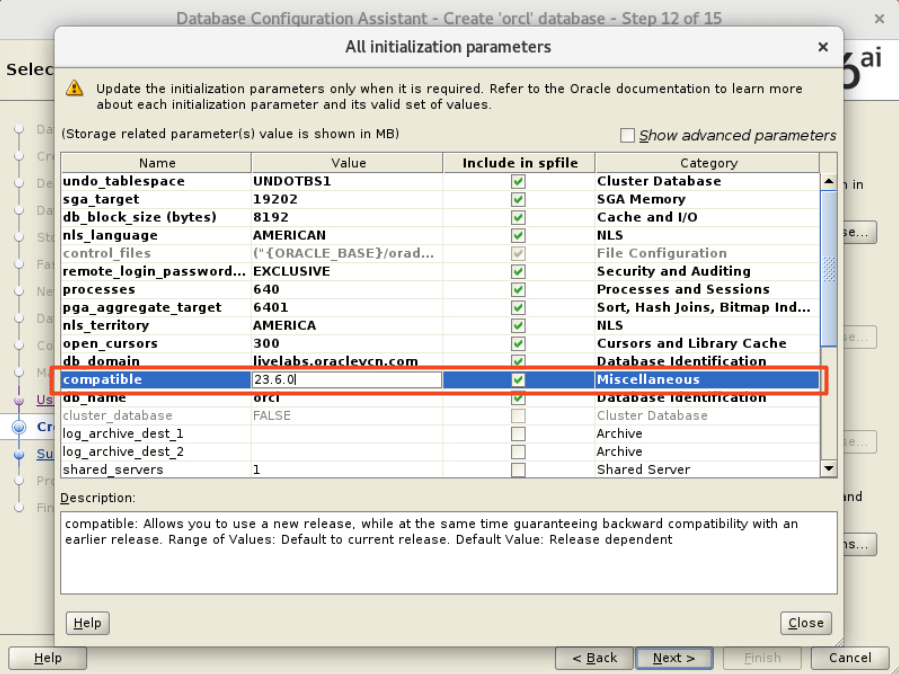
I need to sort out any patching difference: ~~~~ $ORACLE_HOME/OPatch/datapatch -pdbs PDBNEW ~~~~
-
After a restart I check for plug-in violations: ~~~~ ALTER PLUGGABLE DATABASE PDBNEW CLOSE IMMEDIATE; ALTER PLUGGABLE DATABASE PDBNEW OPEN; SELECT TYPE, CAUSE, MESSAGE, ACTION FROM PDB_PLUG_IN_VIOLATIONS WHERE NAME=‘PDBNEW’ AND STATUS != ‘RESOLVED’ AND NOT (CAUSE=‘OPTION’ AND TYPE=‘WARNING’ AND MESSAGE LIKE ‘%PDB installed version NULL%’);</p> <pre><code> TYPE CAUSE MESSAGE ACTION __________ ___________________________ _________________________________________________________________________________________________ __________________________ WARNING is encrypted tablespace? Tablespace SYSTEM is not encrypted. Oracle Cloud mandates all tablespaces should be encrypted. Encrypt the tablespace. WARNING is encrypted tablespace? Tablespace SYSAUX is not encrypted. Oracle Cloud mandates all tablespaces should be encrypted. Encrypt the tablespace. ~~~~ * The query removes any *warnings* about components missing in my PDB. * I can ignore the warning about missing encryption of *SYSTEM* and *SYSAUX*
-
Finally, I create an encryption key (or rotate the key if the PDB is already encrypted): ~~~~ ALTER SESSION SET CONTAINER=PDBNEW; ADMINISTER KEY MANAGEMENT SET KEY FORCE KEYSTORE IDENTIFIED BY <keystore-password> WITH BACKUP; ~~~~
-
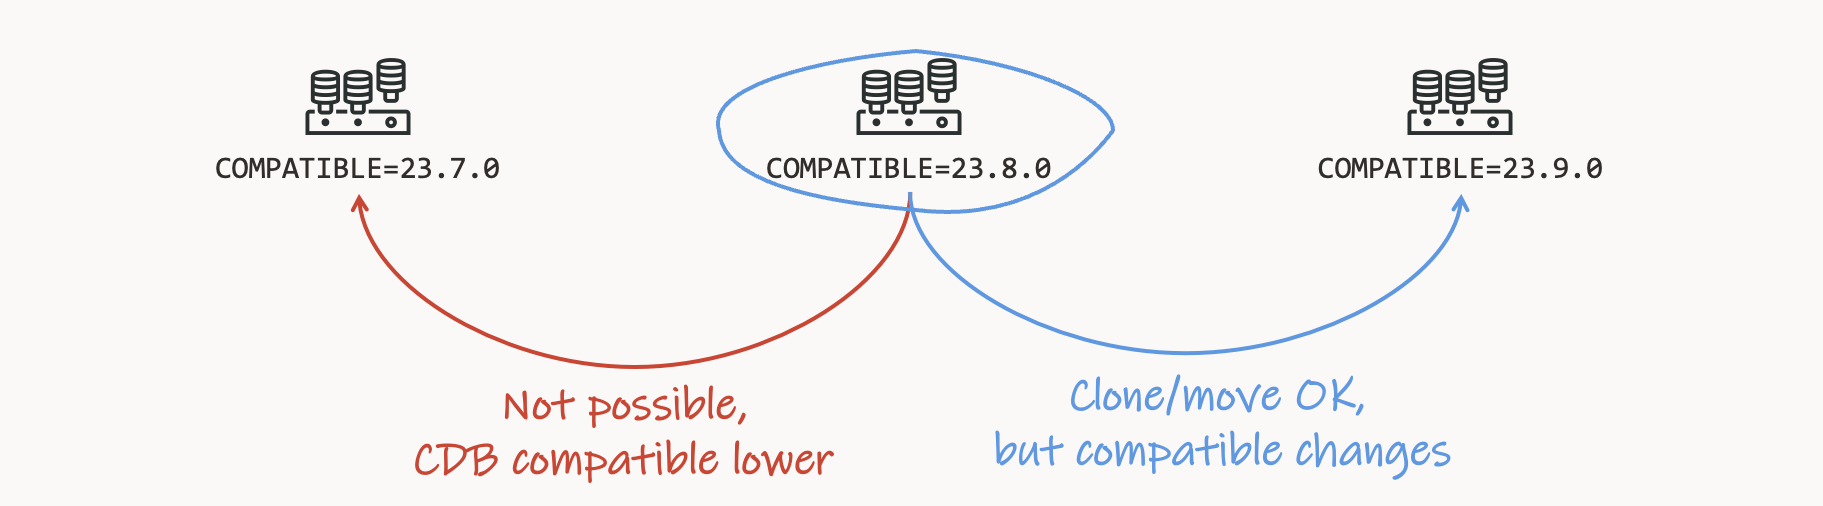
Last, let’s check the timezone file versions in my CDB: ~~~~ ALTER SESSION SET CONTAINER=CDB$ROOT; SELECT CON$NAME, VALUE$ FROM CONTAINERS(SYS.PROPS$) WHERE NAME=‘DST_PRIMARY_TT_VERSION’ ORDER BY 1;</p> <pre><code> CON$NAME VALUE$ ___________ _________ CDB$ROOT 45 PDBNEW 44 ~~~~ * The CDB uses the latest timezone file version, *45*. * My new PDB uses an older timezone file, *44*.
That’s It!
This workaround enables you to create PDBs with a custom timezone file version. I can use the same approach if I want a PDB with a specific set of components installed.
If there is network connectivity between the source and target CDB, I could also clone the PDBTEMPLATE over a network link.
Happy migrating!


 So many people were doing selfies, that we had to make a selfie-with-a-selfie.