
How to Use Data Pump with Exadata Exascale Storage

Do you know that feeling when you get new toys?

A short while ago, in a server room far, far away …

… a brand-new, shiny Oracle Exadata Exascale was left unguarded, so I decided to try out a few things.

Here’s how to export to and import from Exadata Exascale storage.

Prerequisites

  1. I create a directory for the Data Pump dump files pointing to the Exascale vault:
    create directory dumpdir as '@MYVAULT1/CDB26/SALES/DUMPDIR';
    
    • MYVAULT1 is the name of my vault. Notice the @ sign, which denotes Exascale vaults, like + in ASM.
    • I can specify subdirectories (CDB26/SALES/DUMPDIR) to organize my files. However, there’s no concept of directories in Exascale, so these are really path prefixes.
    • Unlike a regular file system or ASM, I don’t have to create the matching file system directory.
  2. I create another directory for my Data Pump log files:
    create directory logdir as '/u02/app/oracle/admin/CDB26/SALES/logdir';
    
    • I can’t use the Exascale directory for log files.
    • Similar to ASM, I can’t store log files in Exascale.
  3. I create the matching file system directory for logdir:
    mkdir -p /u02/app/oracle/admin/CDB26/SALES/logdir
    
    • In Oracle RAC, I should place the directory in a cluster file system or ensure that the folder exists on all nodes.
  4. Finally, I create a user to perform the Data Pump jobs:
    create user dpuser identified by <password>;
    alter user dpuser default tablespace users;
    alter user dpuser quota unlimited on users;
    grant datapump_exp_full_database to dpuser; 
    grant datapump_imp_full_database to dpuser; 
    

Export

  • Here’s how to start an export:

    expdp dpuser/<password>@<connect-string> \
    	dumpfile=dumpdir:myexp%L.dmp \
    	logfile=logdir:myexp-export.log \
    	...
    
    • I write the dump file to my Exascale vault by specifying the database directory (dumpdir) and then the dump file name specification. I’m using the %L wildcard to allow Data Pump to create additional files.
    • Data Pump must write the log file to a real file system, so I use logdir which points to a local file system.
  • At the end of the export, Data Pump writes the names of my dump files:

    04-AUG-26 11:08:36.114: Dump file set for DPUSER.SYS_EXPORT_SCHEMA_01 is:
    04-AUG-26 11:08:36.114:   @MYVAULT1/CDB26/SALES/DUMPDIR/myexp01.dmp
    04-AUG-26 11:08:36.145: Job "DPUSER"."SYS_EXPORT_SCHEMA_01" successfully completed at Tue Aug 4 11:08:36 2026 elapsed 0 00:01:03
    

Import

  • Here’s how to start an import:
    impdp dpuser/<password>@<connect-string> \
    	dumpfile=dumpdir:myexp%L.dmp \
    	logfile=logdir:myexp-import.log \
    	...
    
    • I configure the dumpfile and logfile parameters the same way as in the export.
    • I can use the %L wildcard in the dump file specification for imports as well. Data Pump automatically finds the required dump files.

Pro Tips

Happy Data Pumping!

How To Avoid ORA-39405 During a Data Pump Import

Why did my Data Pump import fail?

Import: Release 19.0.0.0.0 - Production on Mon Jun 29 06:17:06 2025
Version 19.31.0.0.0

ORA-39002: invalid operation
ORA-39405: Oracle Data Pump does not support importing from a source database with TSTZ version 44 into a target database with TSTZ version 45.

It all comes down to the TIMESTAMP WITH TIME ZONE (TSTZ) data type.

The database uses the timezone file to translate your TSTZ data to the right time. If the Daylight Saving Time (DST) rules change, a newer timezone file ensures that you still get the right data.

Data Pump refuses to import the data because differing timezone file versions could lead to incorrect TSTZ values.

The Solution

Simple: apply at least Release Update 19.27 and install the Data Pump bundle patch.

Data Pump now converts your TSTZ values when needed. During data, loading Data Pump uses an internal function called ORA_DST_CONVERT that does all the magic. The function can convert between both older and newer timezone file versions. Because each row requires a function call during import, you should expect a small performance overhead. I expect it to be negligible.

Remember, you can install the Data Pump bundle patch online without any downtime.

But I Don’t Have Timezone Data?

If your dump file doesn’t contain any TSTZ data, it’s safe to import even if the timezone file versions differ.

Older versions of Data Pump were overly cautious. Even without TSTZ data, they immediately failed when they detected a timezone file mismatch.

Why Does This Happen?

A few years ago, Oracle started shipping newer timezone file versions with every Release Update. It’s convenient and ensures that you always have the latest files installed.

But when you create a database, it gets the latest timezone file automatically. As you create databases over time, they’ll end up using different timezone file versions.

This is when you start seeing ORA-39405 in Data Pump.

In the good, ol’ days, timezone files were separate patches. Most people didn’t install them, so all of their databases ended up using the same timezone file version.

That’s It

If you have different timezone file versions in your source and target databases, Data Pump must convert your TSTZ columns to match the target database’s timezone file version. This requires at least Release Update 19.27 and the Data Pump bundle patch.

Happy importing!

How to Exclude Audit Trail From Data Pump Export

A user left a comment in the Utilities Guide:

I want to exclude the audit trail from a Data Pump export, but I can’t find a specific example.

First, thanks to the user for leaving a comment. We read every one of them and use them to improve the documentation.

Let me show you how to exclude the audit trail from your Data Pump export.

Exclude Audit Trail You can exclude the audit during export and import using the exclude parameter.

expdp … full=y exclude=audit_trails Data Pump includes the audit trail only in full exports. Data Pump excludes all kinds of audit trail, including traditional, unified, and fine-grained. It’s not possible to exclude just one audit trail while keeping the others. It’s all or nothing. I recommend using the exclude on the export command, if possible. Don’t try to exclude the underlying parts of the audit trails (such as the AUDSYS schema or the AUD$ table). What About The Policies Data Pump handles audit policies differently, and they might be included in schema and table exports.

To exclude traditional audit policies: expdp … exclude=audit To exclude unified audit policies: expdp … exclude=audit_policy How Did I Know That? The exclude parameter is very powerful, and there’s no room in the documentation to list all the different options you can exclude.

But the database can tell you exactly what you can exclude. Here’s a list of the audit-related object paths that you can exclude in a full export:

SQL> select object_path, comments from database_export_objects where upper(comments) like ‘%AUD%’;

OBJECT_PATH COMMENTS


AUDIT Audits of SQL statements AUDIT_CONTEXT Audit Namespace Context AUDIT_DEFAULT Procedural system privilege audits AUDIT_OBJ Object audits on the selected tables AUDIT_POLICY Audit Policy AUDIT_POLICY_ENABLE Audit Policy Enable AUDIT_TRAILS Database Audit Trails and their configuration

(output truncated)

75 rows selected. For schema and table exports, check schema_export_objects and table_export_objects, respectively.

Additional Notes Remember, traditional auditing is deprecated in Oracle AI Database 26ai. It’s time to start using Unified Auditing. Check out the syntax converter script in Traditional to Unified Audit Syntax Converter – Generate Unified Audit Policies from Current Traditional Audit Configuration (Doc ID 2909718.1). The audit trail is important information. If you exclude the audit trail during a database migration, I recommend archiving it beforehand. You don’t want to lose your audit information. Happy exporting!

How to Use NOLOGGING to Make Imports Faster

You can use NOLOGGING operations to speed up data loads. Imports are all about loading data.

When Data Pump loads the rows into your database and creates indexes, you can avoid generating redo.

You save:

  • Time – because a NOLOGGING operation is faster.
  • Space – because no redo means no archive logs.

But, there are serious implications! If you need to restore the database, those tables and indexes will not be there.

How To

You can toggle the logging clause of a table or index using the Data Pump import parameter transform. To use NOLOGGING.

impdp ... transform=disable_archive_logging:y

The Effect

I made a small test with a simple schema with four identical tables. Each table is 3 GB.

Setting Time to Import Redo, GB
LOGGING 4m 22s 12.2
NOLOGGING 1m 45s 0.047

Many factors affect the numbers, so your result might be very different. Check for yourself.

Underneath the Hood

The LOGGING information is only changed temporarily during the import. At the end of the import, the LOGGING information is reset to its original state.

I enabled Data Pump trace:

impdp ... \
   transform=disable_archive_logging:y \
   trace=1FF0300

And by grepping in the database trace directory, I could find these events:

FTEX_dw00_854409.trc:KUPW:09:38:39.351: 1:       ALTER TABLE "CONSTR_VALIDATE"."T1"  NOLOGGING
FTEX_dm00_854407.trc:KUPM:09:40:20.527: W-3 . . imported "CONSTR_VALIDATE"."T1"                      381.6 MB 23312384 rows in 101 seconds using direct_path
FTEX_dw01_854413.trc:KUPW:09:40:20.619: 2:       ALTER TABLE "CONSTR_VALIDATE"."T1" LOGGING

Words of Caution

I strongly recommend that you only use this feature when:

  1. You fully understand the implications of NOLOGGING operations.
  2. You install the Data Pump Bundle Patch. There are a handful of bugs related to this feature, including one bug where the Data Pump fails to restore the original LOGGING value, leaving the object in NOLOGGING mode.
  3. You have a plan for ensuring the recoverability of your database. Either you don’t care about the data at all, or you start a level 0 backup right away.
  4. You have a plan for your standby databases if you use Automatic Correction of Non-logged Blocks at a Data Guard Standby Database.

Notes

  • This feature doesn’t work if you have FORCE LOGGING enabled. The database silently ignores the NOLOGGING clause.

    select force_logging from v$database;
    
  • In a Data Guard configuration, you most likely use FORCE LOGGING, so don’t expect it to work here. Unless you’re using Automatic Correction of Non-logged Blocks at a Data Guard Standby Database.

  • This feature doesn’t work on Oracle Autonomous Database (ADB) Serverless and Dedicated because it ignores the NOLOGGING clause. ADB protects your data at any cost, and, thus, completely ignores that setting.

  • A Data Pump import always generates redo, even when you are using NOLOGGING operations. The database logs all actions on the data dictionary and UNDO. Furthermore, DML operations on the Data Pump control table are also logged.

Migrations

You can safely use this feature during a migration if you plan to perform a level 0 backup and build your standby databases within the maintenance window.

However, if you’re tight on time, you often take a level 0 backup before the import and rely on archive logs for recoverability. In such a situation, you must not use this feature. The same applies if you build your standby database before the import.

Just the Indexes

A compromise is to use NOLOGGING on the indexes only:

transform=disable_archive_logging:y:index
transform=disable_archive_logging:n:table

The rationale being that you can always rebuild your indexes again. Keep your tables safe, but if something happens, simply recreate the indexes.

In such a situation, it’s good to have the index definitions ready. You can use the SQLFILE option to extract the index DDLs from the dump file:

impdp ... sqlfile=indexes.sql include=index

Conclusion

You can speed up imports by using NOLOGGING operations. It also reduces the amount of redo generation.

Appendix

Give It a Try

You can use our Data Pump hands-on lab to try it yourself. Provision a lab and use the commands below:

# Create directory and copy dump file
mkdir /home/oracle/dpdir
cp /home/oracle/scripts/faster-import-lob.dmp /home/oracle/dpdir

# Create parameter file
# Change the transform parameter accordingly
cd
cat > imp.par <<EOF
directory=dpdir
dumpfile=faster-import-constraints.dmp
parallel=4
logtime=all
metrics=yes
transform=constraint_novalidate:y
transform=disable_archive_logging:y
trace=1FF0300
EOF

# Get rid of previous archived logs
. ftex
rman target /<<EOF
   delete noprompt archivelog all;
EOF
rm -rf /u02/fast_recovery_area/FTEX/archivelog/*

# Data Pump prereqs and a restart to reset metrics
sqlplus / as sysdba<<EOF
   drop user constr_validate cascade;
   grant datapump_exp_full_database, datapump_imp_full_database to dpuser identified by oracle;
   alter user dpuser default tablespace users;
   alter user dpuser quota unlimited on users;
   create or replace directory dpdir as '/home/oracle/dpdir';
   alter system set streams_pool_size=128m scope=spfile;
   shutdown immediate
   startup
EOF

# Remove existing trace files
rm -rf /u01/app/oracle/diag/rdbms/ftex/FTEX/trace/*

# Start import
impdp dpuser/oracle parfile=imp.par

# Measure redo via DB and file system
du -h /u02/fast_recovery_area/FTEX/archivelog
sqlplus / as sysdba<<EOF
   SELECT VALUE / 1024 / 1024 AS redo_generated_mb FROM v\$sysstat WHERE name = 'redo size';
EOF

How To Export To ASM Storage – The Full Picture

At Oracle AI World, I spoke to a customer who used Data Pump as part of their CI/CD pipeline. Exporting and importing a 7 TB database took more than 36 hours.

That’s far too much, I said.

A meme showing a man and a cat shouting 36 hours is too much

A few details:

  • They had the Data Pump bundle patch installed.
  • Unloading and loading rows were generally just slow.
  • They were using NFS storage for the dump files.

I’ve seen far too many cases where misconfigured NFS caused slowness, so I suggested using ASM storage instead. At least, that could rule out NFS as the issue.

Here’s how to use Data Pump and ASM storage.

Export

It turned out that I already blogged about this topic. You can visit that for step-by-step instructions.

My feeling when I saw I blogged about this already

Move File

We now have a dump file on our source database. But we need to move it to the target host.

DBMS_FILE_TRANSFER

On the remote database:

  1. I create a directory in ASM where I can store the dump file:
    ASMCMD> create directory +DATA/DMPDIR
    
  2. I create a user and grant privileges to connect. I’ll use this user to connect via a database link:
    SQL> create user transportuser identified by ... ;
    SQL> grant connect to transportuser;
    
  3. I create a directory and allow my user to write to it:
    SQL> create directory dmpdir as '+DATA/DMPDIR';
    SQL> grant write on directory dmpdir to transportuser;
    

On the source database:

  1. I create a user with the right privileges:
    SQL> create user transportuser identified by ... ;
    SQL> grant connect to transportuser;
    SQL> grant create database link to transportuser;
    SQL> grant read on directory myasmdir to transportuser;
    SQL> grant execute on dbms_file_transfer to transportuser;
    
  2. I connect as transportuser and create a database link to the remote database/PDB:
    SQL> create database link transportlink
         connect to transportuser identified by ...
         using '<connect-string-to-remote-pdb>';
    
  3. I copy the file:
    begin
    dbms_file_transfer.put_file(
       source_directory_object      => 'MYASMDIR',
       source_file_name             => 'exp01.dmp',
       destination_directory_object => 'DMPDIR',
       destination_file_name        => 'exp01.dmp',
       destination_database         => 'TRANSPORTLINK');
    end;
    /
    

A closing remark: DBMS_FILE_TRANSFER is an effective means of copying the file. My wristwatch measurements show it’s slightly faster than using scp in the operating system.

ASMCMD

You could also transfer the file directly from one ASM instance to a remote one. Check out the cp command.

But I don’t recommend this approach, because you need the SYSDBA or SYSASM privilege to connect to asmcmd. Since the issue was related to a CI/CD pipeline, it’s a fully automated flow. If at all possible, I’d avoid using such a powerful privilege in my automation.

Import

Since we have the dump file on our target system, we can perform a Data Pump import. Use the same approach as described above.

Outcome

If the NFS storage indeed caused the slowness, you should see much faster times.

If that’s not the case, here are some other ideas to explore.

Happy Data Pumping!

Using Data Pump Exports As Long-Term Storage

I recently helped a customer get the most out of Data Pump. Here’s how it all started.

For legal reasons, we must keep a backup of our data for five years. We want to use Data Pump exports. Do you have any recommendations?

Before someone flames me, I know that an export is not a backup, but we’re not talking about disaster recovery here.

Meme depicting Captain Picard saying an export is not a backup

Data Pump Export

Here are some of the Data Pump export parameters I would use.

Log File

logtime=all
metrics=yes
logfile=dataexport.log

Whenever you store data for the long term, I think it’s a good idea to store relevant metadata too. So, be sure to save the log file together with the dump files, and include diagnostic information using logtime and metrics.

Dump Files

dumpfile=dataexport_%T_%L.dmp
filesize=10000M
reuse_dumpfiles=yes

The dumpfile specification contains the %T wildcard, which translates into YYYYMMDD at runtime. It’s handy to have the date in the file names. Using %L allows the creation of multiple dump files.

I recommend breaking the dump files into smaller pieces using filesize. Smaller files are easier to handle and transport, and avoid some issues I’ve seen with object storage and huge files.

Content

schemas=myapp
tables=mytab
exclude=statistics

I would advise against doing a full export. It contains far too much information that you won’t need, like tablespace definitions, SQL management objects, and audit trail. A schema or table export is more suitable.

Be sure to exclude statistics. They take time to export and have no value. To narrow down the objects you export, you can also use the include parameter.

The parameters include and exclude are mutually exclusive in Oracle Database 19c. That’s no longer the case in later releases.

Compression

compression=all
compression_algorithm=high

Use compression to make the dump files smaller. I think it’s worth spending a few more CPU cycles on export and compressing as much as possible to reduce the dump file size, so use the high algorithm.

Creating a compressed export requires the Advanced Compression Option. However, importing a compressed backup does not require the same option. Always check the license guide for up-to-date information.

If you don’t have a license for Advanced Compression Option, you can compress the dump file using OS utilities. Unless you also encrypt the dump file. Compressing an encrypted dump file gives no benefit.

Integrity

data_options=verify_stream_format
checksum=yes

Since you are storing data for long-term storage, it’s good to double-check that there’s no corruption in the data. Data Pump writes into the dump file in a streaming manner, and you can check it along the way using data_options.

I’d also recommend generating a checksum and storing that in the dump file using the checksum parameter.

You can periodically check your dump for corruption by using impdp ... verify_only=yes. It will re-calculate the dump file checksum and match that against what is stored in the dump file.

Note that checksum is a feature of Oracle Database 21c.

Usually, using the default checksum_algorithm is fine for checking data integrity. If you want to guard against someone tampering with the dump file, it’s better to use checksum_algorithm=sha512. But for proper protection of your data, use encryption.

Encryption

encryption=all
encryption_mode=password

You can encrypt the data in the dump using the encryption parameter.

I prefer using a separate passphrase to protect the dump file, instead of using the database master encryption key. If you use the latter, you also need to have a backup of the database keystore.

Using Data Pump encryption requires a license for Advanced Security Option. Always check the license guide for up-to-date information.

Miscellaneous

flashback_scn=systimestamp
parallel=<n>

Remember to make a consistent export using flashback_scn. Alternatively, export from a quiesced database or a snapshot standby.

Use whatever parallel degree that you can afford. Normally, on x86-64 architectures, the optimal setting is twice the number of physical cores.

Using OCI Object Storage

The customer also stated:

We plan on storing the dumps in OCI object storage.

To reduce the storage costs, use either:

Your Opinion

How would you store data for the long term? Do you have any experiences with the above Data Pump parameters?

Drop a comment and let me know.

Happy exporting!

Copy Data Pump Files Before the End of the Export

In Oracle Database 23ai, you can copy the dump files even before the export completes.

This saves time during your migration because you can start moving files to the target host while the export is in progress. Additionally, it potentially saves disk space because you can move the files away from the source host.

Which Files Can You Move

  1. After starting the Data Pump export, you must connect to the database using:

    • The same user who started the export
    • A user with DATAPUMP_EXP_FULL_DATABASE role
  2. Replace the job owner and name, and execute:

    set serverout on
    declare
       l_job_owner    varchar2(30) := 'DPUSER';
       l_job_name     varchar2(30) := 'SYS_EXPORT_FULL_01';
       l_handle       number;
       l_stsmask      integer := dbms_datapump.ku$_status_job_status;
       l_job_state    varchar2(30);
       l_status       ku$_status;
       l_dump_file    ku$_dumpfile;
    begin
       l_handle := dbms_datapump.attach(l_job_name, l_job_owner);
       dbms_datapump.get_status(l_handle, l_stsmask, NULL, l_job_state, l_status);
       dbms_datapump.detach(l_handle);
       
       for i in l_status.job_status.files.first..l_status.job_status.files.last() loop
          
          l_dump_file := l_status.job_status.files(i);
    
          if l_dump_file.file_type = dbms_datapump.ku$_dumpfile_type_template then
            continue;
          end if;
    
          if (l_dump_file.file_bytes_written = l_dump_file.file_size) then
             dbms_output.put_line('DONE: ' || l_dump_file.file_name);
          end if;
    
        end loop; 
    end;
    /
    
    
  3. The code lists all the files that Data Pump has marked as completed. Data Pump no longer writes to those files, and you can safely start moving them to the target system.

Prerequisites

  • You must use multiple dump files. You do that by including %L in your DUMPFILE specification.
    DUMPFILE=exp%L.dmp
    
  • You must specify a file size that allows Data Pump to rotate into multiple files when they are full. I suggest using 5G, which is also a good setting for most cloud migrations.
    FILESIZE=5G
    

What About

  • The code examines the max file size and bytes written to determine if the file is full. This is not the same as the physical size of the file in the operating system. You can’t use the file size information from the file system.

  • What about using rsync or similar tools? I guess that could work; however, we didn’t test that.

  • You could query the Data Pump control table for the information:

    SELECT file_name
    FROM <control_table>
    WHERE process_order = -21
    AND file_max_size = completed_bytes
    AND file_max_size <> 0
    ORDER BY file_name;
    
    • However, querying the control table is not a supported approach. Use the above PL/SQL.

Happy exporting!

Data Pump Export Doesn’t Use Schema Name to Exclude a Table

Imagine a database with two schemas, each with two tables with the same name:

Schema Table
APPUSER T1
APPUSER T2
REPUSER T1
REPUSER T2

How can I export the two schemas and exclude REPUSER.T1 – but keep APPUSER.T1?

Let’s Try

  • I can use the EXCLUDE command line parameter:

    expdp schemas=APPUSER,REPUSER exclude="TABLE:\" = 'T1'\""
    
    • This filter removes all tables named T1 regardless of the schema.
    • This won’t work, because it also excludes APPUSER.T1.
    • The same applies if I use the filter in ('T1') or like ('T1').
  • Can I add the schema to the filter?

    expdp schemas=APPUSER,REPUSER exclude=TABLE:"='REPUSER.T1'"
    
    • This filter causes Data Pump to exclude all tables named REPUSER.T1. It doesn’t interpret this as SCHEMA.TABLE_NAME.
    • The filter works solely on the table name. Internally, the filter is added to a query on a dictionary view and here schema and table name are two different columns. So, a single predicate won’t work.
  • Currently, in Data Pump there is no way to shape the EXCLUDE parameter that meets the requirements. Bummer!

Solutions

  • I can use two Data Pump jobs and use the filter only on REPUSER:

    expdp schemas=APPUSER
    expdp schemas=REPUSER exclude="TABLE:\" = 'T1'\""
    
    • In the interest of time, I can start the Data Pump jobs at the same time. I can even import the two dump files simultaneously.
    • Might not work if there are cross-schema dependencies.
  • I can also export APPUSER.T1 later on:

    expdp schemas=APPUSER,REPUSER exclude="TABLE:\" = 'T1'\""
    expdp tables=APPUSER.T1
    
    • Although I can start the two exports at the same time, my table import has to wait for the first job to complete.
  • Do you have any creative solutions? Leave a comment and let me know.

Happy exporting!

How To Install Data Pump Bundle Patch On Running Database Without Downtime

As discussed previously, the Release Updates rarely include any Data Pump fixes. If you start a Data Pump job, the absence of the many fixes may lead to errors or severe performance problems.

Hence, I always recommend that you install the Data Pump bundle patch before starting a Data Pump job.

But the fixes are not part of the Release Update and they are not RAC rolling installable, so it sounds like a pain to install, right? But it is not!

The Data Pump bundle patch is a Non-Binary Online Installable patch, so you can apply it without any downtime.

How To Apply Data Pump Bundle Patch

  1. I start with a running Oracle Database called FTEX.
    ps -ef | grep pmon
    oracle     53316       1  0 13:57 ?        00:00:00 ora_pmon_FTEX
    
  2. I verify that the Oracle home does not have the Data Pump bundle patch:
    $ORACLE_HOME/OPatch/opatch lspatches
    
    37499406;OJVM RELEASE UPDATE: 19.27.0.0.250415 (37499406)
    37654975;OCW RELEASE UPDATE 19.27.0.0.0 (37654975)
    37642901;Database Release Update : 19.27.0.0.250415 (37642901)
    
    OPatch succeeded.
    
  3. I ensure that no Data Pump jobs are running currently.
  4. I patch my database.
    $ORACLE_HOME/OPatch/opatch apply
    
    [output truncated]
    
    Verifying environment and performing prerequisite checks...
    OPatch continues with these patches:   37777295
    
    Do you want to proceed? [y|n]
    y
    User Responded with: Y
    All checks passed.
    Backing up files...
    Applying interim patch '37777295' to OH '/u01/app/oracle/product/19_27'
    
    Patching component oracle.rdbms.dbscripts, 19.0.0.0.0...
    
    Patching component oracle.rdbms, 19.0.0.0.0...
    Patch 37777295 successfully applied.
    Log file location: /u01/app/oracle/product/19_27/cfgtoollogs/opatch/opatch2025-06-23_14-26-49PM_1.log
    
    OPatch succeeded.   
    
    • Although the FTEX database is still running, OPatch doesn’t complain about files in use.
    • This is because the Data Pump bundle patch is marked as a non-binary online installable patch.
    • I can safely apply the patch to a running Oracle home – as long as no Data Pump jobs are running.
    • For cases like this, it’s perfectly fine to use in-place patching.
  5. I complete patching by running Datapatch:
    $ORACLE_HOME/OPatch/datapatch
    
    [output truncated]
    
    Adding patches to installation queue and performing prereq checks...done
    Installation queue:
      No interim patches need to be rolled back
      No release update patches need to be installed
      The following interim patches will be applied:
        37777295 (DATAPUMP BUNDLE PATCH 19.27.0.0.0)
    
    Installing patches...
    Patch installation complete.  Total patches installed: 1
    
    Validating logfiles...done
    Patch 37777295 apply: SUCCESS
      logfile: /u01/app/oracle/cfgtoollogs/sqlpatch/37777295/27238855/37777295_apply_FTEX_2025Jun24_09_10_15.log (no errors)
    SQL Patching tool complete on Tue Jun 24 09:12:19 2025   
    

That’s it! I can now enjoy the many benefits of the Data Pump bundle patch – without any downtime for a single instance database.

Happy patching!

Appendix

What about Oracle RAC Database

Although the Data Pump Bundle Patch is not a RAC Rolling Installable patch, you can still apply it to an Oracle RAC Database following the same approach above.

Simply apply the patch in turn on all nodes in your cluster. You should use OPatch with the -local option and not OPatchAuto. When all nodes are patched, you can run Datapatch.

Is It the Same as an Online or Hot Patch

No, a Non-Binary Online Installable patch is not the same as an Online or Hot patch.

A patch that only affects SQL scripts, PL/SQL, view definitions and XSL style sheets (i.e. non-binary components). This is different than an Online Patch, which can change binary files. Since it does not touch binaries, it can be installed while the database instance is running, provided the component it affects is not in use at the time. Unlike an Online Patch, it does not require later patching with an offline patch at the next maintenance period.

Source: Data Pump Recommended Proactive Patches For 19.10 and Above(Doc ID 2819284.1)

Is the Data Pump Bundle Patch Really That Important

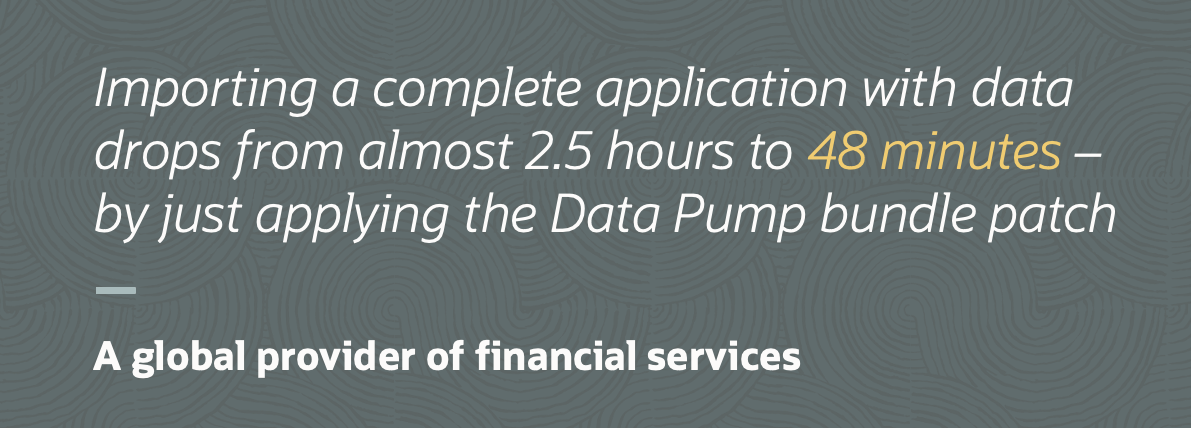
Yes. There are more than 200 fixes for Data Pump. If you start a Data Pump job without it, you might face errors or severe performance issues.

Here’s a statement from a customer, I worked with.

Applying the bundle patch reduced the time for an import to drop from 2,5 hours to 48 minutes

Pump Your Data Pump Skills

Oracle Data Pump is a powerful tool for moving data between databases, but many users only scratch the surface of what it can do. That’s why we created a hands-on lab that will take you beyond the basics and into the details.

Get started with Supercharge data movement with Data Pump.

Learn Oracle Database on Oracle LiveLabs

What Can I Learn

If you invest two hours, this is some of what you get in return:

  • Apply best practices
  • Deal with LOBs effectively
  • Speed up imports using NOVALIDATE constraints
  • Use checksums and encryption to validate your dump files
  • Monitor and trace a job
  • Start a job using the PL/SQL interface

If you’re looking for more details, check out the lab instructions.

Oracle LiveLabs

The lab runs in Oracle LiveLabs.

  • Completely free
  • Nothing to install
  • Runs in a browser

You can check our other labs or flip through the huge catalog of labs on Oracle Database.

Get Started

Start your lab today.

If you want more on Data Pump, check our webinars Data Pump Extreme – Deep Dive with Development and Data Pump Best Practices and Real World Scenarios.

Never Stop Learning