Let me show you how you can migrate an Oracle Database into OCI. My source database is a PDB running on 12.1.0.2. I want to migrate it directly into a 19c CDB. I will show you:
- import via dump file and object storage
- import via database link
This procedure can be used to migrate to:
- VM DB Systems
- Bare Metal DB Systems
- Exadata DB System (ExaCS)
Prerequisites
- I need a ZDM service host. I already blogged about how to create such. The computer is called zdmhost and the user is called zdmuser.
- My source database is a PDB called srcpdb, the CDB is called srccdb, and the host is named srchost. All my data is in the schema SH.
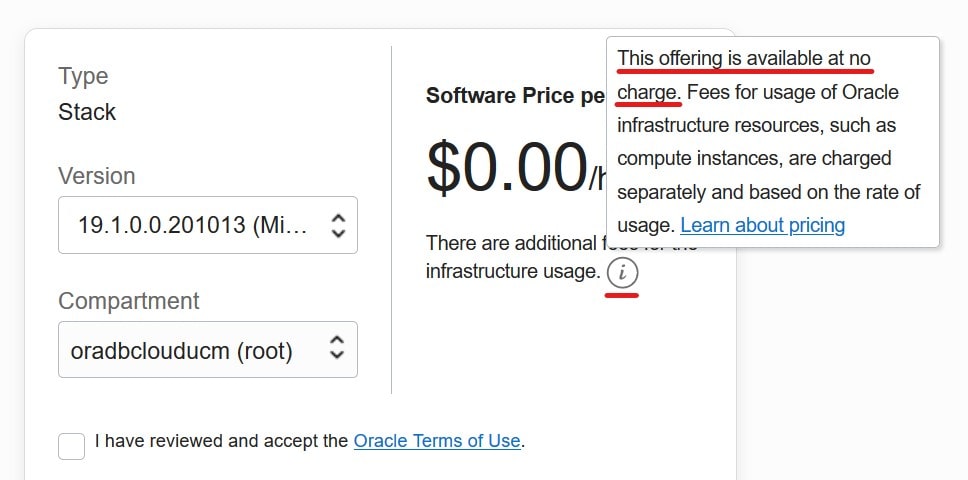
- I have already created a GoldenGate hub as described in this blog post. It is called ogg19cora.
- I want to migrate to a VM DB System, and it is already created. I name it tgthost, the CDB is named tgtcdb and the PDB is named tgtpdb. You can name it whatever you want. Be sure to use ASM as your storage management software.

Prepare Source
My source database is a PDB. I need to prepare the PDB and CDB$ROOT. If you have a non-CDB perform all the steps in your non-CDB unless otherwise written.
First, I prepare the database for GoldenGate replication:
alter session set container=CDB$ROOT;
alter database force logging;
alter database add supplemental log data;
alter system set enable_goldengate_replication=true scope=both;
--At least 2GB
alter system set streams_pool_size=2g scope=both;
alter system set global_names=false;
Create a common user for GoldenGate in CDB$ROOT. Skip this step for non-CDBs:
alter session set container=CDB$ROOT;
create user c##ggadmin identified by <my_secret_pwd> default tablespace users temporary tablespace temp;
grant connect, resource to c##ggadmin;
grant unlimited tablespace to c##ggadmin;
grant select any dictionary to c##ggadmin;
grant create view to c##ggadmin;
grant execute on dbms_lock to c##ggadmin;
exec dbms_goldengate_auth.grant_admin_privilege('c##ggadmin',container=>' all');
Create a user for GoldenGate:
alter session set container=SRCPDB;
create user ggadmin identified by <my_secret_pwd> default tablespace users temporary tablespace temp;
grant connect, resource to ggadmin;
grant unlimited tablespace to ggadmin;
grant select any dictionary to ggadmin;
grant create view to ggadmin;
grant execute on dbms_lock to ggadmin;
exec dbms_goldengate_auth.grant_admin_privilege('ggadmin');
Generate a list of tablespaces that must exist in the target database. Add all schemas to the in-list:
alter session set container=SRCPDB;
select distinct tablespace_name
from (
      select distinct tablespace_name from dba_segments where owner in ('SH')
      union
      select distinct default_tablespace from dba_users where username in ('SH')
      union
      select distinct tablespace_name from dba_ts_quotas where dropped = 'NO' and username in ('SH')
      );
Optional. The best starting point for Data Pump is good and accurate dictionary statistics. This helps Data Pump extract the information as fast as possible:
exec dbms_stats.gather_dictionary_stats;
Via Dump File
I need to create a directory that can be used by Data Pump:
[oracle@srchost]$ mkdir -p /u01/app/oracle/datapump/mydirsrc
Prepare Target
The target database must use a timezone file version that is equal to or higher than the source:
alter session set container=tgtpdb;
select * from v$timezone_file;
Prepare the database for GoldenGate replication:
alter session set container=CDB$ROOT;
alter system set enable_goldengate_replication=true scope=both;
Create a user for GoldenGate:
alter session set container=tgtpdb;
create user ggadmin identified by <my_secret_pwd> default tablespace users temporary tablespace temp;
grant connect, resource to ggadmin;
grant unlimited tablespace to ggadmin;
grant select any dictionary to ggadmin;
grant create view to ggadmin;
grant execute on dbms_lock to ggadmin;
exec dbms_goldengate_auth.grant_admin_privilege('ggadmin');
Allow the GoldenGate user to perform DML (see appendix A):
alter session set container=tgtpdb;
grant insert any table to ggadmin;
grant update any table to ggadmin;
grant delete any table to ggadmin;
I ensure that the list of tablespaces I found in the source database, exist in the target database. If some are missing, I create them. Also, I will extend the data files in advance, so the size is pretty close to the expected end size. For new tablespaces I set the initial size of the data files. If the data files are too small, I will waste a lot of time during import to auto-extend. If I make them too big, I potentially waste space:
alter database datafile '...' resize 100G;
create tablespace ... size 100G ...;
Via Dump File
I need to create a directory that can be used by Data Pump. It will hold the Data Pump dump files and logs:
[oracle@tgthost]$ mkdir -p /u01/app/oracle/datapump/mydirtgt
Via DB Link
When I use a DB link, ZDM insists on using the built-in directory called DATA_PUMP_DIR. I ensure that the database directory exist. Also, I verify that the directory exist in the file system:
select directory_path from dba_directories where directory_name='DATA_PUMP_DIR';
I will do the import directly over a database link. In that case, the target host must be able to resolve the host name of my source database host:
[root@tgthost]$ echo "<source IP address> srchost" >> /etc/hosts
Prepare ZDM
The ZDM service host must be able to resolve the host names of the source and target database host and the GoldenGate hub:
[root@zdmhost]$ echo "<source IP address> srchost" >> /etc/hosts
[root@zdmhost]$ echo "<target IP address> tgthost" >> /etc/hosts
[root@zdmhost]$ echo "<GoldenGate IP address> ogg19cora" >> /etc/hosts
I put my private SSH keys to the source and target database host into ~/.ssh directory. Ensure permissions are set properly:
[zdmuser@zdmhost]$ cp srchost_key_file ~/.ssh
[zdmuser@zdmhost]$ chmod 400 ~/.ssh/srchost_key_file
[zdmuser@zdmhost]$ cp tgthost_key_file ~/.ssh
[zdmuser@zdmhost]$ chmod 400 ~/.ssh/tgthost_key_file
Test the connection. I connect as opc, but you might have a different user. Read more about access to the database host in the documentation:
[zdmuser@zdmhost]$ ssh -i ~/.ssh/srchost_key_file opc@srchost date
[zdmuser@zdmhost]$ ssh -i ~/.ssh/tgthost_key_file opc@tgthost date
If you have configured a proper certificate on your GoldenGate hub, you can jump to the next chapter. If not, read on.
When deployed the GoldenGate hub comes with a self-signed certificate. ZDM will complain about it, because it is considered insecure. For migrations that involve real data, you should use a proper certificate on your GoldenGate hub to ensure your migration is secure. But for tests and demos you might want to disregard the security warning. If so, you can add the self-signed certificate as a trusted one to the Java JDK’s certificate store ($ZDM_HOME/jdk/jre/lib/security/cacerts). You find instructions on how to do so in the MOS support note Zero Downtime Migration – GoldenGate Hub Certificate Known Issues (Doc ID 2768483.1). Use the same host that you added to /etc/hosts.
For your reference, this is the error that ZDM will throw if the certificate is not trusted:
Verifying status of Oracle GoldenGate Microservices at URL "https://..."
PRGZ-1136 : failed to verify configuration and status of Oracle GoldenGate Microservices at URL "https://..."
PRGG-1008 : failed to retrieve detailed information for the health of the Service Manager on Oracle GoldenGate hub "https://..."
PRGG-1001 : HTTP GET request "https://.../services/v2/config/health" failed.
javax.net.ssl.SSLHandshakeException: sun.security.validator.ValidatorException: PKIX path building failed: sun.security.provider.certpath.SunCertPathBuilderException: unable to find valid certification path to requested target
sun.security.validator.ValidatorException: PKIX path building failed: sun.security.provider.certpath.SunCertPathBuilderException: unable to find valid certification path to requested target
PKIX path building failed: sun.security.provider.certpath.SunCertPathBuilderException: unable to find valid certification path to requested target
unable to find valid certification path to requested target
Prepare Response File
I will use a template response file as the basis for my response file:
[zdmuser@zdmhost]$ cp $ZDM_HOME/rhp/zdm/template/zdm_logical_template.rsp ~/logical_online.rsp
[zdmuser@zdmhost]$ cmod 700 ~/logical_online.rsp
Via Dump Files
This is the response file that I end up with (see appendix E for an explanation):
MIGRATION_METHOD=ONLINE_LOGICAL
DATA_TRANSFER_MEDIUM=OSS
SOURCEDATABASE_ADMINUSERNAME=SYSTEM
SOURCEDATABASE_GGADMINUSERNAME=GGADMIN
SOURCEDATABASE_CONNECTIONDETAILS_HOST=srchost
SOURCEDATABASE_CONNECTIONDETAILS_PORT=1521
SOURCEDATABASE_CONNECTIONDETAILS_SERVICENAME=srcpdb....oraclevcn.com
SOURCECONTAINERDATABASE_ADMINUSERNAME=SYSTEM
SOURCECONTAINERDATABASE_GGADMINUSERNAME=C##GGADMIN
SOURCECONTAINERDATABASE_CONNECTIONDETAILS_HOST=srchost
SOURCECONTAINERDATABASE_CONNECTIONDETAILS_PORT=1521
SOURCECONTAINERDATABASE_CONNECTIONDETAILS_SERVICENAME=SRCCDB_fra3dd....oraclevcn.com
TARGETDATABASE_OCID=ocid1.database.oc1.eu-frankfurt-1....
TARGETDATABASE_ADMINUSERNAME=SYSTEM
TARGETDATABASE_GGADMINUSERNAME=GGADMIN
TARGETDATABASE_CONNECTIONDETAILS_HOST=tgthost
TARGETDATABASE_CONNECTIONDETAILS_PORT=1521
TARGETDATABASE_CONNECTIONDETAILS_SERVICENAME=tgtpdb....oraclevcn.com
OCIAUTHENTICATIONDETAILS_USERPRINCIPAL_TENANTID=ocid1.tenancy.oc1....
OCIAUTHENTICATIONDETAILS_USERPRINCIPAL_USERID=ocid1.user.oc1....
OCIAUTHENTICATIONDETAILS_USERPRINCIPAL_FINGERPRINT=58:b9:...
OCIAUTHENTICATIONDETAILS_USERPRINCIPAL_PRIVATEKEYFILE=/home/zdmuser/.oci/oci_api_key.pem
OCIAUTHENTICATIONDETAILS_REGIONID=eu-frankfurt-1
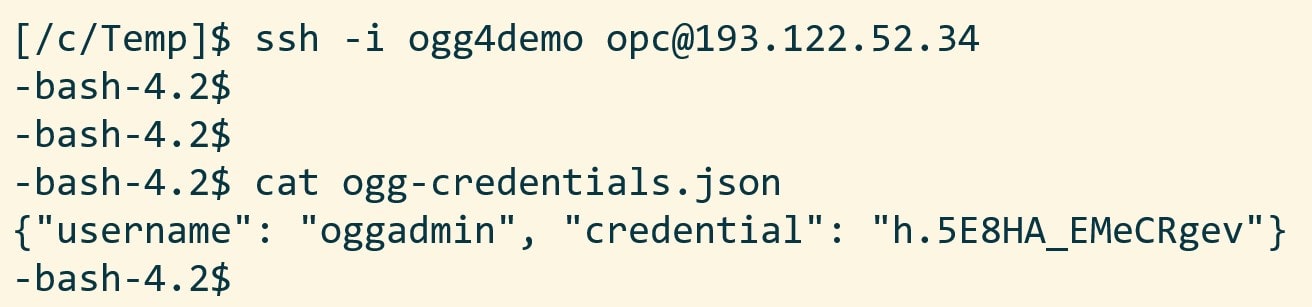
GOLDENGATEHUB_ADMINUSERNAME=oggadmin
GOLDENGATEHUB_URL=https://ogg19cora....oraclevcn.com
GOLDENGATEHUB_SOURCEDEPLOYMENTNAME=Source
GOLDENGATEHUB_TARGETDEPLOYMENTNAME=Target
GOLDENGATEHUB_COMPUTEID=ocid1.instance.oc1.eu-frankfurt-1....
DATAPUMPSETTINGS_JOBMODE=SCHEMA
DATAPUMPSETTINGS_DATAPUMPPARAMETERS_IMPORTPARALLELISMDEGREE=2
DATAPUMPSETTINGS_DATAPUMPPARAMETERS_EXPORTPARALLELISMDEGREE=2
DATAPUMPSETTINGS_IMPORTDIRECTORYOBJECT_NAME=MYDIRTGT
DATAPUMPSETTINGS_IMPORTDIRECTORYOBJECT_PATH=/u01/app/oracle/datapump/mydirtgt
DATAPUMPSETTINGS_EXPORTDIRECTORYOBJECT_NAME=MYDIRSRC
DATAPUMPSETTINGS_EXPORTDIRECTORYOBJECT_PATH=/u01/app/oracle/datapump/mydirsrc
DATAPUMPSETTINGS_DATABUCKET_BUCKETNAME=zdm-staging
DATAPUMPSETTINGS_DATABUCKET_NAMESPACENAME=oradbclouducm
INCLUDEOBJECTS-1=owner:SH
Via DB Link
This is the response file that I end up with (see appendix E for an explanation):
MIGRATION_METHOD=ONLINE_LOGICAL
DATA_TRANSFER_MEDIUM=DBLINK

SOURCEDATABASE_ADMINUSERNAME=SYSTEM
SOURCEDATABASE_GGADMINUSERNAME=GGADMIN
SOURCEDATABASE_CONNECTIONDETAILS_HOST=srchost
SOURCEDATABASE_CONNECTIONDETAILS_PORT=1521
SOURCEDATABASE_CONNECTIONDETAILS_SERVICENAME=srcpdb....oraclevcn.com
SOURCECONTAINERDATABASE_ADMINUSERNAME=SYSTEM
SOURCECONTAINERDATABASE_GGADMINUSERNAME=C##GGADMIN
SOURCECONTAINERDATABASE_CONNECTIONDETAILS_HOST=srchost
SOURCECONTAINERDATABASE_CONNECTIONDETAILS_PORT=1521
SOURCECONTAINERDATABASE_CONNECTIONDETAILS_SERVICENAME=SRCCDB_fra3dd....oraclevcn.com

TARGETDATABASE_OCID=ocid1.database.oc1.eu-frankfurt-1....
TARGETDATABASE_ADMINUSERNAME=SYSTEM
TARGETDATABASE_GGADMINUSERNAME=GGADMIN
TARGETDATABASE_CONNECTIONDETAILS_HOST=tgthost
TARGETDATABASE_CONNECTIONDETAILS_PORT=1521
TARGETDATABASE_CONNECTIONDETAILS_SERVICENAME=tgtpdb....oraclevcn.com

OCIAUTHENTICATIONDETAILS_USERPRINCIPAL_TENANTID=ocid1.tenancy.oc1....
OCIAUTHENTICATIONDETAILS_USERPRINCIPAL_USERID=ocid1.user.oc1....
OCIAUTHENTICATIONDETAILS_USERPRINCIPAL_FINGERPRINT=58:b9:...
OCIAUTHENTICATIONDETAILS_USERPRINCIPAL_PRIVATEKEYFILE=/home/zdmuser/.oci/oci_api_key.pem
OCIAUTHENTICATIONDETAILS_REGIONID=eu-frankfurt-1

GOLDENGATEHUB_ADMINUSERNAME=oggadmin
GOLDENGATEHUB_URL=https://ogg19cora....oraclevcn.com
GOLDENGATEHUB_SOURCEDEPLOYMENTNAME=Source
GOLDENGATEHUB_TARGETDEPLOYMENTNAME=Target
GOLDENGATEHUB_COMPUTEID=ocid1.instance.oc1.eu-frankfurt-1....

DATAPUMPSETTINGS_JOBMODE=SCHEMA
DATAPUMPSETTINGS_DATAPUMPPARAMETERS_IMPORTPARALLELISMDEGREE=2
INCLUDEOBJECTS-1=owner:SH
Perform Evaluation
I am now ready to perform a migration evaluation. It is a dry run of the migration and performs various sanity checks. Nothing is changed during the evaluation:
[zdmuser@zdmhost]$ $ZDM_HOME/bin/zdmcli migrate database \
   -rsp /home/zdmuser/logical_online.rsp \
   -sourcenode srchost \
   -sourcedb SRCCDB_fra3dd \
   -srcauth zdmauth \
   -srcarg1 user:opc \
   -srcarg2 identity_file:/home/zdmuser/.ssh/srchost_key_file \
   -srcarg3 sudo_location:/usr/bin/sudo \
   -targetnode tgthost \
   -tgtauth zdmauth \
   -tgtarg1 user:opc \
   -tgtarg2 identity_file:/home/zdmuser/.ssh/tgthost_key_file \
   -tgtarg3 sudo_location:/usr/bin/sudo \
   -eval
A few comments:
sourcenodeandtargetnodeare the host names of the source and target database host. Those names must be resolvable which I why I put them into /etc/hosts already.sourcedbis the DB_UNIQUE_NAME of the source database.srcarg1is the name of the user that I connect as to the source database host. You might need to change that.srcarg2andtgtarg2is the location of the private key file that I use to connect via SSH.
Next, I am prompted for various passwords and I also get a job ID.

The migration evaluation is then started, and I can use the job ID to monitor it:
[zdmuser@zdmhost]$ $ZDM_HOME/bin/zdmcli query job -jobid <job ID>

My colleague Sinan Petrus Toma showed how to loop:
[zdmuser@zdmhost]$ while :; do $ZDM_HOME/bin/zdmcli query job -jobid <job ID>; sleep 10; done
However, I prefer to get more details, so I tail the ZDM log file instead. This little one-liner finds the newest file and tails it:
[zdmuser@zdmhost]$ tail -n 50 -f "`ls -td /u01/app/oracle/chkbase/scheduled/*log | head -1`"
And I get this level of detail:
zdmhost: 2021-05-28T06:25:25.518Z : Executing phase ZDM_PRE_MIGRATION_ADVISOR
zdmhost: 2021-05-28T06:25:31.883Z : Source PDB name : SRCPDB
zdmhost: 2021-05-28T06:25:32.410Z : Running CPAT (Cloud Premigration Advisor Tool) on the source node srchost ...
zdmhost: 2021-05-28T06:25:38.533Z : Premigration advisor output:
Cloud Premigration Advisor Tool Version 21.0.0
Cloud Premigration Advisor Tool completed with overall result: WARNING
Cloud Premigration Advisor Tool generated report location: /u01/app/oracle/zdm/zdm_SRCCDB_fra3dd_6/out/premigration_advisor_report.json
Start Migration
When the evaluation passes, I can start the real migration. I am re-using the same command line, but I have removed the -eval option. Instead – and this is important – I am using -pauseafter to tell ZDM to pause the migration, just before the switchover takes place. Downtime has not started yet. The database is still open for business, but ZDM will copy the data and start the GoldenGate replication:
[zdmuser@zdmhost]$ $ZDM_HOME/bin/zdmcli migrate database \
   -rsp /home/zdmuser/logical_online.rsp \
   -sourcenode srchost \
   -sourcedb SRCCDB_fra3dd \
   -srcauth zdmauth \
   -srcarg1 user:opc \
   -srcarg2 identity_file:/home/zdmuser/.ssh/srchost_key_file \
   -srcarg3 sudo_location:/usr/bin/sudo \
   -targetnode tgthost \
   -tgtauth zdmauth \
   -tgtarg1 user:opc \
   -tgtarg2 identity_file:/home/zdmuser/.ssh/tgthost_key_file \
   -tgtarg3 sudo_location:/usr/bin/sudo \
   -pauseafter ZDM_MONITOR_GG_LAG
Again, I have to input the passwords as in eval mode. Use the job ID to monitor the progress or tail the log file. Note down the job ID. I need it later on to resume the migration.
When ZDM completes the phase ZDM_MONITOR_GG_LAG it will pause and wait. I can verify it with zdmcli query job:

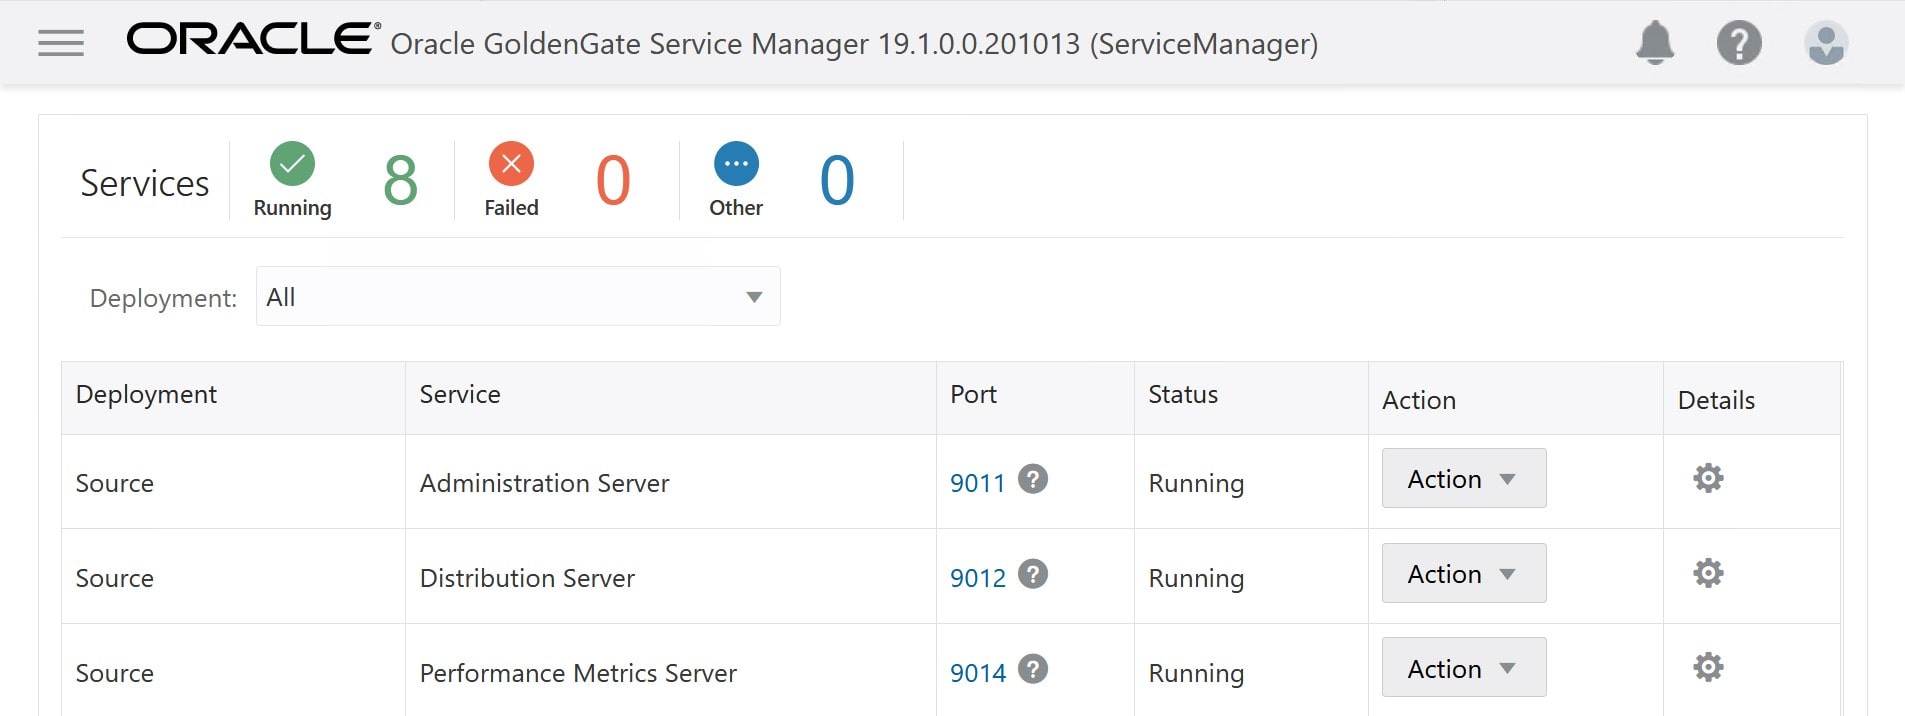
My data has been imported to the target database in OCI, GoldenGate has been configured, and my changes are being replicated. I can monitor the replication by logging on to the GoldenGate hub.
Important: Now, I strongly recommend that you take care of the statistics in your target database:
- Gather dictionary statistics (
DBMS_STATS.GATHER_DICTIONARY_STATS). After the import the data dictionary is now full of a lot of new data – the metadata about your tables and other objects. To ensure a smooth running database, gather dictionary statistics. - Decide on what to do about statistics on user objects as described in this blog post.
Complete Migration
Now it is time to finalize the migration and switch over to the OCI target database. All I need to do, is to resume the paused ZDM job. I use the job ID that was created when I started the migration:
[zdmuser@zdmhost]$ $ZDM_HOME/bin/zdmcli resume job -jobid <job ID>
ZDM will now ensure that all changes are replicated before switching over to the OCI target database. Again, I use the zdmcli query job command to monitor the progress and I can tail the log file. After a short while the migration completes.

That’s it. I have now migrated into OCI! And my new database is running Oracle Database 19c in addition.
I have a few post-migration tasks to carry out:
- I prefer to shut down the source database to ensure that use it anymore.
- ZDM will remove the GoldenGate configuration, but I need to disable the replication in the database:
alter system set enable_goldengate_replication=false scope=both;.
Finally, I would recommend that you take a look at Logical Migration and the Final Touches. A few pointers that can make your migration even more successful.
Other Blog Posts in This Series
- Introduction
- Install And Configure ZDM
- Physical Online Migration
- Physical Online Migration to DBCS
- Physical Online Migration to ExaCS
- Physical Online Migration and Testing
- Physical Online Migration of Very Large Databases
- Logical Online Migration
- Logical Online Migration to DBCS
- Logical Offline Migration to Autonomous Database
- Logical Online Migration and Testing
- Logical Online Migration of Very Large Databases
- Logical Online and Sequences
- Logical Offline Migration How To Minimize Downtime
- Logical Migration and Statistics
- Logical Migration and the Final Touches
- Create GoldenGate Hub
- Monitor GoldenGate Replication
- The Pro Tips
Appendix
A – GoldenGate user privileges
When GoldenGate is replicating changes into the target database, it does so as a regular database user. Thus, it must have privileges to perform DML and DDL on the appropriate schemas. There is a number of ways to do that.
I granted INSERT ANY, UPDATE ANY, and DELETE ANY which will allow me to perform DML in any schema. But that does not cover DDL. If I want to cover that as well there is a number of similar ANY privileges that I would need to grant, like CREATE ANY TABLE, CREATE ANY INDEX and so forth.
But it is discouraged to perform DDL statements during the replication. By default, ZDM does not configure DDL replication. If you want to replicate DDL you need to use the response file parameter GOLDENGATESETTINGS_REPLICATEDDL=true.
Other customers prefer an easier solution and grant PDB_DBA role (or DBA in a non-CDB). Connor McDonald also blogged about a procedure to perform schema grant. If you need inspiration you can have a look at the GGADMIN user in an Autonomous Database. It has PDB_DBA role amongst others.
In the end it comes down to preferences and security regulations in your organization.
B – Update Cloud Premigration Advisor Tool
As part of the migration ZDM will use the Cloud Premigration Advisor Tool (CPAT) to check your source database. The version of CPAT that ships with ZDM is not the latest one. So, you might be missing out on bug fixes and new recommendations. If you want to get the latest and greatest recommendations, I suggest that you manually update the CPAT tool in your ZDM home. You can find instructions in the MOS note Cloud Premigration Advisor Tool (CPAT) Analyzes Databases for Suitability of Cloud Migration (Doc ID 2758371.1)
C – Ignore Certain Data Pump Errors
If there is an error in either your Data Pump export or import, then ZDM will error out. But by default, ZDM will ignore the following errors:
- ORA-31684: Object type string already exists
- ORA-39111: Dependent object type string skipped, base object type string already exists
- ORA-39082 Object type string created with compilation warnings
If you know that your data exports or imports with a specific error and you want to ignore it then you can add your own errors. Please get in touch with My Oracle Support for details.
D – RAC Databases
If your source or target database is a RAC database, then you only need access to one of the nodes. Select the node that you want to use and use the host name and SSH keys to that host.
E – Response File
Allow me to put some comments on the values:
| Setting | Comment |
|---|---|
| DATAPUMPSETTINGS_DATABUCKET_BUCKETNAME | Name of the bucket in OCI Object Storage that will be used as a staging area. I recommend using a separate and dedicated bucket for each migration |
| DATAPUMPSETTINGS_DATABUCKET_NAMESPACENAME | This is your Object Storage Namespace. You find it in the OCI Console, Administration > Tenancy Details |
| DATAPUMPSETTINGS_DATAPUMPPARAMETERS_EXPORTPARALLELISMDEGREE | For on-prem databases set to number of physical cores x 2. For OCI databases set to number of OCPUs. Standard Edition does not allow parallel, so set to 1 |
| DATAPUMPSETTINGS_DATAPUMPPARAMETERS_IMPORTPARALLELISMDEGREE | Set to the number of OCPUs. Standard Edition does not allow parallel, so set to 1 |
| DATAPUMPSETTINGS_JOBMODE | I recommend using SCHEMA. Each schema to import is specified in a separate parameter, INCLUDEOBJECTS-n |
| GOLDENGATEHUB_ADMINUSERNAME | Remember the usernames in GoldenGate are case sensitive |
| GOLDENGATEHUB_SOURCEDEPLOYMENTNAME | The name of the source deployment in GoldenGate hub. If you went with the default value, it should be Source |
| GOLDENGATEHUB_TARGETDEPLOYMENTNAME | The name of the target deployment in GoldenGate hub. If you went with the default value, it should be Target |
| GOLDENGATEHUB_URL | Construct the URL by using the Fully Qualified Domain Name (FQDN), e.g. https://ogg19cora.subx.oraclevcn.com |
| INCLUDEOBJECTS-n | Specify each schema in a separate parameter, example: INCLUDEOBJECTS-1=owner:SH and INCLUDEOBJECTS-2=owner:OE |
| OCIAUTHENTICATIONDETAILS_USERPRINCIPAL_FINGERPRINT | This is the fingerprint of the API keys that you used to configure OCI CLI on the ZDM service host. You can find the fingerprint in the OCI Console. Go to Identify > Users > User Details > API Keys |
| OCIAUTHENTICATIONDETAILS_USERPRINCIPAL_PRIVATEKEYFILE | This is the private key file that you used when you configured OCI CLI on the ZDM service host |
| SOURCECONTAINERDATABASE_CONNECTIONDETAILS_SERVICENAME | This is a service that connects directly into CDB$ROOT. I normally use lsnrctl status to find the name of the service |
| SOURCECONTAINERDATABASE_CONNECTIONDETAILS_SERVICENAME | This is a service that connects directly into CDB$ROOT. I normally use lsnrctl status to find the name of the service |
| SOURCECONTAINERDATABASE_ | The settings apply to my source CDB. If you have a non-CDB simply remove these settings |
| SOURCEDATABASE_CONNECTIONDETAILS_SERVICENAME | This is a service that connects directly into the source PDB (or non-CDB). I normally use lsnrctl status to find the name of the service |
| SOURCEDATABASE_ | These settings apply to my source PDB. Or, to your non-CDB |
| TARGETDATABASE_CONNECTIONDETAILS_SERVICENAME | This is a service that connects directly into the target PDB. I normally use lsnrctl status to find the name of the service |
F – Troubleshooting
If you forget to set global_names=false you might run into this error:
PRGD-1019 : creation of Data Pump job "..." with operation tyoe "IMPORT_ONLINE" failed
PRGD-1016 : stored procedure "DBMS_DATABASE.OPEN" execution as user ...
ORA-20000: Datapump: Unexpected error
ORA-06512: at line 1
ORA-39006: internal error
ORA-06512: at "SYS.DBMS_SYS_ERROR", line 79
ORA-06512: at "SYS.DBMS_DATAPUMP", line 4932
ORA-06512: at "SYS.DBMS_DATAPUMP", line 6844
ORA-06512: at line 1


 You can start and stop the services from the Action drop-down menu.