Classic Preupgrade Tool and Change of Server

In short: If you are using the classic Preupgrade tool (preupgrade.jar) you should ensure that the tool is present in target Oracle Home. The MOS note How to Download and Run Oracle’s Database Pre-Upgrade Utility (Doc ID 884522.1) has been updated to highlight the following: > If the upgrade-to version is 12.2 or higher, then save the file to your target $ORACLE_HOME/rdbms/admin directory and then unzip the file.

You can use this example:

cp preupgrade_19_cbuild_7_lf.zip /u01/app/oracle/product/19.0.0.0/dbhome_1/rdbms/admin/
cd /u01/app/oracle/product/19.0.0.0/dbhome_1/rdbms/admin/
unzip preupgrade_19_cbuild_7_lf.zip

If you are moving the database to a new server as part of the upgrade, ensure that the same version of the Preupgrade tool is used on both the source and target database host.

Background

Lately, I have been involved in a few cases, where customers reported that the classic Preupgrade tool failed during post-upgrade fixups:

@postupgrade_fixups.sql 

DECLARE
*
ERROR at line 1:
ORA-20000: In run_check, Pre-Upgrade Package Requested Check "post_disable_bct_upg" does not exist 
ORA-06512: at line 1 
ORA-06512: at "SYS.DBMS_PREUP", line 293 
ORA-06512: at "SYS.DBMS_PREUP", line 5227 
ORA-06512: at "SYS.DBMS_PREUP", line 3239 
ORA-06512: at line 139 

After guidance from our developers, I learnt that you must extract the classic Preupgrade tool (all the files) into the target Oracle Home before you execute the post-upgrade fixups. Specifically, the files must go into $ORACLE_HOME/rdbms/admin. And you can safely overwrite the existing files. Or, back them up first if you are cautious.

This is especially relevant when you are upgrading the database and moving the database to a new server as well. I have a blog post series on upgrading on VM DB Systems in OCI and they all involve moving the database to a new server. And my initial editions of the posts didn’t have this information.

When you run the classic Preupgrade tool on the source database you should be using the latest version of the tool. You can download it from My Oracle Support. You run the tool on the source database before you shut it down, and move the database to another server. When the upgrade is completed, and you execute the post-upgrade fixups it will use auxiliary packages from the target Oracle Home to make some of the fixups. If the two versions of the auxiliary packages are out of sync, you might run into problems.

One of the developers wrote:

> When postupgrade_fixups.sql is executed, preupgrade_package.sql is executed again, but it is taken from the $ORACLE_HOME/rdbms/admin. As it has a different version, then it is not able to execute the postupgrade fixup

Conclusion

I have been upgrading databases for many years, and I haven’t been aware of this. That I haven’t run into problems before, is just pure luck, I assume.

And remember, always use the latest version of the tool from My Oracle Support.

Further Reading

Using the Pre-Upgrade Information Tool for Oracle Database How to Download and Run Oracle’s Database Pre-Upgrade Utility (Doc ID 884522.1) Database Preupgrade tool check list. (Doc ID 2380601.1)

TDE from a Non-Security Guy

TDE Tablespace Encryption is a must-have in the cloud and something that most of us have to learn. I recently gave a presentation on the basics and what you will need to learn to survive in the cloud.

If you are interested in the recording, it is uploaded to our YouTube channel. It is 43 minutes and no one will probably see it from start to end. But you should really have a look at the Secure External Password Store. It is a really awesome feature. There is a demo right here.

Danish Oracle User Group

The presentation was organized together with the Danish Oracle User Group and I have also published the slides. Please note that some of the content is now out-of-date. With the introduction of isolated keystore mode, using SEPS is now different.

I made a quick poll during the presentation to ask how many years the attendees had worked with databases without worrying about encryption. The answers ranged from eight to 35 (or even 42 – but was that a joke?). The majority was above 20. But with the evolution of the cloud this is about to change. You must learn about encryption these days.

I also mentioned some indications that AES256 is not necessarily more secure than AES128 (the latter being the default encryption algorithm in Oracle Database 19c). I can’t tell you why – that’s way beyond my knowledge – but here are the references:

Also, there was a comment from Asger stating that an encrypted database is hard to compress by your storage system. That is true – normally encryption is bad for your compression ratio. Unless you use compression options that are built into the database. It will compress the data before it is encrypted. You can have your cake – and eat it!

And just a few final words of advice:

  • Always back up your keystore
  • Never delete a keystore
  • Never forget your keystore password

I had much fun talking about TDE. The more I explore, the more I like it. Thanks to those that attended.

How To Gather Fixed Object Statistics After Upgrade With AutoUpgrade

In a previous blog post I wrote about the importance of gathering fixed objects statistics at the right time.

I argued that you could create a scheduler job that re-gathers fixed objects statistics after a number of days (and the database is warmed-up). If you like that idea here is how you can implement that in AutoUpgrade.

Schedule Fixed Objects Statistics Gathering

CDB

First, create a file named /home/oracle/sched_gfos/sched_gfos.sql:

BEGIN
   DBMS_SCHEDULER.CREATE_JOB (
      job_name => '"SYS"."GATHER_FIXED_OBJECTS_STATS_ONE_TIME"',
	  job_type => 'PLSQL_BLOCK',
	  job_action => 'BEGIN DBMS_STATS.GATHER_FIXED_OBJECTS_STATS; END;',
	  start_date => SYSDATE+7,
	  auto_drop => TRUE,
	  comments => 'Gather fixed objects stats after upgrade - one time'   
   );
   DBMS_SCHEDULER.ENABLE (
      name => '"SYS"."GATHER_FIXED_OBJECTS_STATS_ONE_TIME"'
   );
END;
/

Next, create a script named /home/oracle/sched_gfos/sched_gfos.sh. It will run the SQL script in all PDBs including CDB$ROOT, except PDB$SEED. I don’t want to run in PDB$SEED because it is normally in READ ONLY state:

export ORACLE_SID=CDB1
export ORACLE_HOME=/u01/app/oracle/product/19
export PATH=$ORACLE_HOME/bin:$PATH
$ORACLE_HOME/perl/bin/perl $ORACLE_HOME/rdbms/admin/catcon.pl -n 4 -C 'PDB$SEED' -e -b sched_gfos -d /home/oracle/sched_gfos/ sched_gfos.sql

And then I add the following line to my config file:

upg1.after_action=/home/oracle/sched_gfos/sched_gfos.sh

Non-CDB

First, create a file named /home/oracle/sched_gfos/sched_gfos.sql:

BEGIN
   DBMS_SCHEDULER.CREATE_JOB (
      job_name => '"SYS"."GATHER_FIXED_OBJECTS_STATS_ONE_TIME"',
	  job_type => 'PLSQL_BLOCK',
	  job_action => 'BEGIN DBMS_STATS.GATHER_FIXED_OBJECTS_STATS; END;',
	  start_date => SYSDATE+7,
	  auto_drop => TRUE,
	  comments => 'Gather fixed objects stats after upgrade - one time'   
   );
   DBMS_SCHEDULER.ENABLE (
      name => '"SYS"."GATHER_FIXED_OBJECTS_STATS_ONE_TIME"'
   );
END;
/
EXIT

Next, create a script named /home/oracle/sched_gfos/sched_gfos.sh:

export ORACLE_SID=DB1
export ORACLE_HOME=/u01/app/oracle/product/19
export PATH=$ORACLE_HOME/bin:$PATH
sqlplus / as sysdba @/home/oracle/sched_gfos/sched_gfos.sql

And then I add the following line to my config file:

upg1.after_action=/home/oracle/sched_gfos/sched_gfos.sh

Appendix

A previous version of AutoUpgrade gathered fixed objects stats immediately after upgrade. This was not in line with our own recommendations. This has been fixed in AutoUpgrade 19.9.2. Thanks to a keen reader of the blog, Robert Ortel, who made a comment on this.

For reference, here is the workaround I shared to fix the wrong behaviour.

Prevent AutoUpgrade From Gathering Fixed Objects Statistics

AutoUpgrade is by design very flexible and there is a way to override the default fixups. It is very well described in our documentation and Mike Dietrich has a really good blog post about it.

The fixup that you want to override and disable is:

[checkname]          POST_FIXED_OBJECTS
[stage]              POSTCHECKS
[fixup_available]    YES
[runfix]             YES <== Change to NO 
[severity]           RECOMMEND

And you should change runfix to NO. Save the checklist file and reference it from the AutoUpgrade config file using the checklist parameter.

How To Gather Fixed Objects Statistics After Upgrade

Often, I see that re-gathering fixed objects statistics are one of those post-upgrade tasks that is forgotten – or completed in a wrong way. Here’s a quick way to avoid that.

TL;DR

To ensure that fixed objects statistics are gathered after upgrade, run this in your database after upgrade:

BEGIN
   DBMS_SCHEDULER.CREATE_JOB (
      job_name => '"SYS"."GATHER_FIXED_OBJECTS_STATS_ONE_TIME"',
	  job_type => 'PLSQL_BLOCK',
	  job_action => 'BEGIN DBMS_STATS.GATHER_FIXED_OBJECTS_STATS; END;',
	  start_date => SYSDATE+7,
	  auto_drop => TRUE,
	  comments => 'Gather fixed objects stats after upgrade - one time'   
   );
   DBMS_SCHEDULER.ENABLE (
      name => '"SYS"."GATHER_FIXED_OBJECTS_STATS_ONE_TIME"'
   );
END;
/

If you upgrade a CDB run this in all your PDBs and CDB$ROOT. If you upgrade a single PDB, just run this in that specific PDB.

It will create a scheduler job that fires in seven days and gathers fixed objects statistics. Once the job has been started, the job definition will be automatically deleted.

What Is Fixed Objects Statistics

It is important that fixed objects statistics are representative and especially after upgrade they must be re-gathered. A long time ago (in this galaxy, not one far, far away), Maria Colgan made a really good blog post about it. If you want to know more about it, I suggest that you read her blog post.

How Is That Related To Upgrade?

After you have completed the actual database upgrade, there is a significant number of post-upgrade tasks that you have to carry out. There is a whole chapter about it in the Database Upgrade documentation. One of the chapters specifically mention that you have to gather statistics on fixed objects. And the documentation is really clear:

… Oracle strongly recommends that you regather fixed object statistics after you have run representative workloads on Oracle Database.

Normally, this is not a problem because the DBA can just do it right after the upgrade. But …

… Oracle recommends that you do it after the system is in a runtime state, and the most important types of fixed object tables are populated.

So, you should not do this right after the upgrade. The system won’t be in a runtime state or in a warmed-up state. Actually, the database is in the opposite state. It has just been restarted multiple times and there are no representative workloads in the memory structures. Chances are that you could make things even worse.

You must wait until there is a representative workload on the system!

The Solution

The optimal solution is of course that the DBA ensures that these statistics are re-gathered during peak hours or right after. However, this will require some sort of intelligent automation or a DBA that really knows his or her database. These days – with hundreds or thousands of databases under management – that’s hard. And manual tasks have a risk of being forgotten – DBAs are humans after all.

A good solution could be to create a scheduler job that fires a number of days after the upgrade. That should allow for the database to warm up and the memory structures to fill with representative data. It’s not optimal – but for sure it is better than forgetting it.

Upgrading in the cloud – VM DB Systems – 11.2.0.4 to 19c (minimal downtime)

This blog post is a follow-up blog post to a previous post. The procedure I described earlier was a simple approach that required downtime while the entire database is moved from one VM DB System to another. If you have strict requirements to downtime you might not be able to use that approach. In this blog post I will come up with an alternative. I will describe how you can use incremental backups to significantly lower the downtime required. Instead of doing a full backup when the database is down my idea is to:

  • Take a level 0 backup while the source database is up and running
  • Restore the database on target system
  • These two steps take time – but I don’t care because the source database is still up
  • Take incremental backup on source database
  • Recover target database using incremental backup
  • Perform final incremental backup/recover after downtime has started
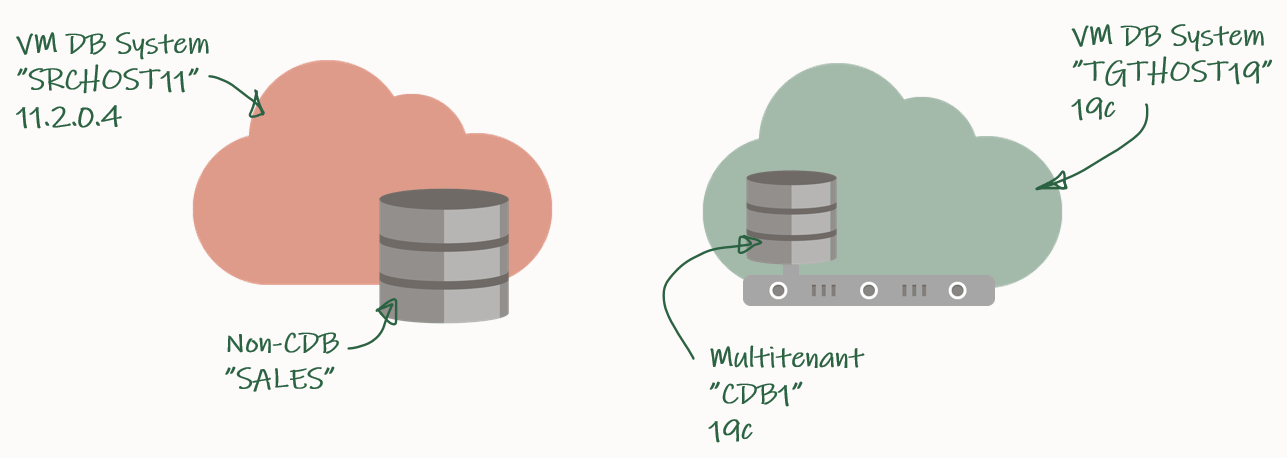
Overview of DB Systems and databases

My source environment is the red environment. The DB System is called SRCHOST11 and it has an 11.2.0.4 database that is called SALES. Due to the restrictions of the VM DB System I have to move the database to a new DB System in order to upgrade it. I have created a brand-new target environment – the green environment – on the release that I want to target. I have named the DB System TGTHOST19 and it has a multitenant database called CDB1. When I am done, the target environment – CDB1 – will also contain a PDB named SALES. The SALES PDB will be the original 11.2.0.4 database that has been upgraded and converted.

For a short period of time I need to spin up a second database instance on the target system. This second – or temporary – instance will be a duplicate of the source database (as non-CDB database) and I will upgrade it to the new release. Then I can plug in the database as a PDB in the precreated CDB database and get rid of the second/temporary instance. You will see how it works later in the blog post.

Backup Database

I need to exchange files between the source and the target systems, and I will use a File Storage service for that. Check out the documentation if you need help creating one – I created one already called upgsales and now I can mount it on my source system:

[opc@srchost11]$ sudo mkdir -p /mnt/upgsales
[opc@srchost11]$ sudo chmod 777 /mnt/upgsales/
[opc@srchost11]$ sudo mount x.x.x.x:/upgsales /mnt/upgsales

While the source database is still open and in use, I will start preparing the backup. First, the password file and wallet:

[oracle@srchost11]$ mkdir -p /mnt/upgsales/backup
[oracle@srchost11]$ cp /opt/oracle/dcs/commonstore/wallets/tde/$ORACLE_UNQNAME/ewallet.p12 /mnt/upgsales/
[oracle@srchost11]$ cp $ORACLE_HOME/dbs/orapw$ORACLE_SID /mnt/upgsales/orapw$ORACLE_SID

If you are really concerned about security, you can copy the wallet file directly to the target system – instead of via the File Storage service. The File Storage service itself is secured, but the fewer places you have a copy of the wallet – the better and the safer, I assume. Further, you can also encrypt traffic to and from the File Storage service.

Next, a PFile:

SALES SQL> CREATE PFILE='/mnt/upgsales/init.ora' FROM SPFILE;

And now I start a level 0 backup:

SALES RMAN> BACKUP INCREMENTAL LEVEL 0 DATABASE FORMAT '/mnt/upgsales/backup/lvl0%U' PLUS ARCHIVELOG FORMAT '/mnt/upgsales/backup/arch%U' ;
SALES RMAN> BACKUP CURRENT CONTROLFILE FORMAT '/mnt/upgsales/backup/controlfile';

Restore Database

On my target system, I need to access the File Storage service as well:

[opc@tgthost19]$ sudo mkdir -p /mnt/upgsales
[opc@tgthost19]$ sudo chmod 777 /mnt/upgsales/
[opc@tgthost19]$ sudo mount x.x.x.x:/upgsales /mnt/upgsales

Next, I will copy the password file and PFile into the target Oracle Home. I need that in order to start the temporary instance. Note, the name of the temporary instance will be SALES – the same as the source database SID:

[oracle@tgthost19]$ cp /mnt/upgsales/init.ora $ORACLE_HOME/dbs/initSALES.ora
[oracle@tgthost19]$ cp /mnt/upgsales/orapwSALES $ORACLE_HOME/dbs/orapwSALES

I also need to copy the wallet:

[oracle@tgthost19]$ mkdir -p /opt/oracle/dcs/commonstore/wallets/tde/SALES
[oracle@tgthost19]$ cp /mnt/upgsales/ewallet.p12 /opt/oracle/dcs/commonstore/wallets/tde/SALES/

And I need to create a directory for audit_file_dest:

[oracle@tgthost19]$ mkdir -p /u01/app/oracle/admin/SALES/adump

Now, I must edit the PFile:

[oracle@tgthost19]$ vi $ORACLE_HOME/dbs/initSALES.ora

And make the following changes:

  • Remove all the double-underscore parameters that contains the memory settings from last restart. That could for instance be SALES.__db_cache_size.
  • Set audit_file_dest=’/u01/app/oracle/admin/SALES/adump’
  • Set control_files=’+RECO/sales/controlfile/current.256.1048859635′
  • Set SALES.sga_target=6G
  • Set SALES.pga_aggregate_target=2G
  • Set db_unique_name=’SALES’

I don’t have an abundance of memory on this system, so I keep the memory settings. Strictly speaking you don’t have to change db_unique_name, but I am doing it so it will be easier to cleanup afterwards.

While I work on the temporary instance, I must shut down the other database – the pre-created one that eventually will hold the PDB. Most likely there is not enough memory on the system to support two databases:

[oracle@tgthost19]$ $ORACLE_HOME/bin/srvctl stop database -db $ORACLE_UNQNAME

Let’s start the temporary instance in NOMOUNT mode. Remember to set the environment:

[oracle@tgthost19]$ export ORACLE_UNQNAME=SALES
[oracle@tgthost19]$ export ORACLE_SID=SALES
[oracle@tgthost19]$ sql / as sysdba

SALES SQL> STARTUP NOMOUNT

And finally, I can start the restore using RMAN. Once the database is mounted I must open the keystore, otherwise, the database can’t perform recovery. Then, I can use the catalog command to find the backup pieces in my staging area. And finally, do the restore:

[oracle@tgthost19]$ rman target /

SALES RMAN> RESTORE CONTROLFILE FROM '/mnt/upgsales/backup/controlfile';
SALES RMAN> ALTER DATABASE MOUNT;
SALES RMAN> sql 'ADMINISTER KEY MANAGEMENT SET KEYSTORE OPEN FORCE KEYSTORE IDENTIFIED BY <SALES-keystore-password>';
SALES RMAN> sql "ADMINISTER KEY MANAGEMENT CREATE LOCAL AUTO_LOGIN KEYSTORE FROM KEYSTORE ''/opt/oracle/dcs/commonstore/wallets/tde/$ORACLE_UNQNAME/'' IDENTIFIED BY <SALES-keystore-password>";
SALES RMAN> CATALOG START WITH '/mnt/upgsales/backup' NOPROMPT;
SALES RMAN> RESTORE DATABASE;

The SALES database is now restored on my target system. I will leave it there – unrecovered and in MOUNT mode so I can apply incremental backups later on.

Incremental Backup/Recover

I can do as many incremental backup/recover cycles as I want. But what matters is that I make one and restore it – as close to the start of the downtime window as possible. This will significantly reduce the time it takes to make the final incremental backup/restore later on.

On my source database, start an incremental backup:

[oracle@srchost11]$ rman target /

SALES RMAN> BACKUP INCREMENTAL LEVEL 1 DATABASE FORMAT '/mnt/upgsales/backup/lvl1%U' PLUS ARCHIVELOG FORMAT '/mnt/upgsales/backup/arch%U';

Now, switch to the target system and recover using that backup. I use the CATALOG command to instruct RMAN to find new backups at the shared file storage.

[oracle@tgthost19]$ rman target /

RMAN SALES> CATALOG START WITH '/mnt/upgsales/backup' NOPROMPT;
RMAN SALES> RECOVER DATABASE;

RMAN will complain about a missing log file. But worry – this is expected and will be fixed later on:

RMAN-00571: ===========================================================
RMAN-00569: =============== ERROR MESSAGE STACK FOLLOWS ===============
RMAN-00571: ===========================================================
RMAN-03002: failure of recover command at 08/28/2020 09:06:51
RMAN-06054: media recovery requesting unknown archived log for thread 1 with sequence 60 and starting SCN of 793358

Down Time Starts

Now it is time to kick users off the database. Your precious downtime starts now.

Prepare Database For Upgrade

In my database I will create some sample data so I can verify the upgrade:

SALES SQL> CREATE USER UPG19 IDENTIFIED BY <secret-password>;
SALES SQL> ALTER USER UPG19 QUOTA UNLIMITED ON USERS;
SALES SQL> CREATE TABLE UPG19.ORDERS(ID NUMBER, CUSTOMER VARCHAR2(50), AMOUNT NUMBER) TABLESPACE USERS;
SALES SQL> INSERT INTO UPG19.ORDERS VALUES(1, 'John', 500);
SALES SQL> COMMIT;

I must prepare my database for upgrade on the source system. When I open the database on the target system, I can only do that in UPGRADE mode (because the database will be restored using 19c Oracle Home). In UPGRADE mode it is impossible to do the pre-upgrade tasks.

I will use the classic preupgrade.jar tool in this demo, but you could also use the newer AutoUpgrade. Always get the latest preupgrade tool from My Oracle Support. Upload the zip file (named preupgrade_19_cbuild_7_lf.zip in my demo) to the source system, extract to $ORACLE_HOME/rdbms/admin and do the pre-upgrade checks:

[oracle@srchost11]$ cp preupgrade_19_cbuild_7_lf.zip $ORACLE_HOME/rdbms/admin
[oracle@srchost11]$ cd $ORACLE_HOME/rdbms/admin
[oracle@srchost11]$ unzip preupgrade_19_cbuild_7_lf.zip

[oracle@srchost11]$ mkdir -p /mnt/upgsales/preupg_logs_SALES
[oracle@srchost11]$ cd /mnt/upgsales/preupg_logs_SALES
[oracle@srchost11]$ $ORACLE_HOME/jdk/bin/java -jar $ORACLE_HOME/rdbms/admin/preupgrade.jar FILE TEXT DIR .

You must upload the same version of the preupgrade tool to the target system before you can run the post-upgrade fixups. Hence, save the zip file so you don’t have to download it again.

Next, I will review the report generated by the tool:

[oracle@srchost11]$ more /mnt/upgsales/preupg_logs_SALES/preupgrade.log

And I can execute the pre-upgrade fixups:

SALES SQL> SET SERVEROUT ON
SALES SQL> @/mnt/upgsales/preupg_logs_SALES/preupgrade_fixups.sql

Final Incremental Backup/Recover

I can now make the last incremental backup on my source system. To be absolutely sure nothing else gets into the source database from now on, I restart the database in restricted mode:

[oracle@srchost11]$ sqlplus / as sysdba

SALES SQL> SHUTDOWN IMMEDIATE
SALES SQL> STARTUP RESTRICT

Then I use RMAN to archive the current log file and start the last backup:

[oracle@srchost11]$ rman target /

SALES RMAN> sql 'ALTER SYSTEM ARCHIVE LOG CURRENT';
SALES RMAN> BACKUP INCREMENTAL LEVEL 1 DATABASE FORMAT '/mnt/upgsales/backup/lvl1%U' PLUS ARCHIVELOG FORMAT '/mnt/upgsales/backup/arch%U';

Now, switch to the target system, catalog the new backups:

[oracle@tgthost19]$ rman target /

RMAN SALES> CATALOG START WITH '/mnt/upgsales/backup' NOPROMPT;

By default, RMAN will try to perform complete recovery. But I can’t do that because I don’t have the online redo logs. I must perform incomplete recovery. That sounds dangerous, but it is not. I archived the current log file after I had ensured that no one was using the system (I started in restricted mode, remember). To perform incomplete recovery, I must know at which sequence to stop. I will use the LIST command in RMAN to do that:

RMAN SALES> LIST BACKUP OF ARCHIVELOG ALL;
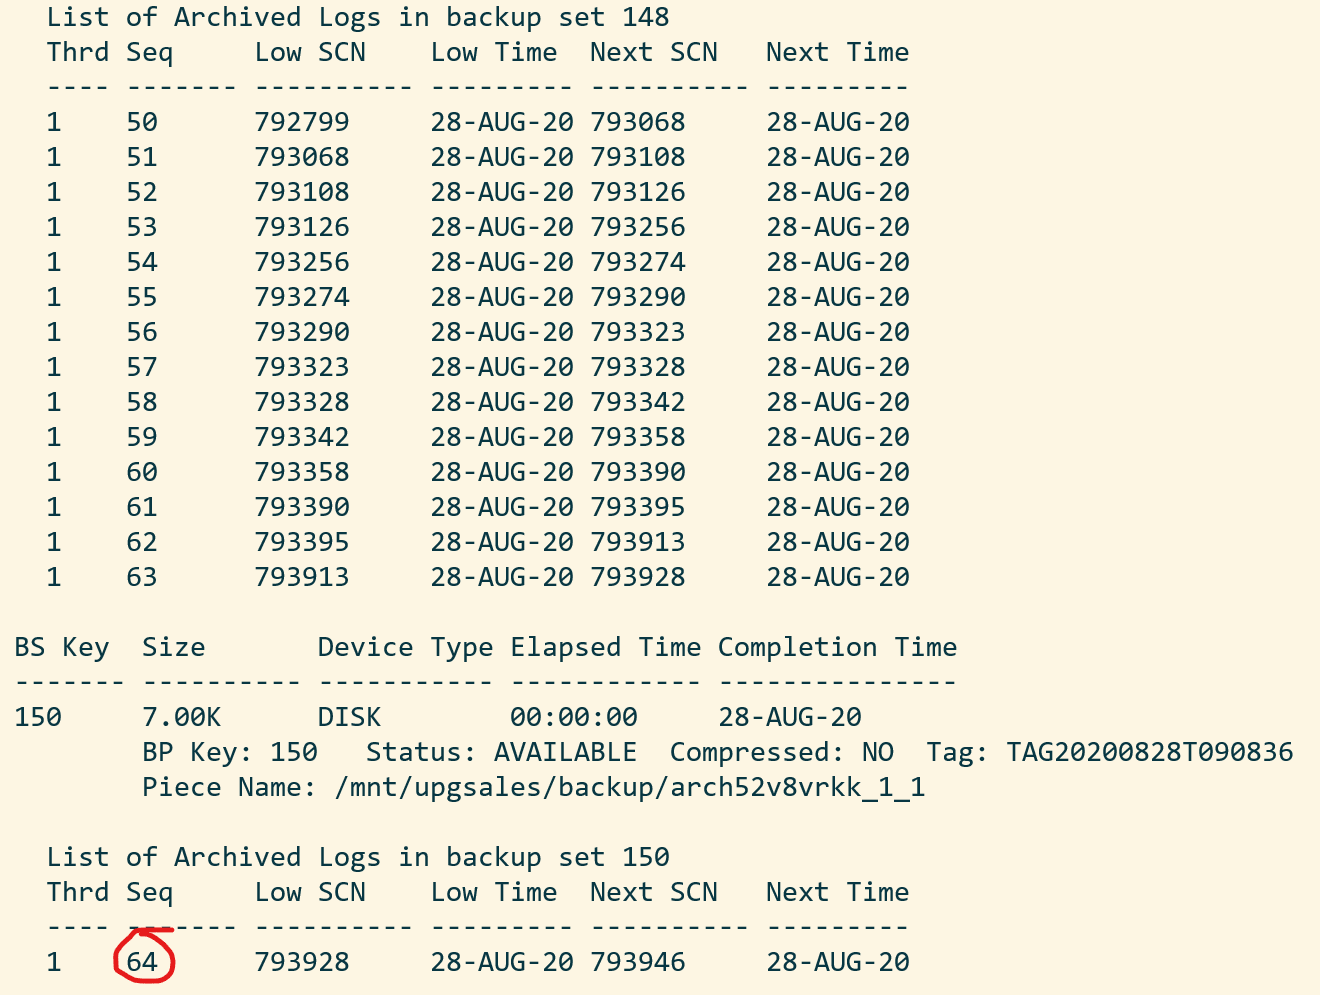
Sample output of RMAN command "list archivelog all" showing which sequence to restore until I take the last available sequence and add one. In my case, I will recover until sequence 65:

RMAN SALES> run {
   SET UNTIL SEQUENCE 65 THREAD 1;
   RECOVER DATABASE;
}

Finally, you can switch to SQLPlus and open the database. You could in theory also do that from RMAN but likely you will hit ORA-04023: Object SYS.STANDARD could not be validated or authorized:

[oracle@tgthost19]$ sqlplus / as sysdba

SALES SQL> ALTER DATABASE OPEN RESETLOGS UPGRADE;

Upgrade Database

I must upload the same version of the preupgrade tool to the target Oracle Home, before I can do the post-upgrade fixups:

[oracle@tgthost19]$ cp preupgrade_19_cbuild_7_lf.zip $ORACLE_HOME/rdbms/admin
[oracle@tgthost19]$ cd $ORACLE_HOME/rdbms/admin
[oracle@tgthost19]$ unzip preupgrade_19_cbuild_7_lf.zip

I can now upgrade the database. Ensure to use the same prompt that has the environment set to the SALES database – the temporary instance:

[oracle@tgthost19]$ mkdir -p /mnt/upgsales/upg_logs_SALES
[oracle@tgthost19]$ dbupgrade -l /mnt/upgsales/upg_logs_SALES

Once the upgrade completes, I will finish with the post-upgrade tasks

SQL> STARTUP

SQL> --Recompile
SQL> @$ORACLE_HOME/rdbms/admin/utlrp
SQL> --Check outcome of upgrade
SQL> @$ORACLE_HOME/rdbms/admin/utlusts.sql
SQL> --Post-upgrade fixups
SQL> @/mnt/upgsales/preupg_logs_$SOURCE_SID/postupgrade_fixups.sql
SQL> --Timezone file upgrade
SQL> SET SERVEROUTPUT ON
SQL> @$ORACLE_HOME/rdbms/admin/utltz_upg_check.sql
SQL> @$ORACLE_HOME/rdbms/admin/utltz_upg_apply.sql

Last, have a look in the report generated by preupgrade.jar to see if there are any post-upgrade tasks that you have to execute:

[oracle@tgthost19]$ more /mnt/upgsales/preupg_logs_SALES/preupgrade.log

Plug In Database

Now that the temporary database is upgraded let’s look at what we need to prepare for the conversion to a PDB. First, I will export the encryption keys:

SALES SQL> ADMINISTER KEY MANAGEMENT EXPORT ENCRYPTION KEYS WITH SECRET "<a-secret-password>" TO '/mnt/upgsales/key_export_SALES' FORCE KEYSTORE IDENTIFIED BY <SALES-keystore-password>;

And then I open the database in READ ONLY mode to create a manifest file. After that, I completely shut down the temporary database and, hopefully, it won’t be needed anymore:

SALES SQL> SHUTDOWN IMMEDIATE
SALES SQL> STARTUP MOUNT
SALES SQL> ALTER DATABASE OPEN READ ONLY;
SALES SQL> EXEC DBMS_PDB.DESCRIBE('/mnt/upgsales/manifest_sales.xml');
SALES SQL> SHUTDOWN IMMEDIATE

Now, I will restart CDB1 which I shut down previously. I will work in CDB1 for the rest of the blog post. Notice, how I am resetting my environment variables to the original values using the source command. You could also open a new SSH session instead. Anyway, just ensure that your environment is now set to work on the original database, CDB1:

[oracle@tgthost19]$ source ~/.bashrc
[oracle@tgthost19]$ env | grep ORA
[oracle@tgthost19]$ $ORACLE_HOME/bin/srvctl start database -db $ORACLE_UNQNAME

I check for plug in compatibility:

CDB1 SQL> SET SERVEROUT ON
CDB1 SQL> BEGIN 
    IF DBMS_PDB.CHECK_PLUG_COMPATIBILITY('/mnt/upgsales/manifest_sales.xml', 'SALES') THEN
        DBMS_OUTPUT.PUT_LINE('SUCCESS');
    ELSE
        DBMS_OUTPUT.PUT_LINE('ERROR');
    END IF;
END;
/

Hopefully, it should read out SUCCESS. If not, you can query PDB_PLUG_IN_VIOLATIONS to find out why:

CDB1 SQL> SELECT type, message, action FROM pdb_plug_in_violations WHERE name='SALES' and status='PENDING';

I can plug in the SALES database as a new PDB – which I also will call SALES. I am using the MOVE keyword to have my data files moved to a directory that matches the naming standard:

CDB1 SQL> CREATE PLUGGABLE DATABASE SALES USING '/mnt/upgsales/manifest_sales.xml' MOVE;
CDB1 SQL> ALTER PLUGGABLE DATABASE SALES OPEN;

I could also use the NOCOPY keyword and just use the data files from where they currently are placed. Later on, I could move the data files to a proper directory that follows the naming standard, and if I were on Enterprise Edition, I could even use online datafile move.

Next, I can switch to the SALES PDB and import my encryption keys from the file I made a little earlier. Note, that I must enter the secret that I used in the export. And now I have to enter the keystore password for CDB1:

CDB1 SQL> ALTER SESSION SET CONTAINER=SALES;
CDB1 SQL> ADMINISTER KEY MANAGEMENT IMPORT ENCRYPTION KEYS WITH SECRET "a-secret-password" FROM '/mnt/upgsales/key_export_SALES' FORCE KEYSTORE IDENTIFIED BY <CDB1-keystore-password> WITH BACKUP;

Be aware, that if your system tablespaces are encrypted, you might have to import the encryption key into CDB$ROOT as well before you can open the database.

Now, it is time to fully convert the database to a PDB:

CDB1 SQL> ALTER SESSION SET CONTAINER=SALES;
CDB1 SQL> @$ORACLE_HOME/rdbms/admin/noncdb_to_pdb.sql
CDB1 SQL> SHUTDOWN IMMEDIATE
CDB1 SQL> STARTUP

Now, check and resolve any plug-in violations:

CDB1 SQL> ALTER SESSION SET CONTAINER=CDB$ROOT;
CDB1 SQL> SELECT type, message, action FROM pdb_plug_in_violations WHERE name='SALES' and status='PENDING';

And finally, ensure that OPEN_MODE=READ WRITE and RESTRICTED=NO. When so, I can save the state of the PDB so it will auto-open whenever the CDB restarts:

CDB1 SQL> ALTER SESSION SET CONTAINER=CDB$ROOT;
CDB1 SQL> SELECT OPEN_MODE, RESTRICTED FROM V$PDBS WHERE NAME='SALES';
CDB1 SQL> ALTER PLUGGABLE DATABASE SALES SAVE STATE;

Verify that my test data exist:

CDB1 SQL> ALTER SESSION SET CONTAINER=SALES;
CDB1 SQL> SELECT * FROM UPG19.ORDERS;

That’s it. The database is now fully upgraded to 19c and converted to a PDB. Be sure to:

  • Start a backup
  • Test your application
  • Adjust your connection strings
  • And what else your procedure mandates

Wrap-Up

Let’s clean up on the target system! I can remove the files and folders that were created to support the temporary instance:

[oracle@tgthost19]$ #audit dest
[oracle@tgthost19]$ rm -rf /u01/app/oracle/admin/SALES/adump
[oracle@tgthost19]$ #diag dest
[oracle@tgthost19]$ rm -rf /u01/app/oracle/diag/rdbms/sales
[oracle@tgthost19]$ #wallet
[oracle@tgthost19]$ rm -rf /opt/oracle/dcs/commonstore/wallets/tde/SALES
[oracle@tgthost19]$ #instance files
[oracle@tgthost19]$ rm $ORACLE_HOME/dbs/initSALES.ora
[oracle@tgthost19]$ rm $ORACLE_HOME/dbs/orapwSALES
[oracle@tgthost19]$ rm $ORACLE_HOME/dbs/spfileSALES.ora
[oracle@tgthost19]$ rm $ORACLE_HOME/dbs/hc_SALES.dat
[oracle@tgthost19]$ rm $ORACLE_HOME/dbs/lkSALES
[oracle@tgthost19]$ #exported master key
[oracle@tgthost19]$ rm /mnt/upgsales/key_export_SALES

Also, since I stored data files in ASM I can delete those as well. Note you have to log on as grid to do that:

[grid@tgthost19]$ asmcmd rm -rf +DATA/SALES
[grid@tgthost19]$ asmcmd rm -rf +RECO/SALES

I can also drop the PDB that gets created automatically when you deploy the new DB System. In my case it is named CDB1_PDB1:

SQL> ALTER PLUGGABLE DATABASE CDB1_PDB1 CLOSE;
SQL> DROP PLUGGABLE DATABASE CDB1_PDB1 INCLUDING DATAFILES;

Also, I can remove the File Storage service that I created. If you want to keep log files from the upgrade (or other files) be sure to copy them somewhere else.

Last, when I am convinced that my upgraded and converted database is doing good, I can terminate the entire source DB system.

Tweaks

If you have a license for any of the Enterprise Edition offerings you might be able to use some of the below features to speed up and backup and recovery. Before using any of them be sure to check the license guide and confirm you have a proper license.

  • Block change tracking – reduces backup time because RMAN doesn’t need to scan the entire database.
  • Parallel backup and recovery – more channels, faster backups and faster restores.
  • Compression – reduces the size of the backups. Since you can apply incremental backups continuously the backup size should be fairly small anyway.

Disclaimer

I am not a backup expert (probably far from). When writing this post I was struggling a lot with missing archive logs. I even had to call an old mentor for advice. But in the end, I decided just to include them in all backups. Possibly, there is a die-hard-RMAN-expert out there that can tell me a better way of doing it. But for sure it doesn’t hurt to include them…

If you come up with a better way, please leave a comment. I would love to learn more.

Conclusion

You can upgrade a 11.2.0.4 database to 19c by moving the database to a new VM DB System. You can reduce downtime by using incremantal backups. You must convert the database to a pluggable database as well because multitenant is the only supported architecture for VM DB Systems on 19c.

References

Other Posts in This Series

Upgrading in the cloud – VM DB Systems – 11.2.0.4 to 19c (simple)

In this blog post I will show you how you can upgrade a database on 11.2.0.4 to 19c. It will also include conversion from the non-CDB architecture into a pluggable database. I have to do this because for VM DB Systems the only supported architecture for 19c is multitenant. Finally, I will use a Standard Edition database to show you something that can be used in any edition.

Overview of DB Systems and databases

My source environment is the red environment. The DB System is called SRCHOST11 and it has an 11.2.0.4 database that is called SALES. Due to the restrictions of the VM DB System I have to move the database to a new DB System in order to upgrade it. I have created a brand-new target environment – the green environment – on the release that I want to target. I have named the DB System TGTHOST19 and it has a multitenant database called CDB1. When I am done, the target environment – CDB1 – will also contain a PDB named SALES. The SALES PDB will be the original 11.2.0.4 database that has been upgraded and converted.

The aim of this blog post is to make it as easy as possible. When I have to move the database from the source DB System to the target DB System, I will just make a full backup that I can restore on the target environment. Obviously, this requires downtime and the amount depends on the size of the database and the transfer speed between the two DB Systems.

My highlevel plan for the task looks like this:

  • Prepare database for upgrade
  • Backup database
  • Restore database
  • Upgrade database
  • Plug in database
  • Wrap-Up

I will elaborate a little on the Restore database part. On VM DB Systems you are not allowed to create your own databases. You can only use the database that gets created when the system is provisioned. However, for a short period of time I need to spin up a second database instance on the target system. This second – or temporary – instance will be a duplicate of the source database (as non-CDB database) and I will upgrade it to the new release. Then I can plug in the database as a PDB in the precreated CDB database, and get rid of the second/temporary instance. You will see how it works later in the blog post.

Prepare Database For Upgrade

I need to exchange files between the source and the target systems and I will use a File Storage service for that. Check out the documentation if you need help creating one – I created one already called upgsales and now I can mount it on my source system:

[opc@srchost11]$ sudo mkdir -p /mnt/upgsales
[opc@srchost11]$ sudo chmod 777 /mnt/upgsales/
[opc@srchost11]$ sudo mount x.x.x.x:/upgsales /mnt/upgsales

In my database I will create some sample data so we can verify the upgrade:

SALES SQL> CREATE USER UPG19 IDENTIFIED BY <secret-password>;
SALES SQL> ALTER USER UPG19 QUOTA UNLIMITED ON USERS;
SALES SQL> CREATE TABLE UPG19.ORDERS(ID NUMBER, CUSTOMER VARCHAR2(50), AMOUNT NUMBER) TABLESPACE USERS;
SALES SQL> INSERT INTO UPG19.ORDERS VALUES(1, 'John', 500);
SALES SQL> COMMIT;

DOWN TIME STARTS NOW – get those users off!

I must prepare my database for upgrade on the source system. When I restore the database on the target system I can only open the database in UPGRADE mode (because the database will be restored using 19c Oracle Home). In UPGRADE mode it is impossible to do the pre-upgrade tasks.

I will use the classic preupgrade.jar tool in this demo, but you could also use the newer AutoUpgrade. Always get the latest preupgrade tool from My Oracle Support. Upload the zip file (named preupgrade_19_cbuild_7_lf.zip in my demo) to the source system, extract to $ORACLE_HOME/rdbms/admin and do the pre-upgrade checks:

[oracle@srchost11]$ cp preupgrade_19_cbuild_7_lf.zip $ORACLE_HOME/rdbms/admin
[oracle@srchost11]$ cd $ORACLE_HOME/rdbms/admin
[oracle@srchost11]$ unzip preupgrade_19_cbuild_7_lf.zip

[oracle@srchost11]$ mkdir -p /mnt/upgsales/preupg_logs_SALES
[oracle@srchost11]$ cd /mnt/upgsales/preupg_logs_SALES
[oracle@srchost11]$ $ORACLE_HOME/jdk/bin/java -jar $ORACLE_HOME/rdbms/admin/preupgrade.jar FILE TEXT DIR .

You must upload the same version of the preupgrade tool to the target system before you can run the post-upgrade fixups. Hence, save the zip file so you don’t have to download it again.

Next, I will review the report generated by the tool:

[oracle@srchost11]$ more /mnt/upgsales/preupg_logs_SALES/preupgrade.log

And I can execute the pre-upgrade fixups:

SALES SQL> SET SERVEROUT ON
SALES SQL> @/mnt/upgsales/preupg_logs_SALES/preupgrade_fixups.sql

Backup Database

The database is now prepared for upgrade. Next, I will get what I need to move the database. First, a PFile:

SALES SQL> CREATE PFILE='/mnt/upgsales/init.ora' FROM SPFILE;

Now I will shut down the database and restart in MOUNT mode. Then I can start a level 0 backup:

SALES SQL> SHUTDOWN IMMEDIATE
SALES SQL> STARTUP MOUNT
SALES SQL> EXIT

[oracle@srchost11]$ rman target /

SALES RMAN> BACKUP DATABASE FORMAT '/mnt/upgsales/db_%U';
SALES RMAN> BACKUP CURRENT CONTROLFILE FORMAT '/mnt/upgsales/cf_%U';

Now we just need the password file and wallet:

[oracle@srchost11]$ cp /opt/oracle/dcs/commonstore/wallets/tde/$ORACLE_UNQNAME/ewallet.p12 /mnt/upgsales/
[oracle@srchost11]$ cp $ORACLE_HOME/dbs/orapw$ORACLE_SID /mnt/upgsales/orapw$ORACLE_SID

If you are really concerned about security you can copy the wallet file directly to the target system – instead of via the File Storage service. The File Storage service itself is secured, but the fewer places you have a copy of the wallet – the better and the safer, I assume. Further, you can also encrypt traffic to and from the File Storage service.

Restore Database

On my target system, I need to access the File Storage service as well:

[opc@tgthost19]$ sudo mkdir -p /mnt/upgsales
[opc@tgthost19]$ sudo chmod 777 /mnt/upgsales/
[opc@tgthost19]$ sudo mount x.x.x.x:/upgsales /mnt/upgsales

Next, I will copy the password file and PFile into the target Oracle Home. I need that in order to start the temporary instance. Note, the name of the temporary instance will be SALES – the same as the source database SID:

[oracle@tgthost19]$ cp /mnt/upgsales/init.ora $ORACLE_HOME/dbs/initSALES.ora
[oracle@tgthost19]$ cp /mnt/upgsales/orapwSALES $ORACLE_HOME/dbs/orapwSALES

I also need to copy the wallet:

[oracle@tgthost19]$ mkdir -p /opt/oracle/dcs/commonstore/wallets/tde/SALES
[oracle@tgthost19]$ cp /mnt/upgsales/ewallet.p12 /opt/oracle/dcs/commonstore/wallets/tde/SALES/

And I need to create a directory for audit_file_dest:

[oracle@tgthost19]$ mkdir -p /u01/app/oracle/admin/SALES/adump

Now, I must edit the PFile:

[oracle@tgthost19]$ vi $ORACLE_HOME/dbs/initSALES.ora

And make the following changes:

  • Remove all the double-underscore parameters that contains the memory settings from last restart. That could for instance be SALES.__db_cache_size.
  • Set audit_file_dest=’/u01/app/oracle/admin/SALES/adump’
  • Set control_files=’+RECO/sales/controlfile/current.256.1048859635′
  • Set SALES.sga_target=6G
  • Set SALES.pga_aggregate_target=2G
  • Set db_unique_name=’SALES’

I don’t have an abundance of memory on this sytem, so I keep the memory settings. Strictly speaking you don’t have to change db_unique_name, but I am doing it so it will be easier to cleanup afterwards.

While I work on the temporary instance I must shut down the other database – the pre-created one that eventually will hold the PDB. Most likely there is not enough memory on the system to support two databases:

[oracle@tgthost19]$ sql / as sysdba

CDB1 SQL> SHUTDOWN IMMEDIATE

Let’s start the temporary instance in NOMOUNT mode. Remember to set the environment:

[oracle@tgthost19]$ export ORACLE_UNQNAME=SALES
[oracle@tgthost19]$ export ORACLE_SID=SALES
[oracle@tgthost19]$ sql / as sysdba

SALES SQL> STARTUP NOMOUNT

And finally, I can start the restore using RMAN. Notice how I am using the NOOPEN keyword which instructs RMAN to keep the database MOUNTED and not try to attempt to open the database. If you try to open the database it will fail because the database must be open in UPGRADE mode. At this point in time, the database itself is on 11.2.0.4 but running on 19c binaries:

[oracle@tgthost19]$ rman auxiliary /

SALES RMAN> DUPLICATE DATABASE TO SALES NOOPEN BACKUP LOCATION '/mnt/upgsales/';

Upgrade Database

RMAN left the database in MOUNTED mode. Before I can open the database I must open the keystore:

SQL> ADMINISTER KEY MANAGEMENT SET KEYSTORE OPEN FORCE KEYSTORE IDENTIFIED BY <source-keystore-password>;

Now, I can open the database and execute the RESETLOGS operation that RMAN didn’t do:

SQL> ALTER DATABASE OPEN RESETLOGS UPGRADE;

I must upload the same version of the preupgrade tool to the target Oracle Home, before I can do the post-upgrade fixups:

[oracle@tgthost19]$ cp preupgrade_19_cbuild_7_lf.zip $ORACLE_HOME/rdbms/admin
[oracle@tgthost19]$ cd $ORACLE_HOME/rdbms/admin
[oracle@tgthost19]$ unzip preupgrade_19_cbuild_7_lf.zip

And I can now upgrade the database:

[oracle@tgthost19]$ mkdir -p /mnt/upgsales/upg_logs_SALES
[oracle@tgthost19]$ dbupgrade -l /mnt/upgsales/upg_logs_SALES

Once the upgrade completes I will finish with the post-upgrade tasks

SQL> STARTUP

SQL> --Recompile
SQL> @$ORACLE_HOME/rdbms/admin/utlrp
SQL> --Check outcome of upgrade
SQL> @$ORACLE_HOME/rdbms/admin/utlusts.sql
SQL> --Post-upgrade fixups
SQL> @/mnt/upgsales/preupg_logs_$SOURCE_SID/postupgrade_fixups.sql
SQL> --Timezone file upgrade
SQL> SET SERVEROUTPUT ON
SQL> @$ORACLE_HOME/rdbms/admin/utltz_upg_check.sql
SQL> @$ORACLE_HOME/rdbms/admin/utltz_upg_apply.sql

Last, have a look in the report generated by preupgrade.jar to see if there are any post-upgrade tasks that you have to execute:

[oracle@tgthost19]$ more /mnt/upgsales/preupg_logs_SALES/preupgrade.log

Plug In Database

Now that the temporary database is upgraded let’s look at what we need to prepare for the conversion to a PDB. First, I will export the encryption keys:

SALES SQL> ADMINISTER KEY MANAGEMENT EXPORT ENCRYPTION KEYS WITH SECRET "<a-secret-password>" TO '/mnt/upgsales/key_export_SALES' FORCE KEYSTORE IDENTIFIED BY <SALES-keystore-password>;

And then I open the database in READ ONLY mode to create a manifest file. After that, I completely shutdown the temporary database and, hopefully, it wont be needed anymore:

SALES SQL> SHUTDOWN IMMEDIATE
SALES SQL> STARTUP MOUNT
SALES SQL> ALTER DATABASE OPEN READ ONLY;
SALES SQL> EXEC DBMS_PDB.DESCRIBE('/mnt/upgsales/manifest_sales.xml');
SALES SQL> SHUTDOWN IMMEDIATE

Now, I will restart CDB1 which I shut down previously. I will work in CDB1 for the rest of the blog post. Notice, how I am resetting my environment variables to the original values using the source command. You could also open a new SSH session instead. Anyway, just ensure that your environment is now set to work on the original database, CDB1:

[oracle@tgthost19]$ source ~/.bashrc
[oracle@tgthost19]$ env | grep ORA
[oracle@tgthost19]$ sql / as sysdba

CDB1 SQL> STARTUP

I check for plug in compability:

CDB1 SQL> SET SERVEROUT ON
CDB1 SQL> BEGIN 
    IF DBMS_PDB.CHECK_PLUG_COMPATIBILITY('/mnt/upgsales/manifest_sales.xml', 'SALES') THEN
        DBMS_OUTPUT.PUT_LINE('SUCCESS');
    ELSE
        DBMS_OUTPUT.PUT_LINE('ERROR');
    END IF;
END;
/

Hopefully, it should read out SUCCESS. If not, you can query PDB_PLUG_IN_VIOLATIONS to find out why:

CDB1 SQL> SELECT type, message, action FROM pdb_plug_in_violations WHERE name='SALES' and status='PENDING';

I can plugin the SALES database as a new PDB – which I also will call SALES. I am using the MOVE keyword to have my data files moved to a directory that matches the naming standard:

CDB1 SQL> CREATE PLUGGABLE DATABASE SALES USING '/mnt/upgsales/manifest_sales.xml' MOVE;
CDB1 SQL> ALTER PLUGGABLE DATABASE SALES OPEN;

I could also use the NOCOPY keyword and just use the data files from where they currently are placed. Later on, I could move the data files to a proper directory that follows the naming standard, and if I were on Enterprise Edition I could even use online datafile move.

Next, I can switch to the SALES PDB and import my encryption keys from the file I made a little earlier. Note, that I must enter the secret that I used in the export. And now I have to enter the keystore password for CDB1:

CDB1 SQL> ALTER SESSION SET CONTAINER=SALES;
CDB1 SQL> ADMINISTER KEY MANAGEMENT IMPORT ENCRYPTION KEYS WITH SECRET "a-secret-password" FROM '/mnt/upgsales/key_export_SALES' FORCE KEYSTORE IDENTIFIED BY <CDB1-keystore-password> WITH BACKUP;

Be aware, that if your system tablespaces are encrypted, you might have to import the encryption key into CDB$ROOT as well before you can open the database.

Now, it is time to fully convert the database into a PDB:

CDB1 SQL> ALTER SESSION SET CONTAINER=SALES;
CDB1 SQL> @$ORACLE_HOME/rdbms/admin/noncdb_to_pdb.sql
CDB1 SQL> SHUTDOWN IMMEDIATE
CDB1 SQL> STARTUP

Now, check and resolve any plug in violations:

CDB1 SQL> ALTER SESSION SET CONTAINER=CDB$ROOT;
CDB1 SQL> SELECT type, message, action FROM pdb_plug_in_violations WHERE name='SALES' and status='PENDING';

And finally, ensure that OPEN_MODE=READ WRITE and RESTRICTED=NO. When so, I can save the state of the PDB so it will auto-open whenever the CDB restarts:

CDB1 SQL> ALTER SESSION SET CONTAINER=CDB$ROOT;
CDB1 SQL> SELECT OPEN_MODE, RESTRICTED FROM V$PDBS WHERE NAME='SALES';
CDB1 SQL> ALTER PLUGGABLE DATABASE SALES SAVE STATE;

That’s it. The database is now fully upgraded to 19c and converted to a PDB. Be sure to:

  • Start a backup
  • Test your application
  • Adjust your connection strings
  • And what else your procedure mandates

Wrap-Up

Let’s clean up on the target system! I can remove the files and folders that were created to support the temporary instance:

[oracle@tgthost19]$ #audit dest
[oracle@tgthost19]$ rm -rf /u01/app/oracle/admin/SALES/adump
[oracle@tgthost19]$ #diag dest
[oracle@tgthost19]$ rm -rf /u01/app/oracle/diag/rdbms/sales
[oracle@tgthost19]$ #wallet
[oracle@tgthost19]$ rm -rf /opt/oracle/dcs/commonstore/wallets/tde/SALES
[oracle@tgthost19]$ #instance files
[oracle@tgthost19]$ rm $ORACLE_HOME/dbs/initSALES.ora
[oracle@tgthost19]$ rm $ORACLE_HOME/dbs/orapwSALES
[oracle@tgthost19]$ rm $ORACLE_HOME/dbs/spfileSALES.ora
[oracle@tgthost19]$ rm $ORACLE_HOME/dbs/hc_SALES.dat
[oracle@tgthost19]$ rm $ORACLE_HOME/dbs/lkSALES
[oracle@tgthost19]$ #exported master key
[oracle@tgthost19]$ rm /mnt/upgsales/key_export_SALES

Also, since I stored data files in ASM I can delete those as well. Note you have to log on as grid to do that:

[grid@tgthost19]$ asmcmd rm -rf +DATA/SALES
[grid@tgthost19]$ asmcmd rm -rf +RECO/SALES

I can also drop the PDB that gets created automatically when you deploy the new DB System. In my case it is named CDB1_PDB1:

SQL> ALTER PLUGGABLE DATABASE CDB1_PDB1 CLOSE;
SQL> DROP PLUGGABLE DATABASE CDB1_PDB1 INCLUDING DATAFILES;

Also, I can remove the File Storage service that I created. If you want to keep log files from the upgrade (or other files) be sure to copy them somewhere else.

Last, when I am convinced that my upgraded and converted database is doing good, I can terminate the entire source DB system.

Tweaks

The transfer speed to the File Storage service is depending on the number of CPUs on your system (more CPUs, more network speed). If the bottleneck is the network, you can try to temporarily add more CPUs.

If you have a license for any of the Enterprise Edition offerings you might be able to use some of the below features to speed up and backup and recovery. Before using any of them be sure to check the license guide and confirm you have a proper license.

  • Parallel backup and recovery – more channels, faster backups and faster restores.
  • Compression – reduces the size of the backups which is beneficial when they are transported over the network.

Conclusion

You can upgrade a 11.2.0.4 database to 19c by moving the database to a new VM DB System. You must convert the database to a pluggable database as well because multitenant is the only supported architecture for VM DB Systems on 19c.

References

Other Posts in This Series

Upgrading in the cloud – VM DB Systems – Transfer Speed

Actually, this blog post doesn’t have anything to do with upgrades – and yet it does. I will be talking about how fast you can transfer data from one VM DB System to another. How does that relate to upgrading? In some situations, it will have a direct impact on the downtime needed to upgrade a VM DB System. Allow me to explain.

For now – when you need to upgrade a VM DB System you have to provision a brand-new system, move the database and then upgrade. The move part is where the transfer speed comes into play. Whether you are transferring a cold copy of the database or doing RMAN backups you will eventually end up with a bottleneck in terms of getting the data from one system to the other. Other more elegant approaches (like having a standby on the new system) can’t be used because of the limitations of VM DB Systems. You are – for instance – not allowed to install any other Oracle Homes on a system than the one that comes when the system is provisioned.

Now back to transfer speed. There are four factors that comes into play:

  • How fast can the source system read the data from disk
  • How fast can the source system send the data over the network
  • How fast can the target system receive the data from the network
  • How fast can the target system write the data to disk

That now boils down to two things:

  • I/O throughput
  • Network speed

I/O Throughput

A VM DB System uses block storage that is allocated when the system is created. The speed of the storage depends on the amount of storage you provision. The more storage, the faster disks.

Storage (GB) Throughput MB/s
256 120
512 240
1024 480
2048 960
4096 1280
6144 1280
8192 1280
10240 1600
12288 1920
14336 2240
16384 2560
18432 2880
20480 3200

You can scale up on storage and get more throughput but be aware that you can’t scale down. Once you have allocated storage there is no way to get rid of it again. So, it is not really suitable for a one-time operation. The good news is that storage scales online so there is no need for downtime to make changes.

But block storage is network attached. So even if the storage is really, you must still have network capacity to send it.

Network Speed

The network speed of your VM DB System depends on the number of OCPUs that you allocate. The more OCPUs, the more network speed.

Shape Throughput MB/s
VM.Standard.2.1 128
VM.Standard.2.2 256
VM.Standard.2.4 512
VM.Standard.2.8 1024
VM.Standard.2.16 2048
VM.Standard.2.24 3200

You can scale up and scale down a VM DB System. So if you need more network throughput for a period of time, you can just scale up. You only need $$$ and downtime. I did some wristwatch measurements and it takes roughly 10 minutes to do a scale operation (either up or down).

Conclusion

If you want to increase the transfer speed between two VM DB Systems, you have two options:

  • Add more OCPUs
  • Add more storage

Adding OCPUs is easy and can be reverted once there is no longer a need for the increased throughput. Storage however can only scale up. Obviously, you have to consider the limits of both the sending system as well as the receiving system.

If you end up in a situation where downtime matters to you and you need to move data between two VM DB Systems, you can increase transfer speeds by scaling up.

But since the storage is network attached, you need twice as much network bandwidth as I/O throughput. The VM must use network bandwidth on receiving the data from the remote host, and again to send the data to the storage system. If you are using ASM with redundancy, you need even more network bandwidth.

I recommend that you test the throughput in your specific system to know the limits, and prove the numbers.

Other Posts in This Series

Upgrade and profile scripts

In short: When upgrading an Oracle database to any release, I recommend to:

  • Remove the glogin.sql file from the target Oracle Home (sqlplus/admin subfolder).
  • Remove login.sql from current directory, if present.
  • Unset SQLPATH environment variable.

That’s it. Shortest blog post ever…

If you want a little more detail, read on. This blog post started by a tweet I saw the other day. I vaguely remember from my days outside Oracle (in the real world) that the upgrade run book I used had similar steps.

What If

What might happen if you don’t do it? AutoUpgrade might fail with:

-------------------------------------------------
Errors in database [CDB1]
Stage     [DBUPGRADE]
Operation [STOPPED]
Status    [ERROR]
Info    [
Error: UPG-1400
UPGRADE FAILED [CDB1]
Cause: Database upgrade failed with errors
For further details, see the log file located at /home/oracle/upg_logs/CDB1/CDB1/100/autoupgrade_20200804_user.log]

A command line upgrade might fail with:

Unexpected error encountered in catctlMain; Error Stack Below; exiting
Died at /u01/app/oracle/product/19/rdbms/admin/catctl.pl line 9188.
 at /u01/app/oracle/product/19/rdbms/admin/catctl.pl line 9188.
    main::catctlDie("\x{a}Unexpected error encountered in catconInit; exiting\x{a} No chil"...) called at /u01/app/oracle/product/19/rdbms/admin/catctl.pl line 37
27
    main::catctlDBLogon("/u01/app/oracle/product/19/rdbms/admin", "/home/oracle/upg_logs/CDB1/CDB1/100/dbupgrade", "catupgrd20200804112601", "CDB\$ROOT", 0, 4) ca
lled at /u01/app/oracle/product/19/rdbms/admin/catctl.pl line 3782
    main::catctlLogon() called at /u01/app/oracle/product/19/rdbms/admin/catctl.pl line 1422
    main::catctlMain() called at /u01/app/oracle/product/19/rdbms/admin/catctl.pl line 1370
    eval {...} called at /u01/app/oracle/product/19/rdbms/admin/catctl.pl line 1368

------------------------------------------------------
CATCTL FATAL ERROR
------------------------------------------------------

And Database Upgrade Assistant might fail like this:
Error message when DBUA fails due to ORA-04023
And when you dig a little further into the logs you will find ORA-04023: Object SYS.STANDARD could not be validated or authorized.

Notice that I write that the error might happen. That is because it all depends on what you put in glogin.sql or login.sql. Some things might work – but some for sure won’t. One thing that is often used is SET SERVEROUT ON and that will for sure break the upgrade.

Why

glogin.sql is officially named site profile script and login.sql is named user profile script. As mentioned in the documentation they are executed each time you start SQL*Plus and can contain anything that you would type in SQL*Plus. A lot of the commands you use in SQL*Plus are using functionality in the database. Take for example SET SERVEROUT ON which uses the database package DBMS_OUTPUT.

When a database is upgraded it is started in UPGRADE mode which changes the behaviour of the database a lot. Further, the upgrade needs to change a lot of functionality in the database. It does so by calling SQL*Plus to execute a script – and it must execute many scripts. Simplified, it is something similar to:

sqlplus / as sysdba @upgrade.sql

If you define a profile script during upgrade you are effectively injecting code to be executed before the upgrade script. And if your profile script is trying to use functionality that doesn’t work for the time being an error occurs. Some scripts are set to exit on SQLERROR which will break the upgrade. Others, ignore the error only to fail later on when the log file is inspected for unexpected error messages.

Imagine what happens when the upgrade tries to replace the package DBMS_OUTPUT and at the same time there is a profile script which sets SET SERVEROUT ON. We are trying to use the same functionality there are being replaced.

How

You can use this little example to avoid the problem:

export TARGET_ORACLE_HOME=/u01/app/oracle/product/19
mv $TARGET_ORACLE_HOME/sqlplus/admin/glogin.sql $TARGET_ORACLE_HOME/sqlplus/admin/glogin.sql.backup
mv login.sql login.sql.backup
export SQLPATH=
# Now start the upgrade using the preferred method
java -jar autoupgrade.jar ....
# Or
cd $TARGET_ORACLE_HOME/bin
dbupgrade
# Or
$TARGET_ORACLE_HOME/bin/dbua

What Now

AutoUpgrade already has a simple sanity check on the glogin.sql but it is not bulletproof. If your glogin.sql is way off you might get an error:
AutoUpgrade error message due to a bad glogin.sql file - Validating glogin.sql file content
The other options (command line or DBUA) have no checks at all.

We are working on making our documentation clearer on this problem, so expect to see an update coming soon.

Zero Downtime Migration – The Pro Tips

Here are my pro tips. It is a little mix and match of all my notes that didn’t make it into the previous blog posts but are still too good to go.

Pro Tip 1: Log Files

If something goes south where can you find the log files? On the ZDM service host:

  • $ZDM_BASE/chkbase/scheduled
  • $ZDM_BASE/crsdata/<hostname>/rhp

On the source and target hosts you can also find additional log files containing all the commands that are executed by ZDM:

  • $ORACLE_BASE/zdm/zdm_<db_unique_name>_<zdm_job_id>/zdm/log

Other sources:

  • Alert log
  • Data Pump process trace file DM00

Data Pump log file

  • Directory referenced by directory object
  • $ORACLE_HOME/rdbms/log/<PDB GUID>

Pro Tip 2: Troubleshooting

When you are troubleshooting it is sometimes useful to get rid of all the log files and have ZDM start all over. Some of the log files get really big and are a hard to read, so I usually stop the ZDM service, delete all the log files, and restart ZDM and my troubleshooting. But only do this if there are no other jobs running than the one you are troubleshooting:

[zdmuser@zdmhost]$ $ZDM_HOME/bin/zdmservice stop
[zdmuser@zdmhost]$ rm $ZDM_BASE/crsdata/*/rhp/rhpserver.log*
[zdmuser@zdmhost]$ rm $ZDM_BASE/chkbase/scheduled/*
[zdmuser@zdmhost]$ $ZDM_HOME/bin/zdmservice start

There are also several chapters on troubleshooting:

Pro Tip 3: Aborting A Job

Sometimes it is useful to completely restart a migration. If a database migration is already registered in ZDM, you are not allowed to specify another migration job. First, you have to abort the existing job, before you can enter a new migration job.

[zdmuser@zdmhost]$ $ZDM_HOME/bin/zdmcli abort job -jobid n

Now, you can use zdmcli migrate database command again.

Pro Tip 4: Show All Phases

A ZDM migration is split into phases, and you can have ZDM pause after each of the phases. The documentation has a list of all phases but you can also get it directly from the ZDM tool itself for a specific migration job:

[zdmuser@zdmhost]$ $ZDM_HOME/bin/zdmcli migrate database \
   -rsp ~/migrate.rsp
   ... \
   ... \
   ... \
   -listphases

Pro Tip 5: Adding Custom Scripts

You can add your own custom scripts to run before or after a phase in the migration job. You can use the -listphases command (described above) to get a list of all the phases. Then decide whether your script should run before or after that phase. This is called an action plug-in. You can bundle those together in a template to make it easier to re-use. If this is something you need, you should dive into the documentation.

If you target an Autonomous Database, you are not allowed to execute scripts on the target database host. Instead, you can .sql scripts.

The environment in which the script starts has some environment variables that you can use, like:

  • Database (ZDM_SRCDB)
  • Oracle Home (ZDM_SRCDBHOME)
  • ZDM Phase (RHP_PHASE)

Pro Tip 6: GoldenGate Health Check

You can use the healthcheck script on the source and target databases – where the extract and replicat process is running. It will give you invaluable information for your troubleshooting experience and it is a good idea to run and attach a health check if you need to contact My Oracle Support. It is like an AWR report but with information specific to Oracle GoldenGate replication.

Generate report by:

  • Installing objects in database: ogghc_install.sql
  • Execute health check: ogghc_run.sql
  • Optionally, clean-up objects: ogghc_uninstall.sql

For GoldenGate MicroServices Architecture find the scripts on the GoldenGate hub:

  • /u01/app/ogg/oraclenn/lib/sql/healthcheck

And run the scripts in source and target database.

Pro Tip 7: Convert From Single Instance To RAC

A useful feature of ZDM is that it can convert a single instance database to a RAC database in OCI. And it is super simple to do that. The only thing you have to do is to create the target placeholder database as a RAC database. ZDM will detect that and take care of the rest.

Finally, let me mention that if the source database is RAC One Node or RAC, then the target database must be a RAC database. Be sure to create the target placeholder database as RAC.

Pro Tip 8: Get Data Pump Log File in Autonomous Database

When you are importing into Autonomous Database, the Data Pump log file is stored in the directory DATA_PUMP_DIR. But in Autonomous Database you don’t have access to the underlying file system, so how do you get the log file? One approach is to upload the log file into Object Storage.

  1. ZDM will create a set of credentials as part of the migration workflow. Find the name of the credentials (or create new ones using DBMS_CLOUD):
select owner, credential_name, username, enabled from dba_credentials;
  1. Find the name of the Data Pump log file:
select * from dbms_cloud.list_files('DATA_PUMP_DIR');
  1. Upload it. If you need help generating the URI, check the documentation:
begin
    DBMS_CLOUD.PUT_OBJECT (
       credential_name => '<your credential>',
       object_uri      => 'https://objectstorage.<region>.oraclecloud.com/n/<namespace>/b/<bucket>/',
       directory_name  => 'DATA_PUMP_DIR',
       file_name       => '<file name>');
end;
/
  1. Your OCI Console to download the Data Pump log file.

Other Blog Posts in This Series

Zero Downtime Migration – Install And Configure ZDM

To use Zero Downtime Migration (ZDM) I must install a Zero Downtime Migration service host. It is the piece of software that will control the entire process of migrating my database into Oracle Cloud Infrastructure (OCI). This post describes the process for ZDM version 21. The requirements are:

  • Must be running Oracle Linux 7 or newer.
  • 100 GB disk space according to the documentation. I could do with way less – basically there should be a few GBs for the binaries and then space for configuration and log files.
  • SSH access (port 22) to each of the database hosts.
  • Recommended to install it on a separate server (although technically possible to use one of the database hosts).

Create and configure server

In my example, I will install the ZDM service host on a compute instance in OCI. There are no requirements to CPU nor memory and ZDM is only acting as a coordinator – all the work is done by the database hosts – so I can use the smallest compute shape available. I was inspired to use OCI CLI after reading a blog post by Michał. I will use that approach to create the compute instance. But I could just as well use the web interface or REST APIs.

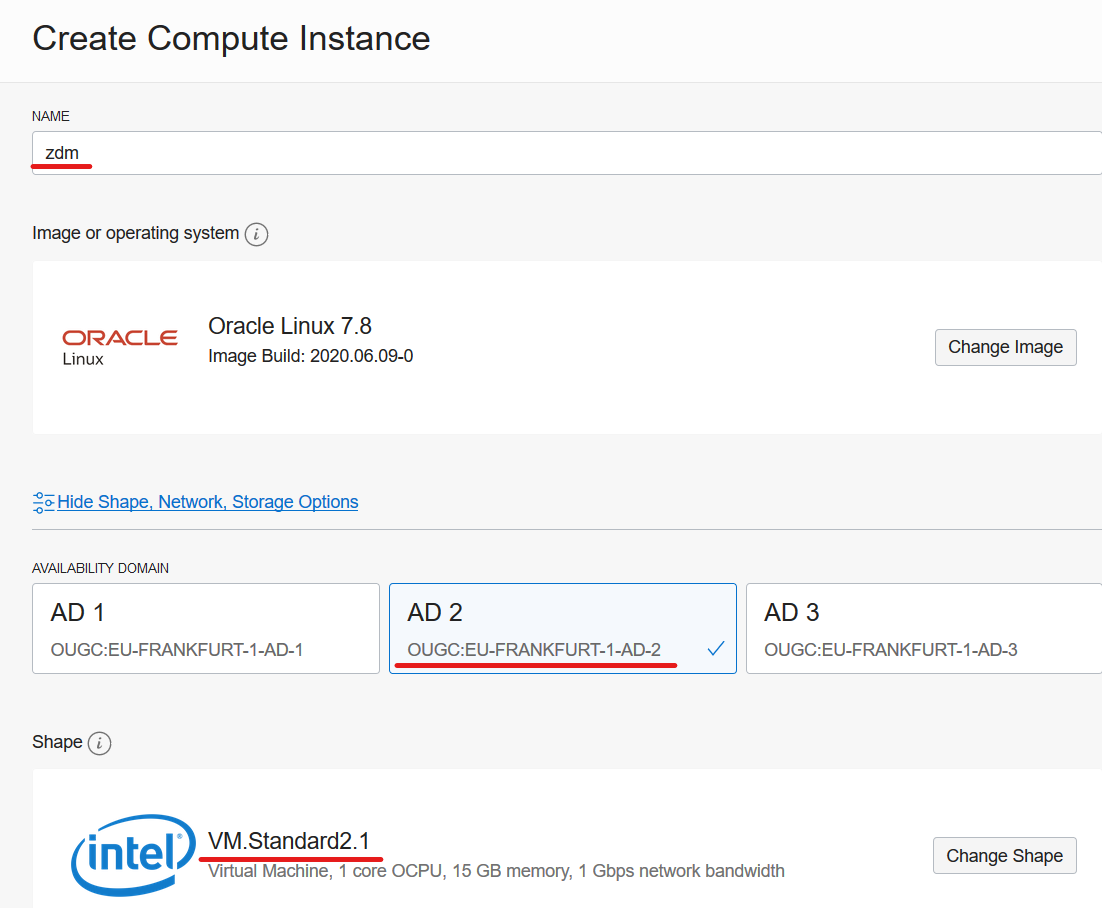
First, I will define a few variables that you have to change to your needs. DISPLAYNAME is the hostname of my compute instance – and also the name I see in the OCI webpage. AVAILDOM is the availability domain into which the compute instance is created. SHAPE is the compute shape:

DISPLAYNAME=zdm
AVAILDOM=OUGC:EU-FRANKFURT-1-AD-1
SHAPE=VM.Standard2.1

When I create a compute instance using the webpage these are the values: Screenshot of OCI webpage where display name, availability domain and shape are shown

In addition, I will define the OCID of my compartment, and also the OCID of the subnet that I will use. I am making sure to select a subnet that I can reach via SSH from my own computer. Last, I have the public key file:

COMPARTMENTID="..."
SUBNETID="..."
PUBKEYFILE="/path/to/key-file.pub"

Because I want to use the latest Oracle Linux 7 image I will query for the OCID of that and store it in a variable:

IMAGEID=`oci compute image list \
   --compartment-id $COMPARTMENTID \
   --operating-system "Oracle Linux" \
   --sort-by TIMECREATED \
   --query "data[?contains(\"display-name\", 'GPU')==\\\`false\\\` && contains(\"display-name\", 'Oracle-Linux-7')==\\\`true\\\`].{DisplayName:\"display-name\", OCID:\"id\"} | [0]" \
   | grep OCID \
   | awk -F'[\"|\"]' '{print $4}'`

And now I can create the compute instance:

oci compute instance launch \
 --compartment-id $COMPARTMENTID \
 --display-name $DISPLAYNAME \
 --availability-domain $AVAILDOM \
 --subnet-id $SUBNETID \
 --image-id $IMAGEID \
 --shape $SHAPE \
 --ssh-authorized-keys-file $PUBKEYFILE \
 --wait-for-state RUNNING

The command will wait until the compute instance is up and running because I used the wait-for-state RUNNING option. Now, I can get the public IP address so I can connect to the instance:

VMID=`oci compute instance list \
  --compartment-id $COMPARTMENTID \
  --display-name $DISPLAYNAME \
  --lifecycle-state RUNNING \
  | grep \"id\" \
  | awk -F'[\"|\"]' '{print $4}'`
oci compute instance list-vnics \
 --instance-id $VMID \
 | grep public-ip \
 | awk -F'[\"|\"]' '{print $4}'

Prepare Host

The installation process is described in the documentation which you should visit to get the latest changes. Log on to the ZDM service host and install required packages (python36 is needed for OCI CLI):

[root@zdm]$ yum -y install \
  glibc-devel \
  expect \
  unzip \
  libaio \
  kernel-uek-devel-$(uname -r) \
  python36

Create a group (ZDM) and user (ZDMUSER). This is only needed on the ZDM Service Host. You don’t need this user on the database hosts:

[root@zdm]$ groupadd zdm ; useradd -g zdm zdmuser

Make it possible to SSH to the box as zdmuser. I will just reuse the SSH keys from opc:

[root@zdm]$ cp -r /home/opc/.ssh /home/zdmuser/.ssh ; chown -R zdmuser:zdm /home/zdmuser/.ssh

Create directory for Oracle software and change permissions:

[root@zdm]$ mkdir /u01 ; chown zdmuser:zdm /u01

Edit hosts file, and ensure name resolution work to the source host (srchost) and target hosts (tgthost):

[root@zdm]$ echo -e "[ip address] srchost" >> /etc/hosts
[root@zdm]$ echo -e "[ip address] tgthost" >> /etc/hosts

Install And Configure ZDM

Now, to install ZDM I will log on as zdmuser and set the environment in my .bashrc file:

[zdmuser@zdm]$ echo "INVENTORY_LOCATION=/u01/app/oraInventory; export INVENTORY_LOCATION" >> ~/.bashrc
[zdmuser@zdm]$ echo "ORACLE_BASE=/u01/app/oracle; export ORACLE_BASE" >> ~/.bashrc
[zdmuser@zdm]$ echo "ZDM_BASE=\$ORACLE_BASE; export ZDM_BASE" >> ~/.bashrc
[zdmuser@zdm]$ echo "ZDM_HOME=\$ZDM_BASE/zdm21; export ZDM_HOME" >> ~/.bashrc
[zdmuser@zdm]$ echo "ZDM_INSTALL_LOC=/u01/zdm21-inst; export ZDM_INSTALL_LOC" >> ~/.bashrc
[zdmuser@zdm]$ source ~/.bashrc

Create directories

[zdmuser@zdm]$ mkdir -p $ORACLE_BASE $ZDM_BASE $ZDM_HOME $ZDM_INSTALL_LOC

Next, download the ZDM software into $ZDM_INSTALL_LOC.

Once downloaded, start the installation:

[zdmuser@zdm]$ ./zdminstall.sh setup \
  oraclehome=$ZDM_HOME \
  oraclebase=$ZDM_BASE \
  ziploc=./zdm_home.zip -zdm

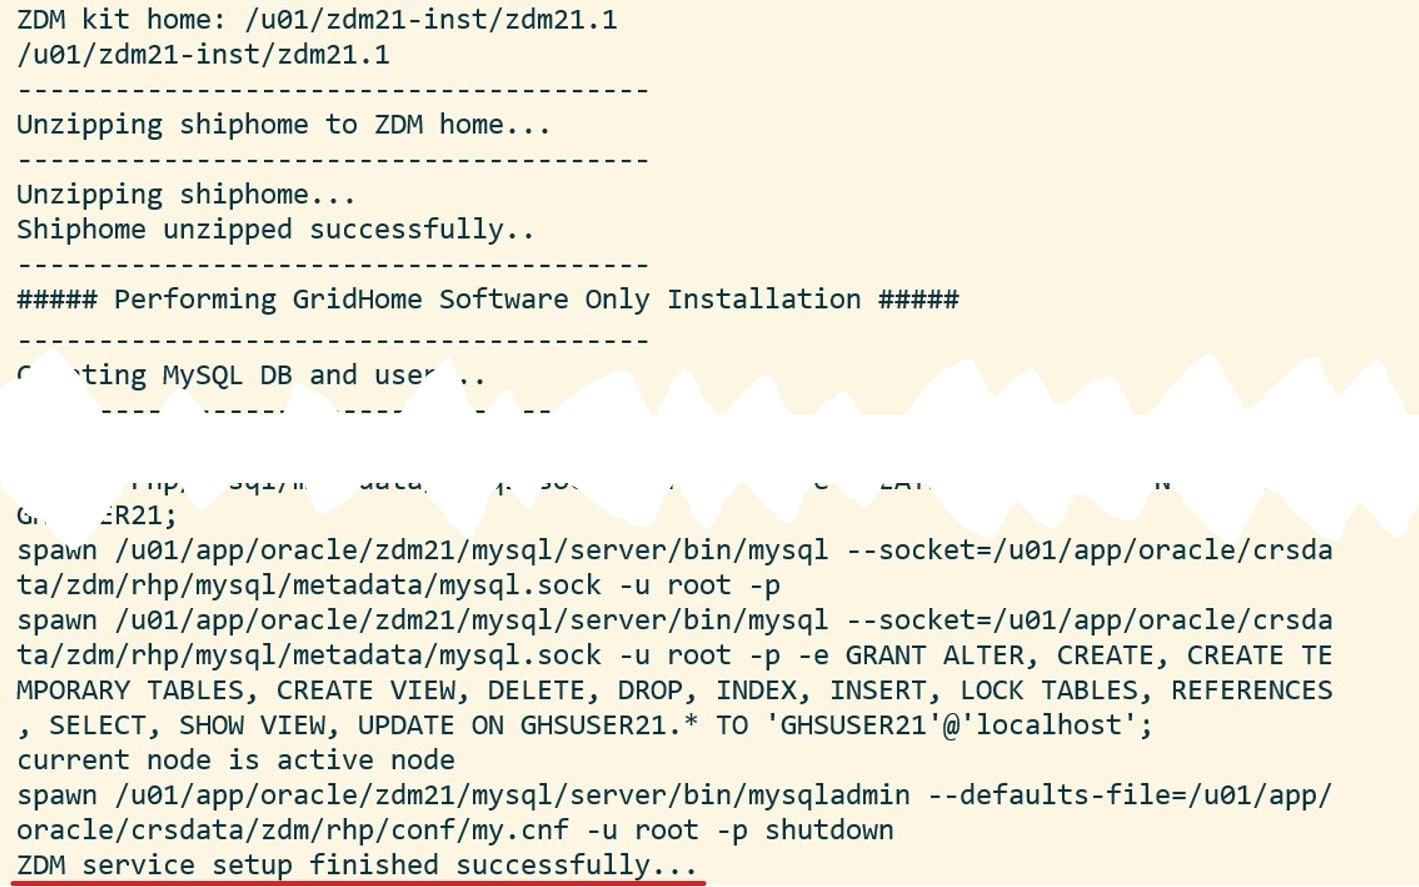
And it should look something similar to this: Screenshot of a successful ZDM installation

Start the ZDM service:

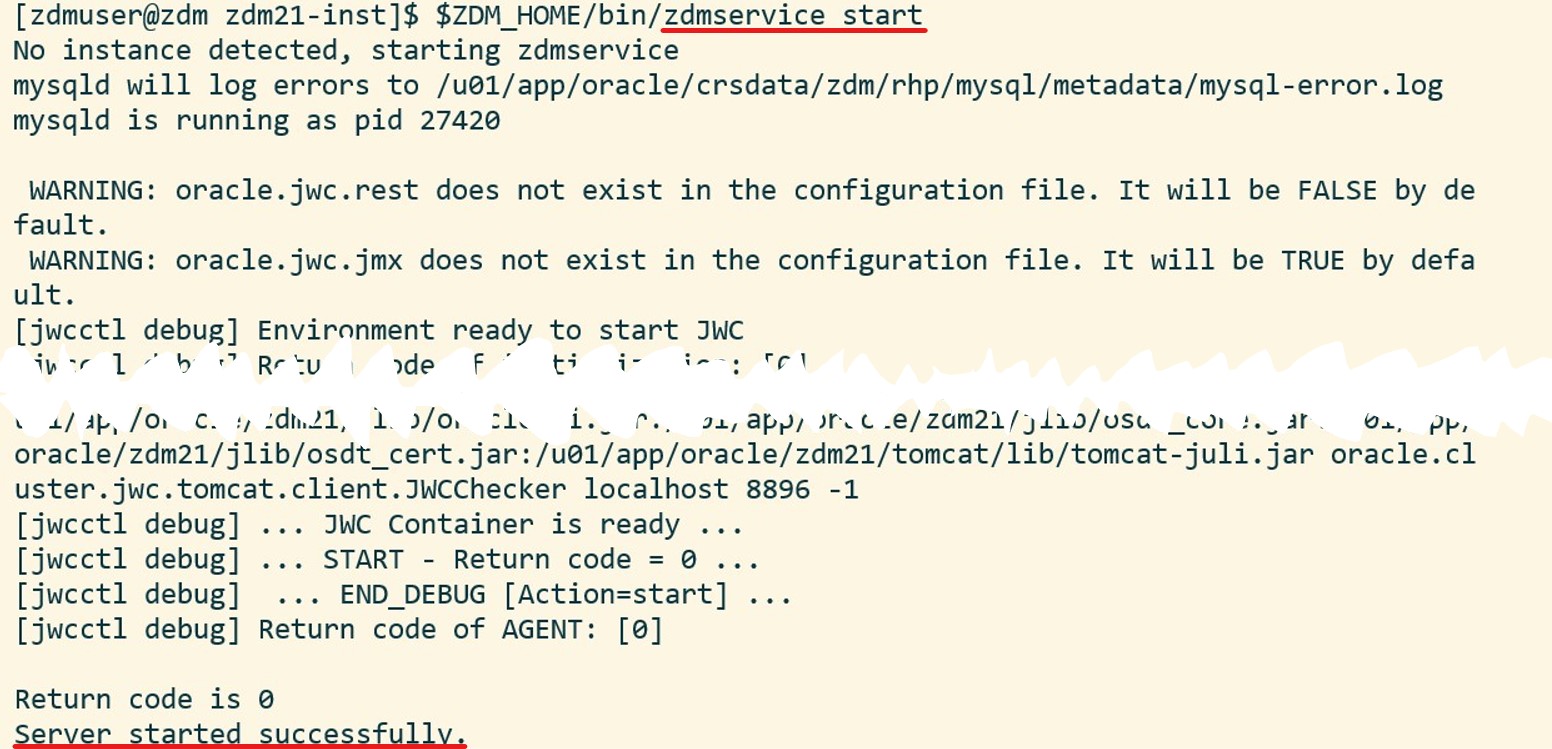
[zdmuser@zdm]$ $ZDM_HOME/bin/zdmservice start

Which should produce something like this: Sample output when starting ZDM service (jwcctl debug jwc) And, optionally, I can verify the status of the ZDM service:

[zdmuser@zdm]$ $ZDM_HOME/bin/zdmservice status

The ZDM service is running

Install OCI CLI

You might need OCI CLI as part of the migration. It is simple to install, so I always do it:

bash -c "$(curl -L https://raw.githubusercontent.com/oracle/oci-cli/master/scripts/install/install.sh)"
oci setup config

You find further instructions here.

Configure Network Connectivity

The ZDM service host must communicate with the source and target hosts via SSH. For that purpose I need private key files to each of the hosts. The private key files must be without a passphrase, in RSA/PEM format and I have to put them at /home/zdmuser/.ssh/[host name]. In my demo, the files are to be named:

  • /home/zdmuser/.ssh/srchost
  • /home/zdmuser/.ssh/tgthost

Ensure that only zdmuser can read them:

[zdmuser@zdm]$ chmod 400 /home/zdmuser/.ssh/srchost
[zdmuser@zdm]$ chmod 400 /home/zdmuser/.ssh/tgthost

Now, I will verify the connection. In my example I will connect to opc on both database hosts, but you can change it if you like:

[zdmuser@zdm]$ ssh -i /home/zdmuser/.ssh/srchost opc@srchost
[zdmuser@zdm]$ ssh -i /home/zdmuser/.ssh/tgthost opc@tgthost

If you get an error when connecting ensure the following:

  • The public key is added to /home/opc/.ssh/authorized_keys on both database hosts (change opc if you are connecting as another user)
  • The key files are in RSA/PEM format (the private key file should start with -----BEGIN RSA PRIVATE KEY-----)
  • The key files are without a passphrase

That’s It

Now, I have a working ZDM service host. I am ready to start the migration process.

It is probably also a good idea to find a way to start the ZDM service automatically, if the server restarts.

There is also a community marketplace image that comes with ZDM already installed. You can read about it here; evaluate it and see if it is something for you.

Other Blog Posts in This Series