
It’s a Wrap – UKOUG Conference ’23

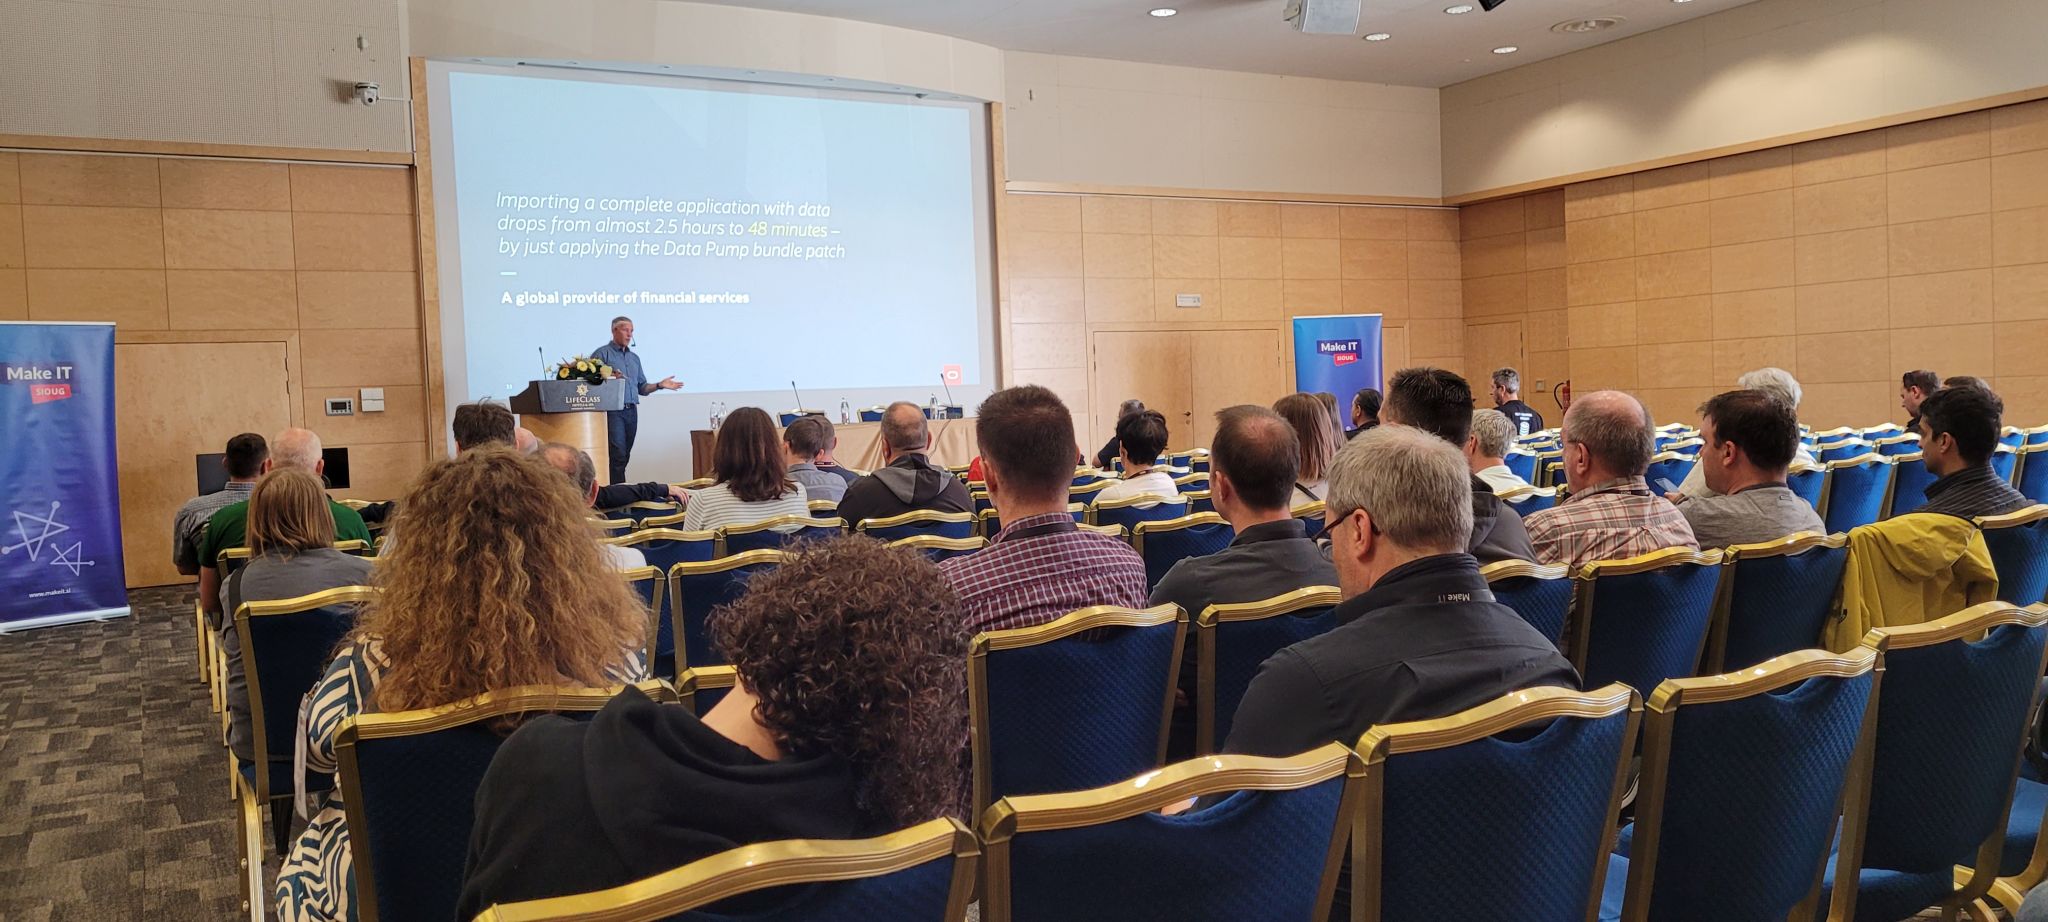
I just finished my presentation at the UKOUG conference. This time, it was held at the Oracle office in Reading. Two intense days full of learning experiences.

It’s the 40th anniversary of UKOUG – that’s truly amazing. The community started when I was just a little child and still lives on today, what a change tech has undergone since then.

Congratulations to the board and the entire community on the 40th anniversary.

The Slides

Patch Me If You Can – Grid Infrastructure Edition

This is a modification of an existing talk about database patching, but mostly on Oracle Grid Infrastructure. But since Oracle Database and Grid Infrastructure go hand in hand, it also has some database stuff.

You should flip through the slides if you work with Oracle Grid Infrastructure. And remember – always patch out-of-place.

Help! My Database is still on 8i!

I also had the opportunity to close the conference with my 8i talk. I really like this talk because it is a walk down memory lane. Plus, it includes demos using Oracle 8i Database. It’s cool to be old school.

For a little laugh, you can find a comparison of Oracle Database releases and mobile phones of the same age.

Thanks

Thanks to the board of UKOUG and the organizers for pulling yet another successful conference. Thanks to the sponsors making it all possible and to everyone who attended my sessions or the conference in general.

It keeps impressing me how much you can learn in such a short time. My head is full. Luckily, the weekend is coming up.

P.S. The chocolate fountain was amazing (see below)!

Pictures

Welcome to UKOUG Conference '23 Presenting Patch Me If You Can - Grid Infrastructure Edition Red Carpet at the 40th Anniversary Celebration The Chocolate Fountain Cool art

How to Clone Oracle Grid Infrastructure Home Using Golden Images

Cloning Oracle Grid Infrastructure (GI) homes is a convenient way of getting a new GI Home. It’s particularly helpful when you need to patch out-of-place using the SwitchGridHome method.

When you have created a new GI home and applied all the necessary patches, you can turn it into a golden image. Later on, you can deploy from that golden image and avoid updating OPatch and apply patches.

How to Create a Golden Image

  1. First, only create a golden image from a freshly installed Oracle Home. Never use an Oracle Home that is already in use. As soon as you start to use an Oracle Home you taint it with various files and you don’t want to carry those files around in your golden image. The golden image must be completely clean.

  2. Then, you create a directory where you can store the golden image:

    export GOLDIMAGEDIR=/u01/app/grid/goldimages
    mkdir -p $GOLDIMAGEDIR
    
  3. Finally, you create the golden image. This command creates a golden image of the specified GI home:

    export NEW_GRID_HOME=/u01/app/19.20.0/grid
    $NEW_GRID_HOME/gridSetup.sh -createGoldImage \
       -destinationLocation $GOLDIMAGEDIR \
       -silent
    

    Be sure to do this before you start to use the new GI home.

  4. The installer creates the golden image as a zip file in the specified directory. The name of the zip file is unique and printed on the console. You can also use the secret parameter -name to specify a name for the zip file. To name the zip file gi_19_20_0.zip:

    $NEW_GRID_HOME/gridSetup.sh -createGoldImage \
       ... \
       -name gi_19_20_0.zip
    

No software must run out of the Oracle Home, when you create the gold image. Don’t use a production Oracle Home. I recommend using a test or staging server instead.

Check the documentation for further details.

How to Deploy from a Golden Image

  1. You must create a folder for the new GI home. You do it as root:

    export NEW_GRID_BASE=/u01/app/19.20.0
    export NEW_GRID_HOME=$NEW_GRID_BASE/grid
    mkdir -p $NEW_GRID_HOME
    chown -R grid:oinstall $NEW_GRID_BASE
    chmod -R 775 $NEW_GRID_BASE
    

    If you install the new GI home in a cluster, you must create the folder on all nodes.

  2. Then, you extract the golden image as grid:

    export NEW_GRID_HOME=/u01/app/19.20.0/grid
    cd $NEW_GRID_HOME
    unzip -q /u01/app/grid/goldimages/gi_19_20_0.zip
    
  3. Finally, you use gridSetup.sh to perform the installation:

    ./gridSetup.sh 
    

That’s it!

I recommend using golden images when you patch out-of-place using the SwitchGridHome method.

Appendix

Oracle Restart vs. Oracle RAC

If you create a GI home for use with Oracle RAC, you can’t use that gold image for a new GI home for Oracle Restart.

Such two GI homes would be very different. You must have two gold images. One for RAC and one for Restart.

Further Reading

Other Blog Posts in This Series

How to Roll Back Oracle Grid Infrastructure 19c Using SwitchGridHome

Let me show you how I roll back a patch from Oracle Grid Infrastructure 19c (GI) using the out-of-place method and the -switchGridHome parameter.

My demo system:

  • Is a 2-node RAC (nodes copenhagen1 and copenhagen2).
  • Runs Oracle Linux.
  • Was patched from 19.17.0 to 19.19.0. I patched both GI and database. Now I want GI back on 19.17.0.

I only roll back the GI home. See the appendix for a few thoughts on rolling back the database as well.

This method works if you applied the patch out-of-place – regardless of whether you used the OPatchAuto or SwitchGridHome method.

Preparation

  • I use the term old Oracle Home for the original, lower patch level Oracle Home.

    • It is my 19.17.0 Oracle Home
    • It is stored in /u01/app/19.0.0.0/grid
    • I refer to this home using the environment variable OLD_ORACLE_HOME
    • This is the Oracle Home that I want to roll back to
  • I use the term new Oracle Home for the higher patch level Oracle Home.

    • It is my 19.19.0 Oracle Home
    • It is stored in /u01/app/19.19.0/grid
    • I refer to this home using the environment variable NEW_ORACLE_HOME
    • This is the Oracle Home that I want to roll back from

Both GI homes are present in the system already.

How to Roll Back Oracle Grid Infrastructure 19c

1. Sanity Checks

I execute the following checks on both nodes, copenhagen1 and copenhagen2. I show the commands for one node only.

  • I verify that the active GI home is the new GI home:

    [grid@copenhagen1]$ export ORACLE_HOME=$NEW_GRID_HOME
    [grid@copenhagen1]$ $ORACLE_HOME/srvm/admin/getcrshome
    
  • I verify that the cluster upgrade state is NORMAL:

    [grid@copenhagen1]$ $ORACLE_HOME/bin/crsctl query crs activeversion -f
    
  • I verify all CRS services are online:

    [grid@copenhagen1]$ $ORACLE_HOME/bin/crsctl check cluster
    
  • I verify that the cluster patch level is 19.19.0 – the new patch level:

    [grid@copenhagen1]$ $ORACLE_HOME/bin/crsctl query crs releasepatch
    

2. Cluster Verification Utility

  • I use Cluster Verification Utility (CVU) to verify that my cluster meets all prerequisites for a patch/rollback. I do this on one node only:
    [grid@copenhagen1]$ $CVU_HOME/bin/cluvfy stage -pre patch
    
    • You can find CVU in the GI home, but I recommend always getting the latest version from My Oracle Support.

3. Roll Back Node 1

The GI stack (including database, listener, etc.) needs to restart on each instance. But I do the rollback in a rolling manner, so the database stays up all the time.

  • I drain connections from the first node, copenhagen1.

  • I unlock the old GI home, root:

    [root@copenhagen1]$ export OLD_GRID_HOME=/u01/app/19.0.0.0/grid
    [root@copenhagen1]$ cd $OLD_GRID_HOME/crs/install
    [root@copenhagen1]$ ./rootcrs.sh -unlock -crshome $OLD_GRID_HOME
    
    • This is required because the next step (gridSetup.sh) runs as grid and must have access to the GI home.
    • Later on, when I run root.sh, the script will lock the GI home.
  • I switch to old GI home as grid:

    [grid@copenhagen1]$ export OLD_GRID_HOME=/u01/app/19.0.0.0/grid
    [grid@copenhagen1]$ export ORACLE_HOME=$OLD_GRID_HOME
    [grid@copenhagen1]$ export CURRENT_NODE=$(hostname)
    [grid@copenhagen1]$ $ORACLE_HOME/gridSetup.sh \
       -silent -switchGridHome \
       oracle.install.option=CRS_SWONLY \
       ORACLE_HOME=$ORACLE_HOME \
       oracle.install.crs.config.clusterNodes=$CURRENT_NODE \
       oracle.install.crs.rootconfig.executeRootScript=false
    
  • I complete the switch by running root.sh as root:

    [root@copenhagen1]$ export OLD_GRID_HOME=/u01/app/19.0.0.0/grid
    [root@copenhagen1]$ $OLD_GRID_HOME/root.sh
    
    • This step restarts the entire GI stack, including resources it manages (databases, listener, etc.). This means downtime on this node only. The remaining nodes stay up.
    • In that period, GI marks the services as OFFLINE so users can connect to other nodes.
    • If my database listener runs out of the Grid Home, GI will move it to the new Grid Home, including copying listener.ora.
    • In the end, GI restarts the resources (databases and the like).
  • I update any profiles (e.g., .bashrc) and other scripts referring to the GI home.

  • I verify that the active GI home is the new GI home:

    [grid@copenhagen1]$ $OLD_ORACLE_HOME/srvm/admin/getcrshome
    
  • I verify that the cluster upgrade state is ROLLING PATCH:

    [grid@copenhagen1]$ $OLD_ORACLE_HOME/bin/crsctl query crs activeversion -f
    
  • I verify all CRS services are online:

    [grid@copenhagen1]$ $OLD_ORACLE_HOME/bin/crsctl check cluster
    
  • I verify all resources are online:

    [grid@copenhagen1]$ $OLD_ORACLE_HOME/bin/crsctl stat resource -t 
    
  • I verify that the GI patch level is 19.17.0 – the old patch level:

    [grid@copenhagen1]$ $OLD_ORACLE_HOME/bin/crsctl query crs releasepatch
    

4. Roll Back Node 2

  • I roll back the second node, copenhagen2, using the same process as the first node, copenhagen1.
    • I double-check that the CURRENT_NODE environment variable gets updated to copenhagen2.
    • When I use crsctl query crs activeversion -f to check the cluster upgrade state, it will now be back in NORMAL mode, because copenhagen2 is the last node in the cluster.

5. Cluster Verification Utility

  • I use Cluster Verification Utility (CVU) again. Now I perform a post-rollback check. I do this on one node only:
    [grid@copenhagen1]$ $CVU_HOME/bin/cluvfy stage -post patch
    

That’s it!

My cluster is now operating at the previous patch level.

Appendix

SwitchGridHome Does Not Have Dedicated Rollback Functionality

OPatchAuto has dedicated rollback functionality that will revert the previous patch operation. Similar functionality does not exist when you use the SwitchGridHome method.

This is described in Steps for Minimal Downtime Grid Infrastructure Out of Place ( OOP ) Patching using gridSetup.sh (Doc ID 2662762.1). To rollback, simply switch back to the previous GI home using the same method as for the patch.

There is no real rollback option as this is a switch from OLD_HOME to NEW_HOME To return to the old version you need to recreate another new home and switch to that.

Should I Roll Back the Database as Well?

This post describes rolling back the GI home only. Usually, I recommend keeping the database and GI patch level in sync. If I roll back GI, should I also roll back the database?

The short answer is no!

Keeping the GI and database patch in sync is a good idea. But when you need to roll back, you are in a contingency. Only roll back the component that gives you problems. Then, you will be out of sync for a period of time until you can get a one-off patch or move to the next Release Update. Being in this state for a shorter period is perfectly fine – and supported.

Other Blog Posts in This Series

Files to Move During Oracle Grid Infrastructure Out-Of-Place Patching

Like with Oracle Database, I strongly recommend patching Oracle Grid Infrastructure using the out-of-place method. It has many advantages over in-place patching

A while ago, I wrote about the files you must move during Oracle Database out-of-place patching. There are quite many files to consider. A blog reader left a comment asking about a similar blog post for Oracle Grid Infrastructure, so here it is.

Listener

The listener runs out of the GI home. When you patch out-of-place, the listener must also start in the new GI home.

If you patch using any of the below methods, it will move the listener for you:

The two methods also move listener.ora as part of the process.

If you use opatchauto you should note that the tool moves listener.ora when preparing the new GI using opatchauto apply ... -prepare-clone. You can run that command hours or days before you move the listener. If you add things to listener.ora in between, you must also add it to listener.ora in the new GI home.

Conclusion

There is really nothing to worry about when you patch Oracle Grid Infrastructure out-of-place. The above-mentioned two tools will take care of it for you.

Happy Patching

A Rare Insight Into the Oracle Database Development Process

Have you ever wondered why Oracle didn’t include your bug fix in the next Release Update? Or what good is it that your bug is fixed in 23.1 when Oracle Database isn’t released yet?

We’ll explain this – and much more in our next webinar.

  • Episode 17: From SR to Patch June 22, 2023, 16:00 CEST

Oracle Database 19c Upgrade Virtual Classroom

Mike and I will show you what happens behind the scenes, from opening a service request to the final delivery of a fix. This is your rare chance to get insights into the Oracle Database development process from insiders. And even if you are a long-time Oracle expert, you will still learn something new.

You can sign up here.

But I Can’t Make It

Don’t worry. As usual, we will publish the recording on our YouTube channel and share the slides with you. Keep an eye out on my Webinars page. On the same page, you can also watch all previous webinars and get the slides.

But it’s better to watch it live. You can ask questions to us live. I promise you; we won’t leave until we have answered all your questions.

All Tech, No Marketing

Remember, our mantra is: All tech, no marketing.

I hope to see you there!

How to Apply Patches Out-of-place to Oracle Grid Infrastructure and Oracle Data Guard Using Standby-First

I strongly recommend that you always patch out-of-place. Here’s an example of how to do it on Oracle Grid Infrastructure (GI) and Oracle Data Guard using Standby-First Patch Apply.

Standby-First Patch Apply allows you to minimize downtime to the time it takes to perform a Data Guard switchover. Further, it allows you to test the apply mechanism on the standby database by temporarily converting it into a snapshot standby database.

The scenario:

  • Oracle Grid Infrastructure 19c and Oracle Database 19c
  • Patching from Release Update 19.17.0 to 19.19.0
  • Vertical patching – GI and database at the same time
  • Data Guard setup with two RAC databases
    • Cluster 1: copenhagen1 and copenhagen2
    • Cluster 2: aarhus1 and aarhus2
    • DB_NAME: CDB1
    • DB_UNIQUE_NAME: CDB1_COPENHAGEN and CDB1_AARHUS
  • Using Data Guard broker
  • Patching GI using SwitchGridHome method

Let’s get started!

Step 1: Prepare

I can make the preparations without interrupting the database.

  • I ensure my environment meets the requirements for Standby-First Patch Apply.

  • I deploy new GI homes to all four hosts.

    • I use the SwitchGridHome method.
    • Very important: I only perform step 1 (Prepare a New Grid Home).
    • I apply the Release Update 19.19.0 as part of the deployment using gridSetup.sh ... -applyRU ... -applyOneOffs as described in the blog post.
  • I deploy new database homes to all four hosts.

  • I also recompile invalid objects. This can make it easier for Datapatch later in the process:

    PRIMARY SQL> @?/rdbms/admin/utlrp
    

Step 2: Restart Standby in New Oracle Homes

Now, I can move the standby database to the new GI and database homes.

  • On the standby hosts, aarhus1 and aarhus2, I first move the database configuration files from the old database home to the new one.

  • I change the database configuration in GI. Next time the database restarts, it will be in the new Oracle Home:

    [oracle@aarhus1]$ $OLD_ORACLE_HOME/bin/srvctl modify database \
       -db $ORACLE_UNQNAME \
       -oraclehome $NEW_ORACLE_HOME
    
  • I switch to the new GI on all standby hosts, aarhus1 and aarhus2, by executing step 2 (Switch to the new Grid Home) of the SwitchGridHome method.

    • It involves running gridSetup.sh ... -switchGridHome and root.sh.
    • You can perform the switch in a rolling manner or all at once.
    • The switch restarts the standby database instance. The standby database instance restarts in the new Oracle Home.
    • If the profile of grid (like .bashrc) sets the ORACLE_HOME environment variable, I ensure to update it.
  • If I had multiple standby databases, I would process all standby databases in this step.

Step 3: Test Standby Database

This is an optional step, but I recommend that you do it.

  • I convert the standby database (CDB1_AARHUS) to a snapshot standby database:
    DGMGRL> convert database CDB1_AARHUS to snapshot standby;
    
  • I test Datapatch on the standby database. It is important that I run the command on the standby database:
    [oracle@aarhus1]$ $ORACLE_HOME/OPatch/datapatch -verbose
    
  • I can also test my application on the standby database.
  • At the end of my testing, I revert the standby database to a physical standby database. The database automatically reverts all the changes made during testing:
    DGMGRL> convert database CDB1_AARHUS to physical standby;
    

Step 4: Switchover

I can perform the previous steps without interrupting my users. This step requires a maintenance window because I am doing a Data Guard switchover.

  • I check that my standby database is ready to become primary. Then, I start a Data Guard switchover:
    DGMGRL> connect sys/<password> as sysdba
    DGMGRL> validate database CDB1_AARHUS;
    DGMGRL> switchover to CDB1_AARHUS;
    

A switchover does not have to mean downtime.

If my application is configured properly, the users will experience a brownout; a short hang, while the connections switch to the new primary database.

Step 5: Restart New Standby in New Oracle Homes

Now, the primary database runs on aarhus1 and aarhus2. Next, I can move the new standby hosts, copenhagen1 and copenhagen2, to the new GI and database homes.

  • I repeat step 2 (Restart Standby In New Oracle Homes) but this time for the new standby hosts, copenhagen1 and copenhagen2.

Step 6: Complete Patching

Now, both databases in my Data Guard configuration run out of the new Oracle Homes.

Only proceed with this step once all databases run out of the new Oracle Home.

I need to run this step as fast as possible after I have completed the previous step.

  • I complete the patching by running Datapatch on the primary database (CDB1_AARHUS). I add the recomp_threshold parameter to ensure Datapatch recompiles all objects that the patching invalidated:

    [orale@aarhus1]$ $ORACLE_HOME/OPatch/datapatch \
       -verbose \
       -recomp_threshold 10000
    
    • I only need to run Datapatch one time. On the primary database and only on one of the instances.
  • I can run Datapatch while users are connected to my database.

  • Optionally, I can switch back to the original primary database on copenhagen1 and copenhagen2, if I prefer to run it there.

That’s it. Happy patching!

Appendix

Further Reading

Other Blog Posts in This Series

Files to Move During Oracle Database Out-Of-Place Patching

I strongly recommend that you patch your Oracle Database using the out-of-place method. It has many advantages over in-place patching. But when you move your Oracle Database from one Oracle Home to another, you also need to move a lot of files.

Which files are that, and how can you make it easier for you? Also, some files might exist already in the target Oracle Home; what do you do then?

Files to Move

Password File

Linux:

dbs/orapw<ORACLE_SID>

Windows:

database\pwd<ORACLE_SID>.ora

You can override the default location in Windows using the following registry entries:

ORA_<ORACLE_SID>_PWFILE
ORA_PWFILE

If you use Grid Infrastructure, you can put the password file outside of the Oracle Home:

srvctl modify datatabase \
   -d $ORACLE_UNQNAME
   -pwfile <NEW_LOCATION_OUTSIDE_ORACLE_HOME>

I recommend storing it in ASM.

Parameter Files

Linux:

dbs/init<ORACLE_SID>.ora
dbs/spfile<ORACLE_SID>.ora

Windows:

database\init<ORACLE_SID>.ora
database\spfile<ORACLE_SID>.ora

Parameter files may include other files using the IFILE parameter.

You can redirect the server parameter file to a location outside the Oracle Home using the SPFILE parameter in your parameter file. If you use Grid Infrastructure, you can also redirect the server parameter file:

srvctl modify datatabase \
   -d $ORACLE_UNQNAME
   -spfile <NEW_LOCATION_OUTSIDE_ORACLE_HOME>

I recommend storing it in ASM.

Oratab

You need to update the database instance entry in the oratab file:

/etc/oratab

On Solaris, you find the file in:

/var/opt/oracle/oratab

On Windows, the file does not exist. Instead, you re-register the instance in the registry when you use oradim.exe.

Profile Scripts

Many people have profile scripts that set the environment to a specific database. Be sure to update the Oracle Home in such scripts.

Network Files

Network configuration files:

network/admin/ldap.ora
network/admin/listenener.ora
network/admin/sqlnet.ora
network/admin/tnsnames.ora

tnsnames.ora, sqlnet.ora and listener.ora can include contents from other files using the IFILE parameter, although the support of it is somewhat… questionable according to Allows for IFILE Ifile Support and Oracle Net (Doc ID 1339269.1).

You can redirect the files using the TNS_ADMIN environment variable. On Windows, you can also redirect using the TNS_ADMIN registry entry. If you use Grid Infrastructure, you can set the TNS_ADMIN environment variable as part of the cluster registration:

srvctl setenv database \
   -d $ORACLE_UNQNAME \
   -env "TNS_ADMIN=<NEW_LOCATION_OUTSIDE_ORACLE_HOME>"

Data Guard Broker Config Files

Linux:

dbs/dr1<ORACLE_SID>.dat
dbs/dr2<ORACLE_SID>.dat

Windows:

database\dr1<ORACLE_SID>.dat
database\dr2<ORACLE_SID>.dat

You can redirect the broker config files using the parameter DG_BROKER_CONFIG_FILEn:

alter system set db_broker_start=false;
alter system set dg_broker_config_file1='<NEW_LOCATION>/dr1<ORACLE_SID>.dat';
alter system set dg_broker_config_file2='<NEW_LOCATION>/dr2<ORACLE_SID>.dat';
alter system set db_broker_start=true;

I recommend storing the files in ASM.

Admin directory

admin subdirectory in Oracle Home:

admin

If you don’t set ORACLE_BASE environment variable, the database uses the Oracle Home for that location. It can contain diagnostic information like logs and tracing which you might want to move to the new Oracle Home.

In rare cases, the TDE keystore will go in there as well. This is definitely a folder that you want to keep.

admin/$ORACLE_UNQNAME/wallet

I recommend having a dedicated ORACLE_BASE location. Always set ORACLE_BASE environment variable for all databases. This will ensure that the database will not create an admin directory in the Oracle Home.

If you use TDE Tablespace Encryption, I strongly recommend that you store the database keystore outside of the Oracle Home using the WALLET_ROOT parameter.

Direct NFS

The Direct NFS configuration file:

dbs/oranfstab

The file might exist in the target Oracle Home, in which case you must merge the contents.

Typically, on Windows, the files from dbs are stored in database folder. But that’s different for this specific file (thanks Connor for helping out).

Centrally Managed Users

One of the default locations of the configuration file for Active Directory servers for centrally managed users is.

ldap/admin/dsi.ora

I recommend using the LDAP_ADMIN environment variable to redirect the file to a location outside of the Oracle Home.

LDAP

Configuration of Directory Usage Parameters:

ldap/admin/ldap.ora

I recommend using the LDAP_ADMIN or TNS_ADMIN environment variable to redirect the file to a location outside of the Oracle Home.

Oracle Messaging Gateway

The Messaging Gateway default initialization file:

mgw/admin/mgw.ora

The file might exist in the target Oracle Home, in which case you must merge the contents.

Oracle Database Provider for DRDA

Configuration file for Oracle Database Provider for DRDA:

drdaas/admin/drdaas.ora

The file might exist in the target Oracle Home, in which case you must merge the contents.

Oracle Text

If you use Oracle Text, you can generate a list of files that you must copy to the target Oracle Home:

ctx/admin/ctx_oh_files.sql

Oracle Database Gateway for ODBC

ODBC gateway initialization file:

hs/admin/init<ORACLE_SID>.ora

External Procedures

You can define the environment for external procedures in extproc.ora. Such configuration might exist in the target Oracle Home already, in which case you must merge the contents:

hs/admin/extproc.ora

Other Things to Consider

Enterprise Manager

After moving the database to a new Oracle Home, you need to reconfigure the target in Enterprise Manager. The Oracle Home path is part of the configuration. You can easily change it with emcli:

emcli modify_target \
   -type='oracle_database' \
   -name='<target_name>' \
   -properties='OracleHome:<new_oracle_home_path>'

Also, if you moved the listener as part of the patching to a new Oracle Home, you need to update that as well.

On My Oracle Support you can find an example on how to bulk update multiple targets.

In a future version of AutoUpgrade, it will be able to modify the target in Enterprise Manager for you.

Oracle Key Vault

There should be no additional configuration needed if you are using Oracle Key Vault and you move the database to a new Oracle Home.

You can find information on how to configure Oracle Key Vault in an Oracle Database in the documentation.

ZDLRA

When you patch out-of-place, you should always ensure that the target Oracle Home has the latest version of libra.so. AutoUpgrade does not copy this file for you, because there is no way to tell which version is the latest version.

Ideally, you configure ZDLRA in via sqlnet.ora and store the wallet outside of the Oracle Home. If so, the ZDLRA configuration works in the target Oracle Home because AutoUpgrade takes care of sqlnet.ora.

If you use ra_install.jar to configure ZDLRA, the script will:

  • Create a file: $ORACLE_HOME/dbs/ra<ORACLE_SID>.ora
  • Create a folder with a wallet: $ORACLE_HOME/dbs/wallet

In this case, you must manually copy the files to the target Oracle Home. You can avoid this by using sqlnet.ora for the configuration instead.

AutoUpgrade does not copy these files for you, because of the issue described above with libra.so.

Database Directories

You must update certain internal database directories, when you move the database to a new Oracle Home. The easiest way is to run:

@?/rdbms/admin/utlfixdirs.sql

In multitenant, you need to run the script in CDB$ROOT only.

On My Oracle Support you find a list of all the directories that you must update if you don’t use the script above.

In a future version of AutoUpgrade, it will change all the applicable directories for you automatically.

How to Make It Easy

Use AutoUpgrade

The easiest way to patch your Oracle Database is to use AutoUpgrade. It takes care of everything for you (unless stated otherwise above). You need a config file:

patch1.source_home=/u01/app/oracle/product/19.18.0
patch1.target_home=/u01/app/oracle/product/19.19.0
patch1.sid=MYDB

Then you start AutoUpgrade:

java -jar autoupgrade.jar -config mydb.cfg -mode deploy

That’s it! You don’t need to worry about all those configuration files. AutoUpgrade got you covered.

Use Read-Only Oracle Home

If you use Read-Only Oracle Home, the process is slightly easier.

You can’t store any custom files in the Oracle Home. Instead, you store all configuration files in Oracle Base Home; a directory outside the Oracle Home. You can find all the files you need to copy in Oracle Base Home.

When you create a new Read-Only Oracle Home, the installer will create a new Oracle Base Home specifically for that new Oracle Home. As part of the patching, you move the files into that new Oracle Base Home.

Conclusion

Did I miss any files? Please leave a comment if you move other files when you patch out-of-place.

Patching Oracle Grid Infrastructure And Oracle Data Guard

How do you patch Oracle Grid Infrastructure 19c (GI) when Oracle Data Guard protects your Oracle Database?

I had a talk with Ludovico Caldara, the product manager for Oracle Data Guard, about it:

To provide more details, I will use the following setup as an example:

  • Data Guard setup with two databases.
  • Each database is a 2-node RAC database.
  • Sites are called copenhagen and aarhus.

Patching Oracle Grid Infrastructure Only

  1. Prepare new GI homes on all nodes in both sites (copenhagen and aarhus).
  2. Disable Fast-Start Failover (FSFO) for the reasons described below. You can leave the observer running.
  3. Start with the standby site, aarhus.
  4. Complete the patching process by switching to the new GI home in a rolling manner on all nodes at aarhus site.
  5. If you use Active Data Guard and have read-only sessions in your standby database, you should ensure that instances are properly drained before restarting the GI stack (via root.sh).
  6. Proceed with the primary site, copenhagen.
  7. Complete the patching process by switching to the new GI home in a rolling manner on all nodes at copenhagen site.
  8. Be sure to handle draining properly to ensure there are no interuptions.
  9. Re-enable FSFO.

Later, when you want to patch the database, you can follow up the standby-first method described in Oracle Patch Assurance – Data Guard Standby-First Patch Apply (Doc ID 1265700.1). If the database patches you install are RAC Rolling Installable (like Release Updates), you should choose option 1 in phase 3 to avoid any downtime or brownout.

Alternative Approach

If you have many nodes in your cluster and an application that doesn’t behave well during draining, consider switching over to the standby site instead of patching the primary site in a rolling manner. When you switch over, there is only one interruption, whereas many interruptions in a rolling patch apply.

  1. Patch standby site, aarhus.
  2. Switch over to aarhus.
  3. Patch former primary, copenhagen.

What If You Want to Patch the Database At the Same Time?

Out-of-place SwitchGridHome

You get complete control over the process with Out-of-place SwitchGridHome. It is my preferred method. There are more commands to execute, but it doesn’t matter if you automate it.

Here is an overview of the process. You can use many of the commands from this blog post:

  1. Prepare new GI homes using gridSetup. Be sure to apply the needed patches. Do it on one node in both primary (copenhagen) and standby site (aarhus). The process will copy the new GI home to all other nodes in the cluster. Do not execute root.sh.
  2. Prepare new database homes. Be sure to apply the needed patches. Here is an example. Do it on one node in both primary (copenhagen) and standby site (aarhus). The process will copy the new database home to all other nodes in the cluster. Remember to execute root.sh.
  3. Disable FSFO.
  4. Start with the standby site, aarhus.
  5. Configure the standby database to start in the new database home:
    $ $OLD_ORACLE_HOME/bin/srvctl modify database \
         -db $STDBY_ORACLE_UNQNAME \
         -oraclehome $NEW_ORACLE_HOME
    
  6. If you use Active Data Guard and have read-only sessions connected, drain the instance.
  7. Switch to the new GI home using gridSetup.sh -switchGridHome ... and root.sh.
    1. root.sh restarts the entire GI stack. When it restarts the database, the database instance runs in the new database home.
    2. Repeat the process on all nodes in the standby site (aarhus).
  8. Proceed with the primary site, copenhagen.
  9. Configure the primary database to start in the new database home:
    $ $OLD_ORACLE_HOME/bin/srvctl modify database \
         -db $PRMY_ORACLE_UNQNAME \
         -oraclehome $NEW_ORACLE_HOME
    
  10. Be sure to drain the instance.
  11. Switch to the new GI home using gridSetup.sh -switchGridHome ... and root.sh.
    1. root.sh restarts the entire GI stack. When it restarts the database, the database instance runs in the new database home.
    2. Repeat the process on all nodes in the primary site (copenhagen).
  12. Execute datapatch -verbose on one of the primary database instances to finish the patch apply.
  13. Re-enable FSFO.

Out-of-place OPatchAuto

Out-of-place OPatchAuto is a convenient way of patching because it also automates the database operations. However, I still recommend using Out-of-place SwitchGridHome method because it gives you more control over draining.

Here is an overview of the process:

  1. Deploy new GI and database homes using opatchauto apply ... -prepare-clone. Do it on all nodes in both primary (copenhagen) and standby site (aarhus). Since you want to patch GI and database homes, you should omit the -oh parameter.
  2. Disable FSFO.
  3. Start with the standby site, aarhus.
  4. Complete patching of all nodes in the standby site (aarhus) using opatchauto apply -switch-clone.
    1. When OPatchAuto completes the switch on a node, it takes down the entire GI stack on that node, including database instance.
    2. GI restarts using the new GI home. But the database instance still run on the old database home.
    3. On the last node, after the GI stack has been restarted, all database instances restart again to switch to the new database home. This means that each database instance will restart two times.
  5. Proceed with the primary site, copenhagen.
  6. Complete patching of all nodes in the primary site (copenhagen) using opatchauto apply -switch-clone.
    1. The procedure is the same as on the standby site.
    2. In addition, OPatchAuto executes Datapatch to complete the database patching.
  7. Re-enable FSFO.

Fast-Start Failover

When you perform maintenance operations, like patching, consider what to do about Fast-Start Failover (FSFO).

If you have one standby database

  • Single instance standby I recommend disabling FSFO. If something happens to the primary database while you are patching the standby site, you don’t want to switch over or fail over automatically. Since the standby site is being patched, the standby database might restart shortly. You should evaluate the situation and determine what to do rather than relying on FSFO handling it.
  • RAC standby I recommend disabling FSFO for the same reasons as above. Now, you could argue that the standby database is up all the time if you perform rolling patching. That’s correct, but nodes are being restarted as part of the patching process, and services are being relocated. Having sessions switching over or failing over while you are in the middle of a rolling patch apply is a little delicate situation. Technically, it works; the Oracle stack can handle it. But I prefer to evaluate the situation before switching or failing over. Unless you have a super-cool application that can transparently handle it.

Nevertheless, leaving FSFO enabled when you patch GI or a database is fully supported.

If you have more standby databases

I recommend keeping FSFO enabled if you have multiple standby databases.

When you patch one standby database, you can set FastStartFailoverTarget to the other standby database. When patching completes, you can set FastStartFailoverTarget to the first standby database and continue patching the second standby database. This keeps your primary database protected at all times.

The Easy Way

As shown above, you can patch Oracle Grid Infrastructure even when you have Oracle Data Guard configured. But why not take the easy way and use Oracle Fleet Patching and Provisioning (FPP)?

FPP automatically detects the presence of Data Guard and executes the commands in the appropriate order, including invoking Datapatch when needed.

If you need to know more, you can reach out to Philippe Fierens, product manager for FPP. He is always willing to get you started.

Happy Patching

Appendix

Other Blog Posts in This Series

Pro Tips

Here’s a collection of good tips and tricks I found while writing this series of blog posts.

Pro Tip #1: How Do You Determine Grid Infrastructure Patch Level?

To determine the GI patch level:

[grid@copenhagen1]$ $ORACLE_HOME/OPatch/opatch lspatches | grep "OCW"

34444834;OCW RELEASE UPDATE 19.17.0.0.0 (34444834)

The inventory registers the GI Release Updates as OCW RELEASE UPDATE. In this example, GI is running on 19.17.0.

Sometimes critical one-off patches are delivered as merge patches with the GI Release Update. It can mess up the patch description. This example is from a Base Database Service in OCI:

[grid@copenhagen1]$ $ORACLE_HOME/OPatch/opatch lspatches | grep "OCW"

34122773;OCW Interim patch for 34122773

The patch description no longer contains the name of the Release Update. In this case, you can trawl through MOS to find the individual patches in the merge patch to identify which Release Update it contains. Or, you can often look at the ACFS patch instead:

[grid@copenhagen1]$ $ORACLE_HOME/OPatch/opatch lspatches | grep "ACFS"

34139601;ACFS RELEASE UPDATE 19.16.0.0.0 (34139601)

Pro Tip #2: Where Can You Find the Log Files?

Logging happens in different places depending on which method you use. Here are a few locations to browse when there are problems:

  • $GRID_HOME/install
  • $GRID_HOME/cfgtoollogs
  • $GRID_BASE/crsdata/<node>/crsconfig
  • /u01/app/oraInventory/logs

Pro Tip #3: Where Can You Find Information On Troubleshooting?

A few good MOS notes:

OPatchAuto enables you to control the logging granularity. If you run into problems, increase the logging level to get more information:

$ORACLE_HOME/OPatch/opatchauto ... -logLevel FINEST

In addition, OPatchAuto can resume a broken session. Fix the issue and restart OPatchAuto. It will pick up from where it left off:

$ORACLE_HOME/OPatch/opatchauto resume

Pro Tip #4: How Can I Install Patches Manually?

If you don’t want to use the automation tools (like OPatchAuto), you can install the patches manually using OPatch.

The details are in Supplemental Readme – Grid Infrastructure Release Update 12.2.0.1.x / 18c /19c (Doc ID 2246888.1).

The GI patch bundle contains several sub patches that must be installed in the correct order using opatch apply.

Pro Tip #5: How Do You Roll Back A Patch?

In-place OPatchAuto

You can find patch rollback (or deinstallation) instructions in the patch readme file. In short, you execute the following command:

$ORACLE_HOME/OPatch/opatchauto \
   rollback <unzipped_patch_location>/<patch_dir>

Note you might need to reboot the server.

Out-of-place OPatchAuto

You find rollback instructions in MOS note Grid Infrastructure Out of Place ( OOP ) Patching using opatchauto (Doc ID 2419319.1). In short, you execute the following command:

$NEW_ORACLE_HOME/OPatch/opatchauto \
   rollback \
   -switch-clone

Out-of-place SwitchGridHome

Check out this blog post.

Zero Downtime Oracle Grid Infrastructure Patching

You find rollback instructions in MOS note Step by Step Zero Downtime Oracle Grid Infrastructure Patching in Silent Mode (Doc ID 2865083.1). You need to execute a few commands. Check the MOS note for details.

Pro Tip #6: The FAQ

On My Oracle Support there is an extensive FAQ. Bookmark it: RAC: Frequently Asked Questions (RAC FAQ) (Doc ID 220970.1)

Appendix

Other Blog Posts in This Series

Which Method Should I Choose When Patching Oracle Grid Infrastructure 19c

I have shown you a few ways to patch Oracle Grid Infrastructure 19c (GI). Which one should you choose? Here’s an overview of the pros and cons of each method.

Just Grid Infrastructure Or Also The Database

You can patch:

  • Just GI and later on the database
  • Or GI and the database at the same time

If possible, I recommend patching GI and database in a separate maintenance operation. Proceed with the database when you are confident the new GI runs fine. If you do it a week apart, you should have enough time to kick the tires on the new GI.

I like to keep things separate. If there is a problem, I can quickly identify whether the GI or database patches are causing problems. The more patches you put in simultaneously, the more changes come in, and the harder it is to keep things apart.

The downside is that you now have two maintenance operations; one for GI and one for the database. But if your draining strategy works and/or you are using Application Continuity, you can complete hide the outage from your end users.

If you have a legacy application or draining is a nightmare for you, then it does make sense to consider patching GI and database at the same time.

In-place vs. Out-of-place

In-place OPatchAuto Out-of-place OPatchAuto Out-of-place SwitchGridHome Out-of-place ZDOGIP
Space usage Just for the new patches A new GI home and the new patches A new GI home and the new patches A new GI home and the new patches
Additional system resources No No No Yes
Node downtime Significant Short Short None (1)
Install multiple patches in one go Yes Yes Yes Yes
Grid Home change                      No                                                                                                   Yes. New Grid Home location. Scripts and profiles must be updated. New Grid Home to maintain and monitor Yes. New Grid Home location. Scripts and profiles must be updated. New Grid Home to maintain and monitor Yes. New Grid Home location. Scripts and profiles must be updated. New Grid Home to maintain and monitor
Grid Home origin N/A Existing Grid Home is cloned Fresh Grid Home from base release Fresh Grid Home from base release
Rollback complexity Significant Simple Simple Simple
Rollback node outage Significant Short Short None (1)

Notes:

  1. If you are using ACFS or ASM Filter Driver, you must restart the GI stack at one point in time. The node is down for a short period.

I recommend out-of-place patching. There are multiple ways of doing that. Choose the one that suits you best. My personal favorite is the SwitchGridHome method.

Happy Patching

There are even more methods than I have shown in this blog post series. I have demonstrated the methods that most people would consider. Evaluate the pros and cons yourself and choose what works best for you.

What’s your favorite? Why did you choose a specific method? Leave a comment and let me know.

Appendix

Further Reading

OPatchAuto Out-of-place

If you decide to patch GI and database at the same time, be aware of the following. The database instance will need to restart two times. First, each instance goes does to switch to the new GI. The second time is when you switch on the last node. Then all database instances are brought down again in a rolling manner and restarted in the new Oracle Home. If you want to control draining yourself, don’t use this method. The second database restarts happens completely automated one after the other. Without any possibility for you to intervene to control draining.

Other Blog Posts in This Series